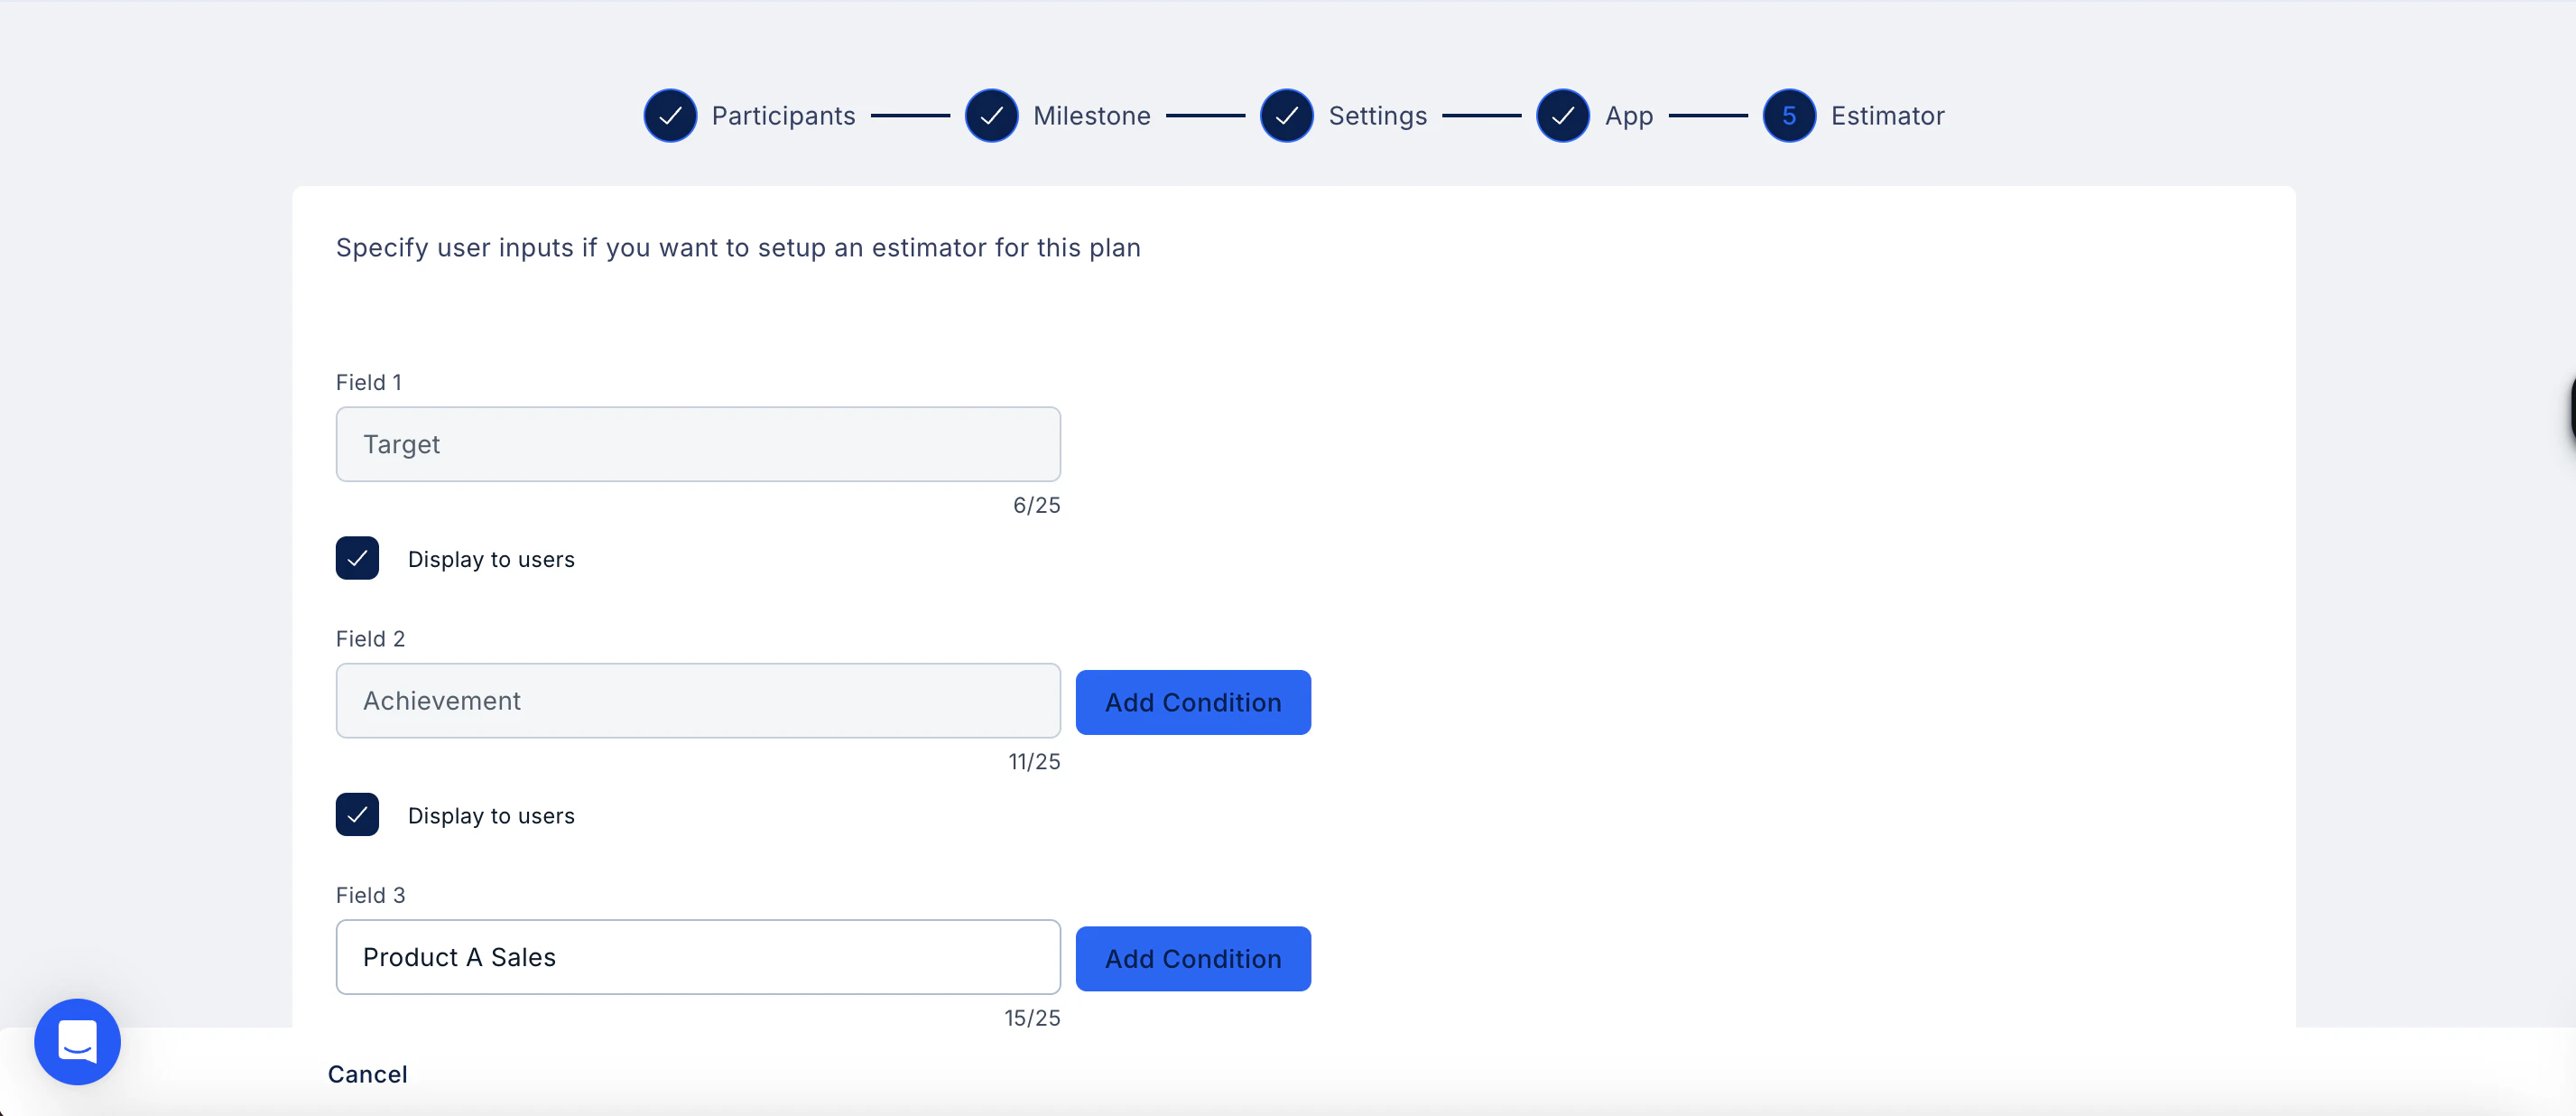
Part 1: Define user input fields
Specify what users will enter when running the Estimator.- Enter a label for each input field (up to 25 characters) — for example, Target, Achievement, or Product A Sales.
- Check Display to users for any field you want visible in the Estimator on the user’s app.
- Click Add Condition if you need to apply conditions to a specific field.
- Repeat to add as many fields as your Plan requires.
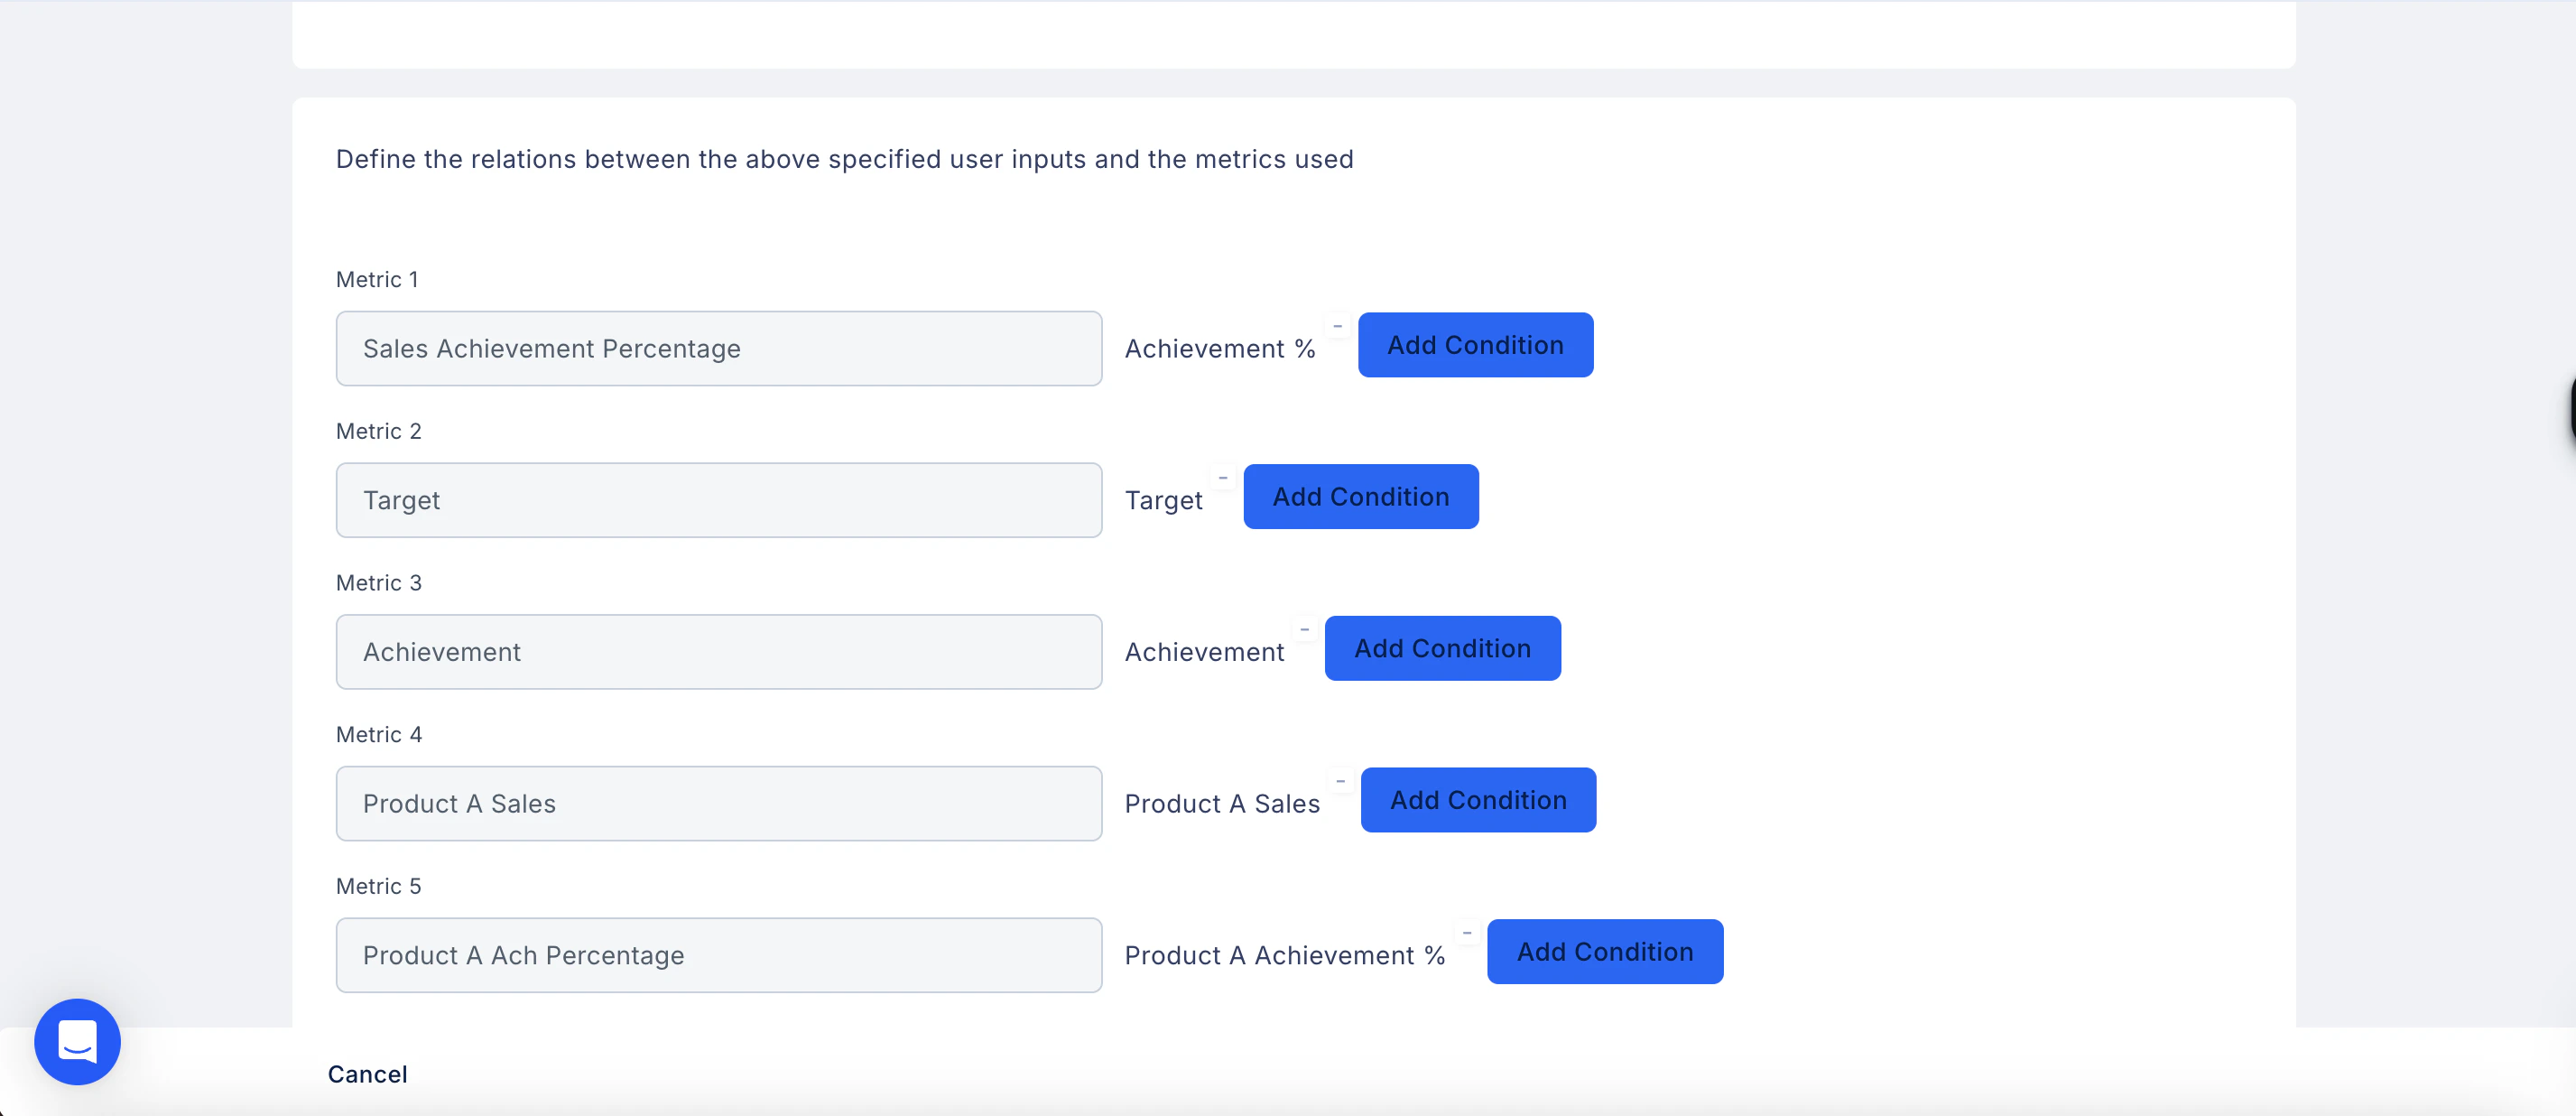
Part 2: Map inputs to metrics
Once the fields are defined, connect each user input to the relevant metric in your Plan.- Under Define the relations between the above specified user inputs and the metrics used, you will see each metric from your Plan listed — for example, Sales Achievement Percentage, Target, Achievement, and Product A Sales.
- The corresponding user input field is shown alongside each metric.
- Click Add Condition next to each metric to define how the input maps to it.
- Repeat for all metrics, then click Save.