
How to open the Admin Hub
1
Log in to Empuls
Sign in to your organization’s Empuls instance with your admin credentials.
2
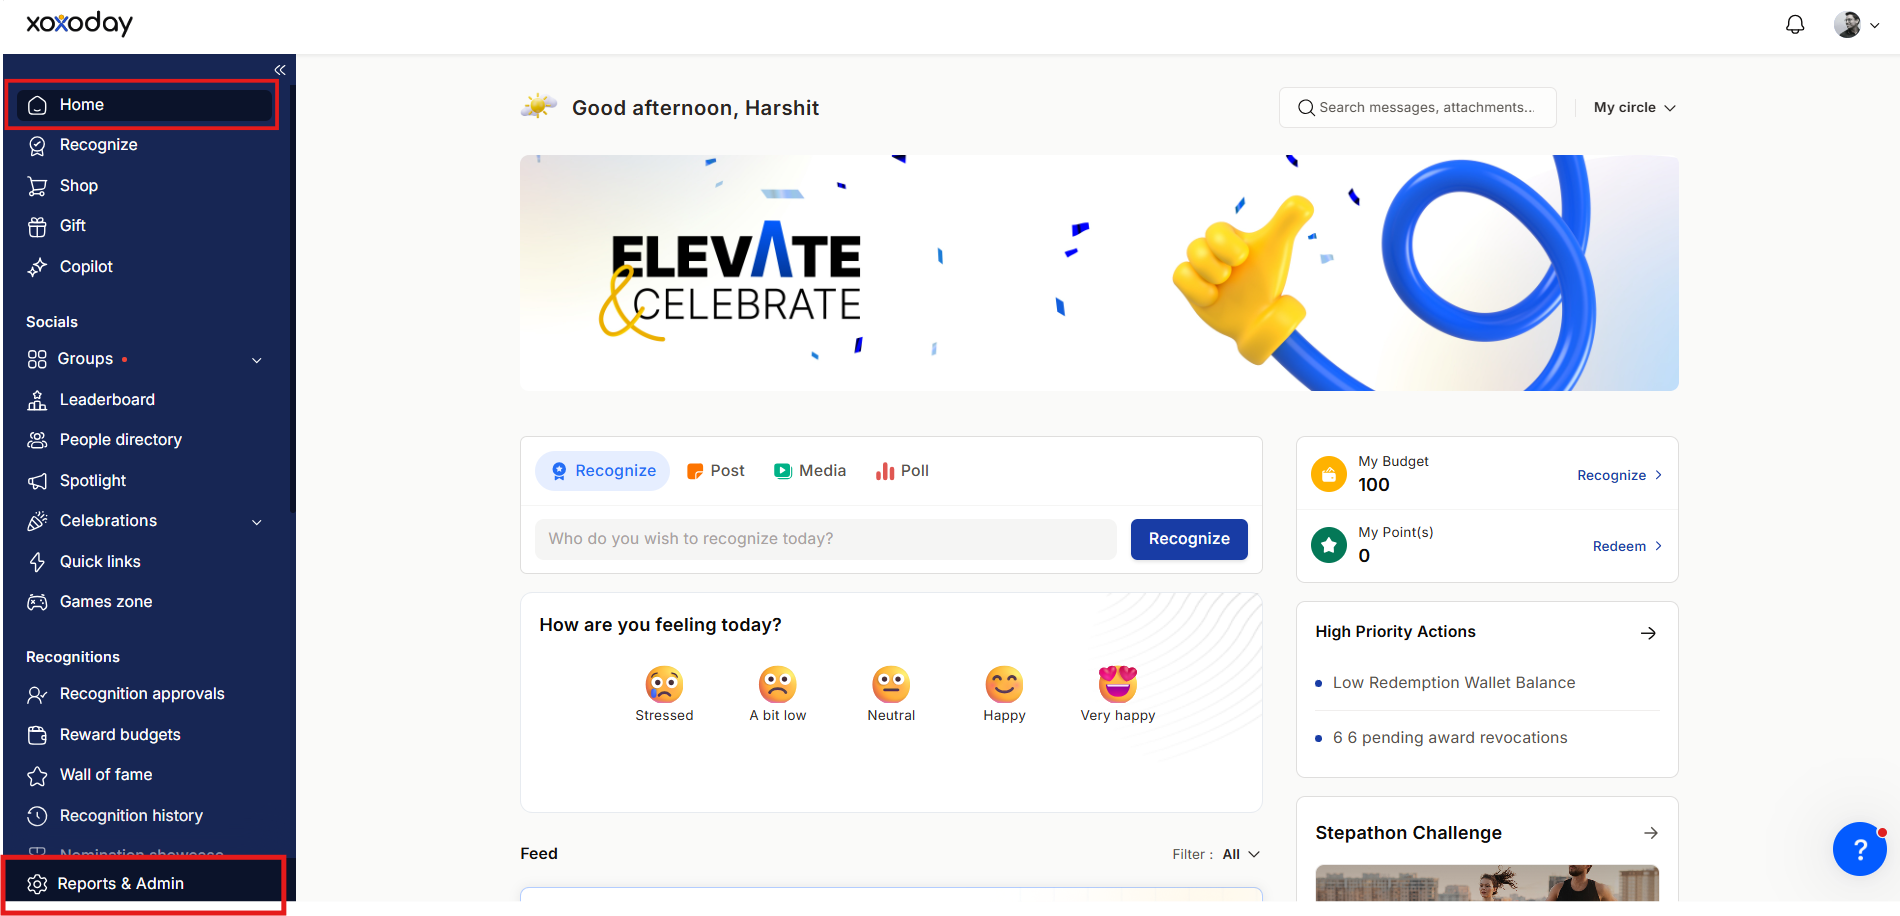
Click Reports & Settings in the left panel
Scroll to the bottom of the left-side navigation panel and click Reports & Settings.
3
The Admin Dashboard opens
You now have access to all admin sections described below.
Admin Hub sections
Reports
The Reports section gives admins complete visibility into recognition, rewards, and employee engagement across the organization.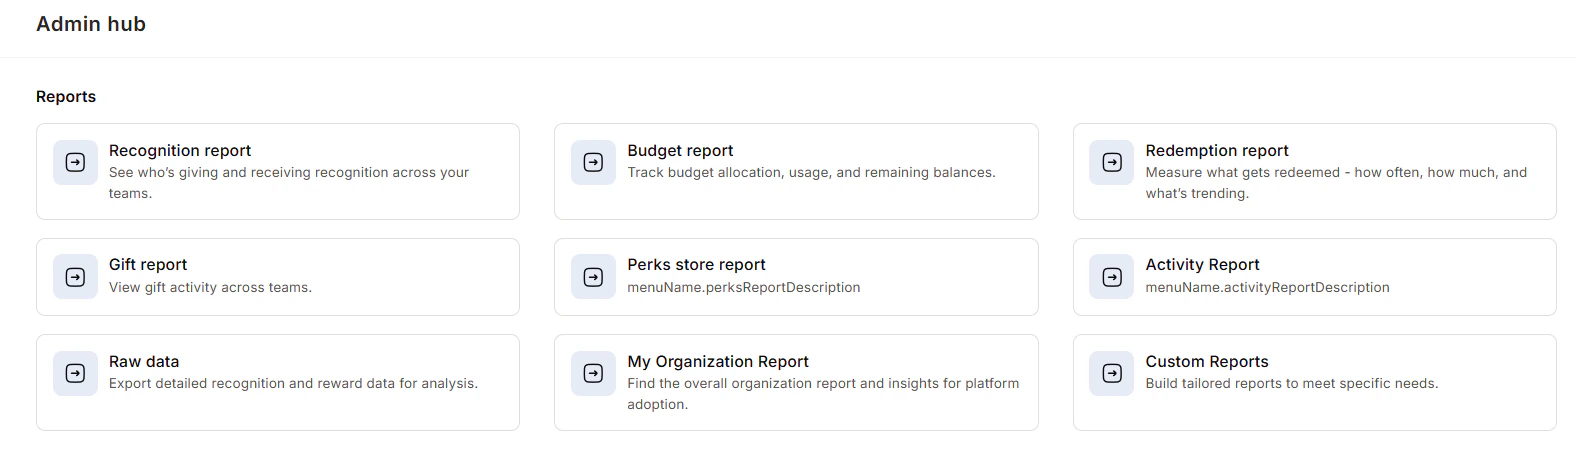
Manage budgets
The Manage Budgets section lets you create, allocate, monitor, edit, pause, and automate recognition budgets. You can set fixed or prorated allocations, assign budgets to specific managers or teams, and configure recurring distributions so recognition programs never run dry. See Budgets for the full setup guide.
Finance
The Finance section manages all money-related settings in one place.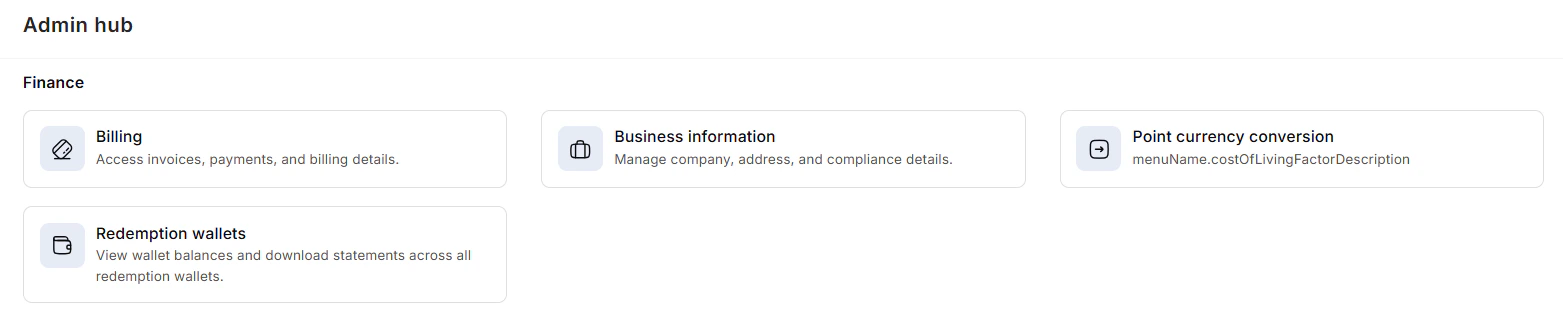
Programs
The Programs section is where you create and manage all employee recognition and incentive initiatives.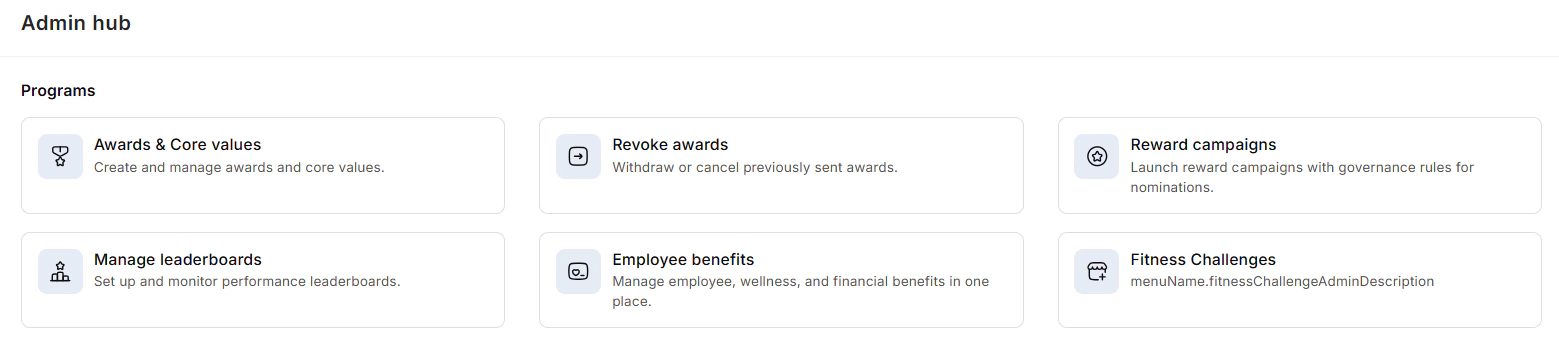
Gifts
The Gifts section handles all automated and one-off gifting activity — birthday gifts, work anniversaries, new joiner welcomes, festive gifts, and long-service awards.
- Manage gifts — Configure milestone gifts and set up automated triggers. Birthday and work anniversary gifts are triggered automatically when the employee’s date of birth or date of joining is added to their profile.
- Automate workflows — Set up recurring gift workflows for festivals, holidays, and onboarding events.
- Revoke gifts — Withdraw gifts in case of errors or disputes.
Employees
The Employees section covers all employee lifecycle and access management actions. See Manage Employees for the detailed guide.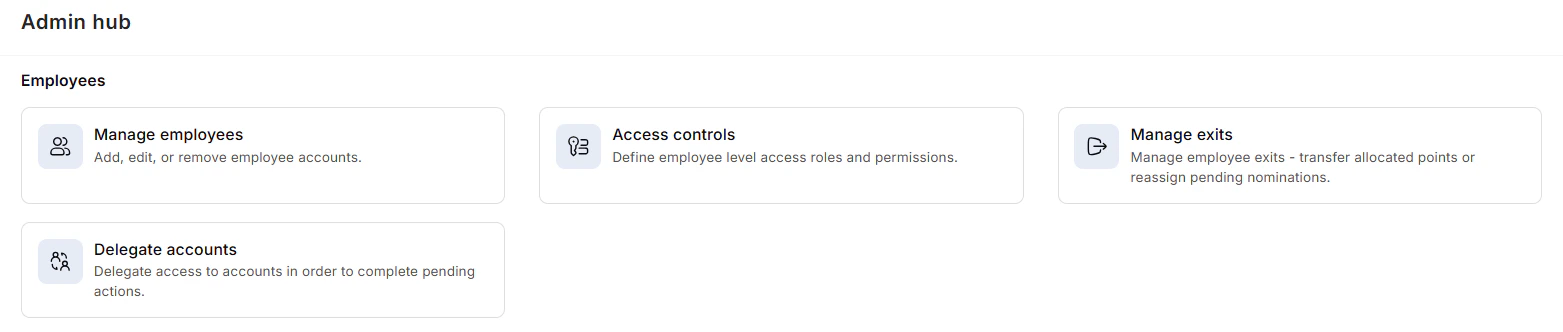
- Manage employees — Add or remove users individually or via CSV bulk import.
- Access controls — Define roles and permissions (Super Admin, General Admin, Manager, User) and create custom roles.
- Manage exits — Configure how unused budget points and reward points are handled when employees leave.
- Delegate accounts — Temporarily grant access to another user to complete pending tasks during absences or role transitions.
Shop
The Shop section lets you manage the employee rewards catalog — the gift cards, merchandise, and experiences employees can redeem their points for. Configure catalog availability and set redemption rules for different regions.
Platform settings
Platform settings covers branding and homepage configuration.
Integrations
Connect Empuls with your HRMS, payroll system, Microsoft Teams, Slack, or other business tools. The Integrations section lets you set up new connections and monitor existing ones to ensure data flows correctly between systems.
User authentication
Set the default login method for your organization. Empuls supports Google, Microsoft, Slack, and custom SAML 2.0 SSO. With single sign-on, employees access Empuls alongside other corporate apps without re-entering credentials, and you manage user access through your chosen identity provider.
AI settings
Configure how AI features work across your Empuls instance.
Next steps
Manage employees
Add employees individually or in bulk, manage roles, handle exits, and delegate accounts.
Set up branding
Apply your organization’s logo, colors, and visual identity to the platform.
Configure budgets
Create automated recognition budgets and allocate them to managers and teams.
Subscription and billing
Manage your plan, billing contact, invoices, and redemption wallets.