
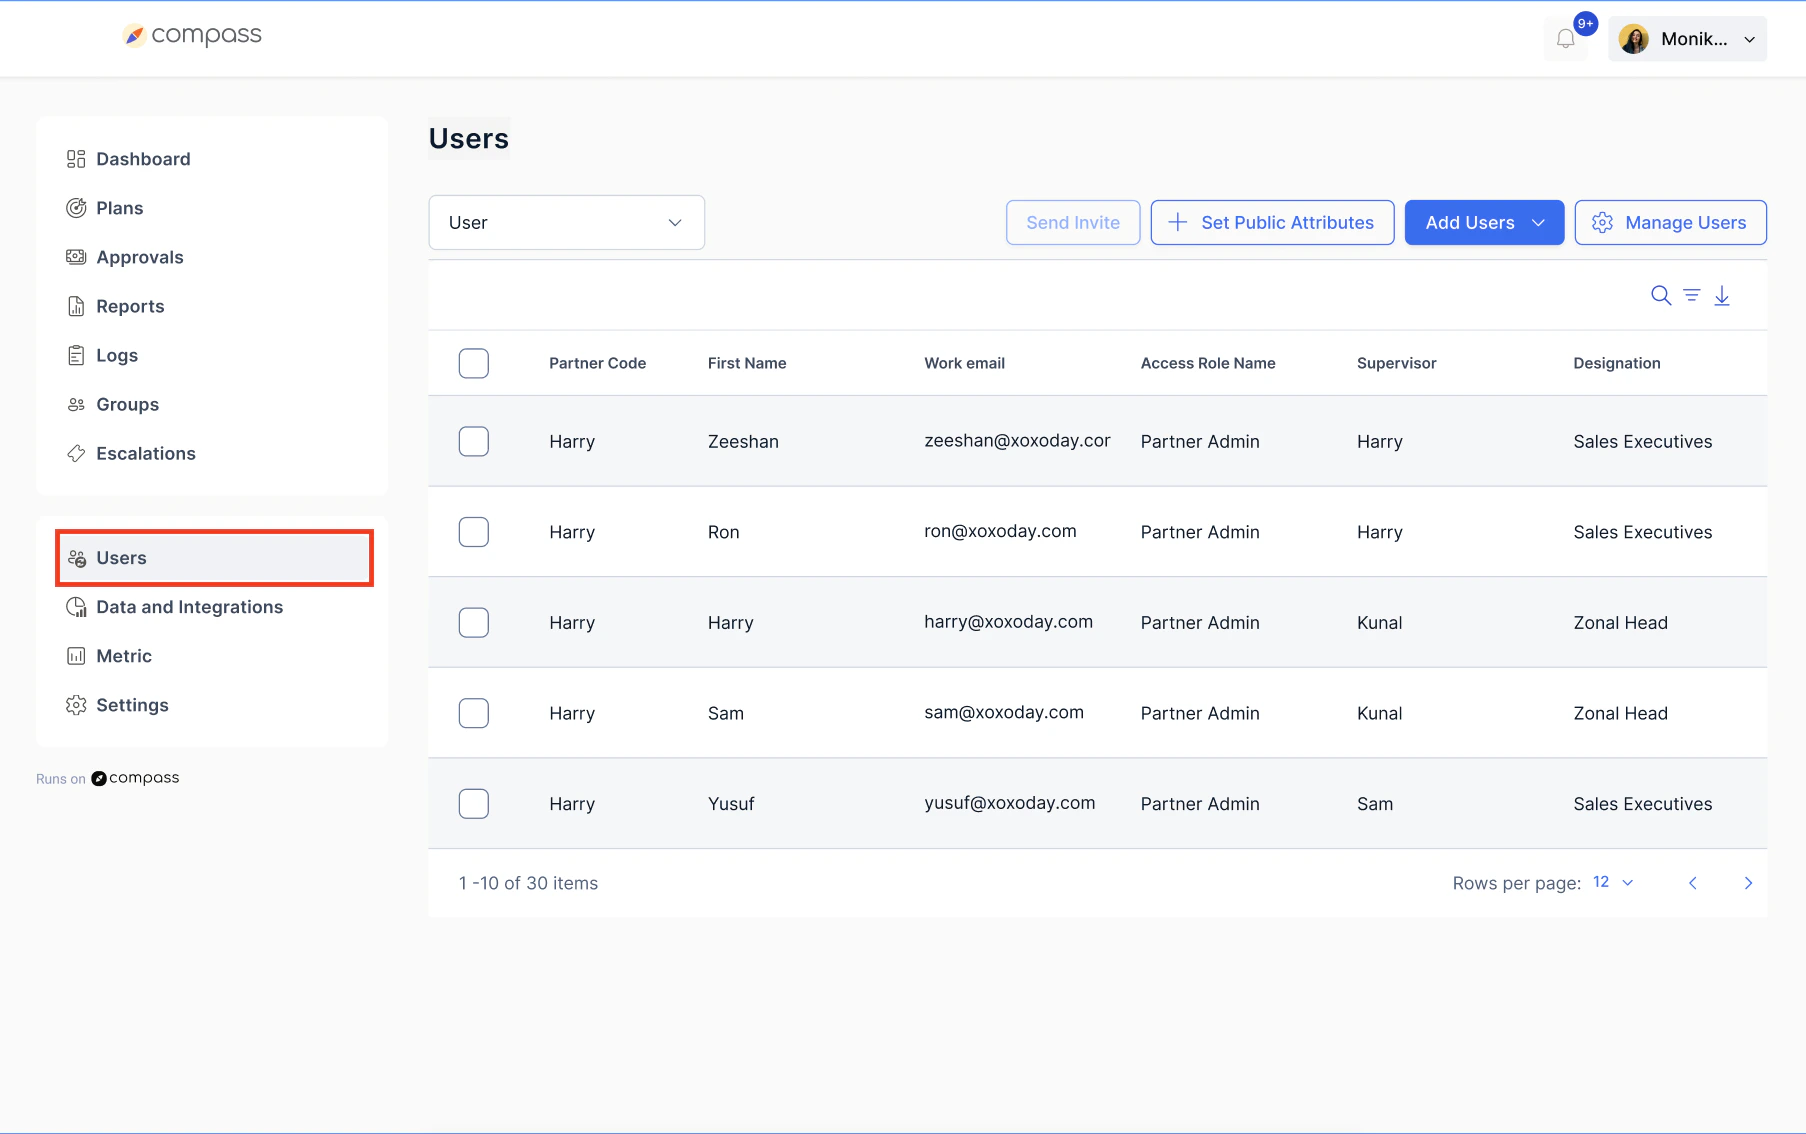
Step 1: Navigate to User Management
- Log in to the platform
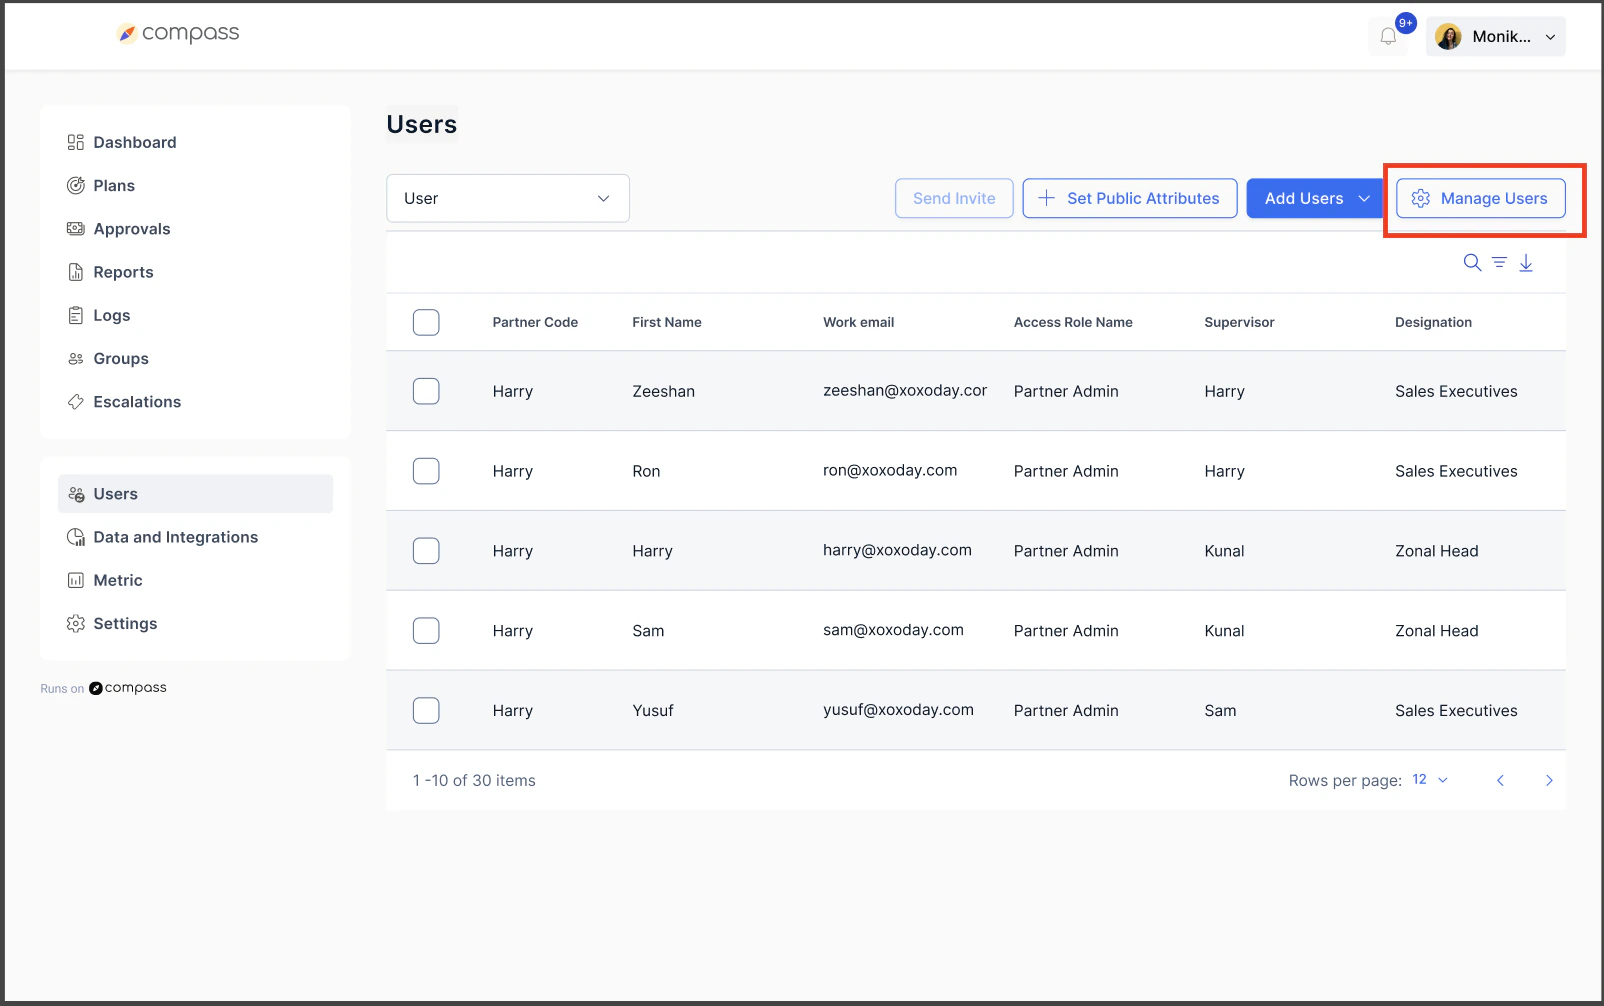
- Click on Users
Step 2: Add Users
You can add users in two ways:Option A: Add Manually
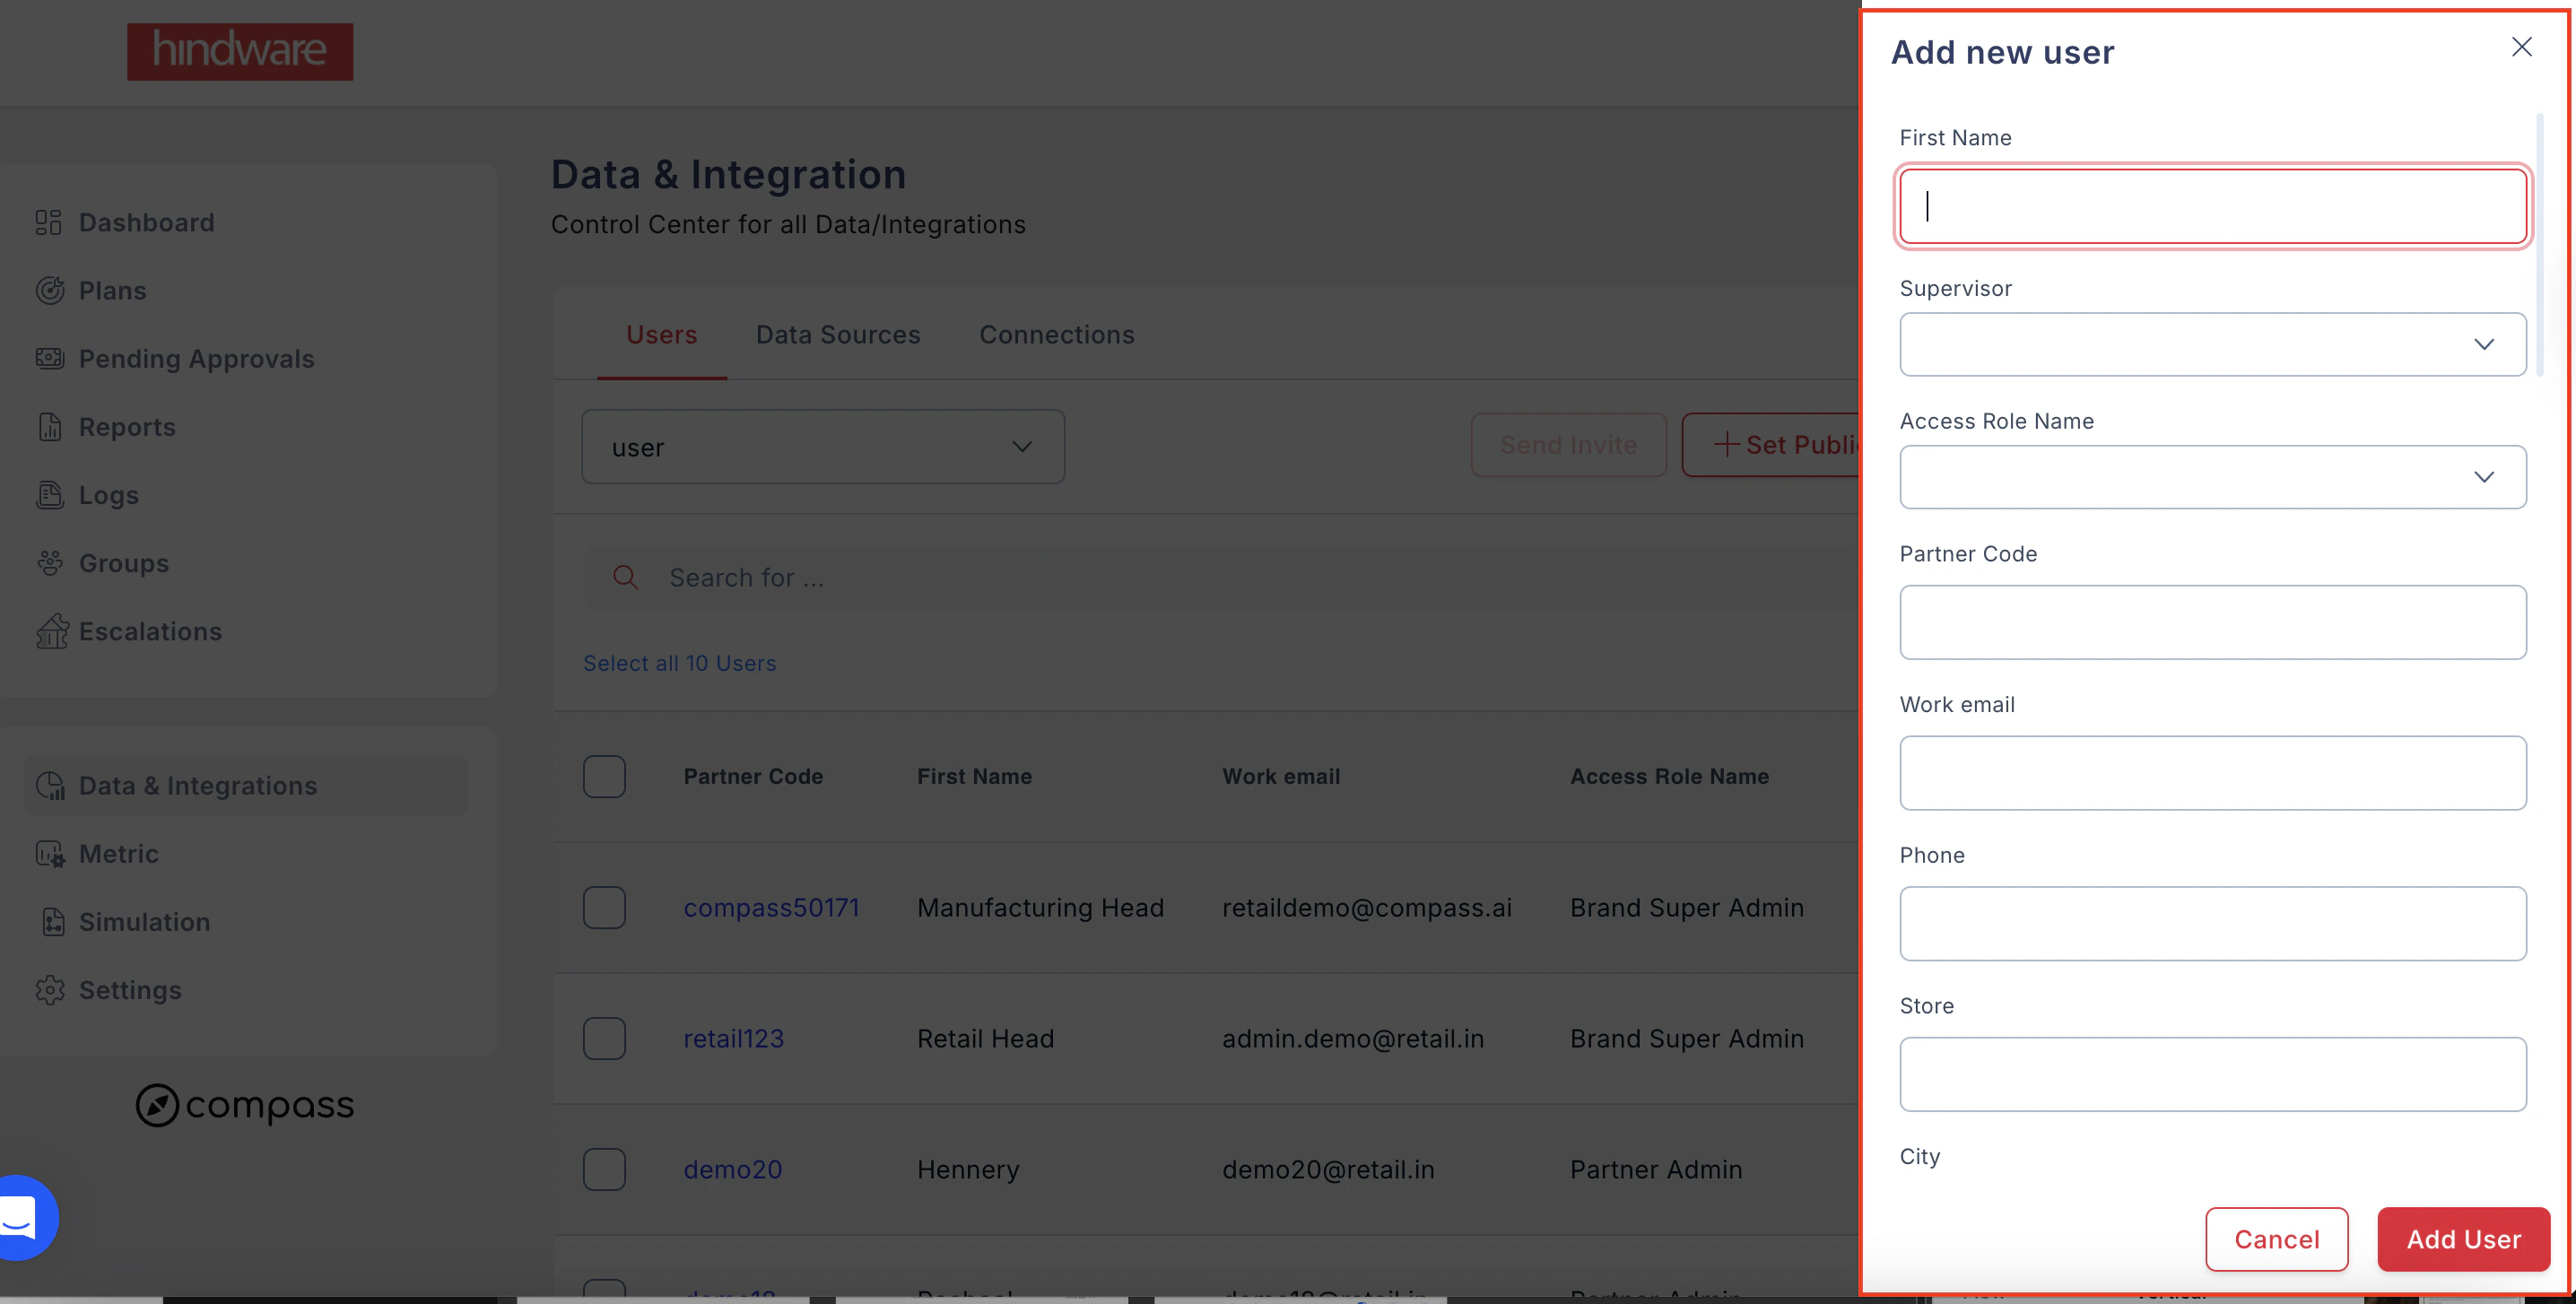
- Click on Add User.
- Fill in user details like first name, phone number, work email, etc.
- Click Save.
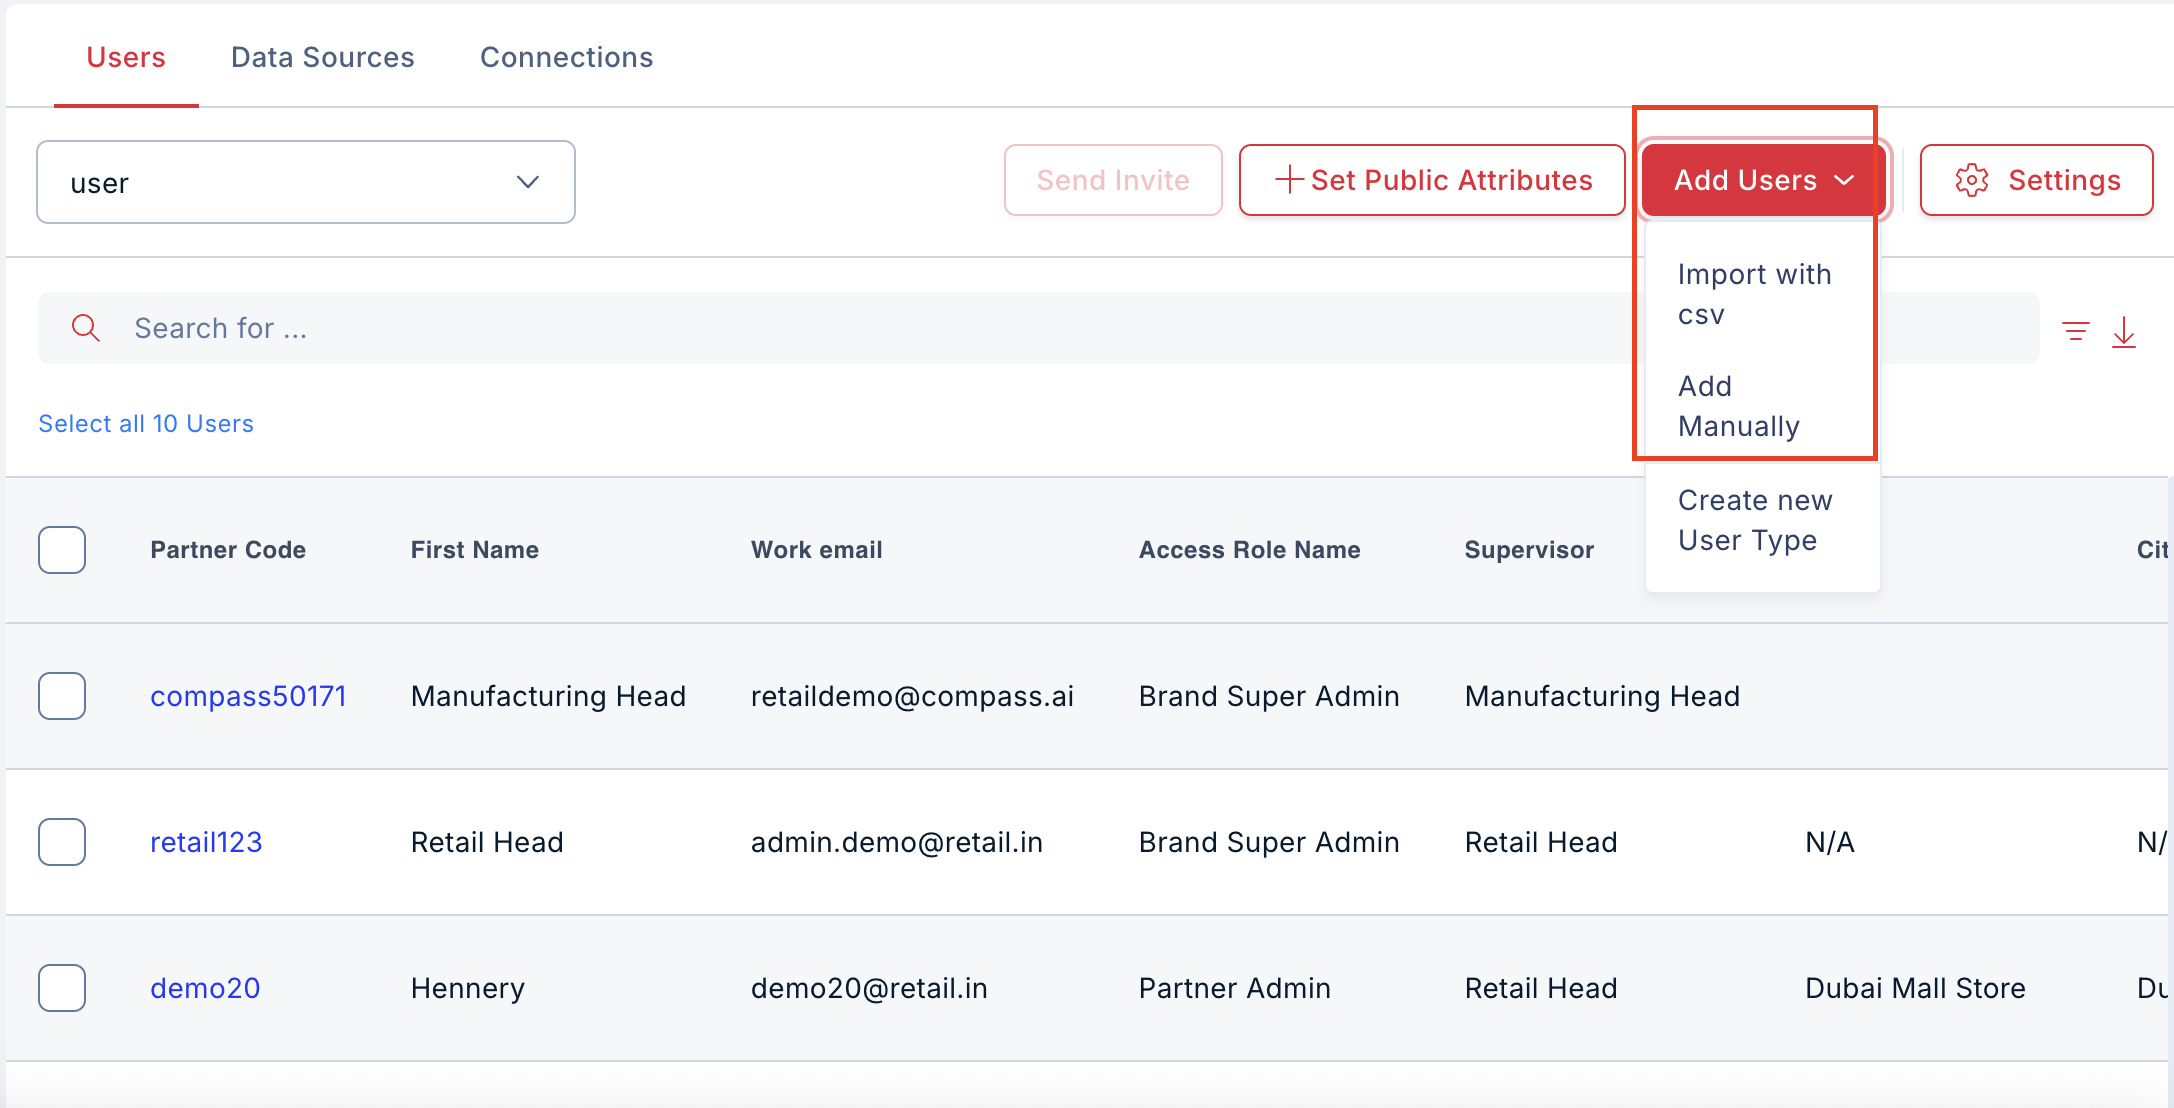
Option B: Bulk Upload (CSV)
- Click on Add User.
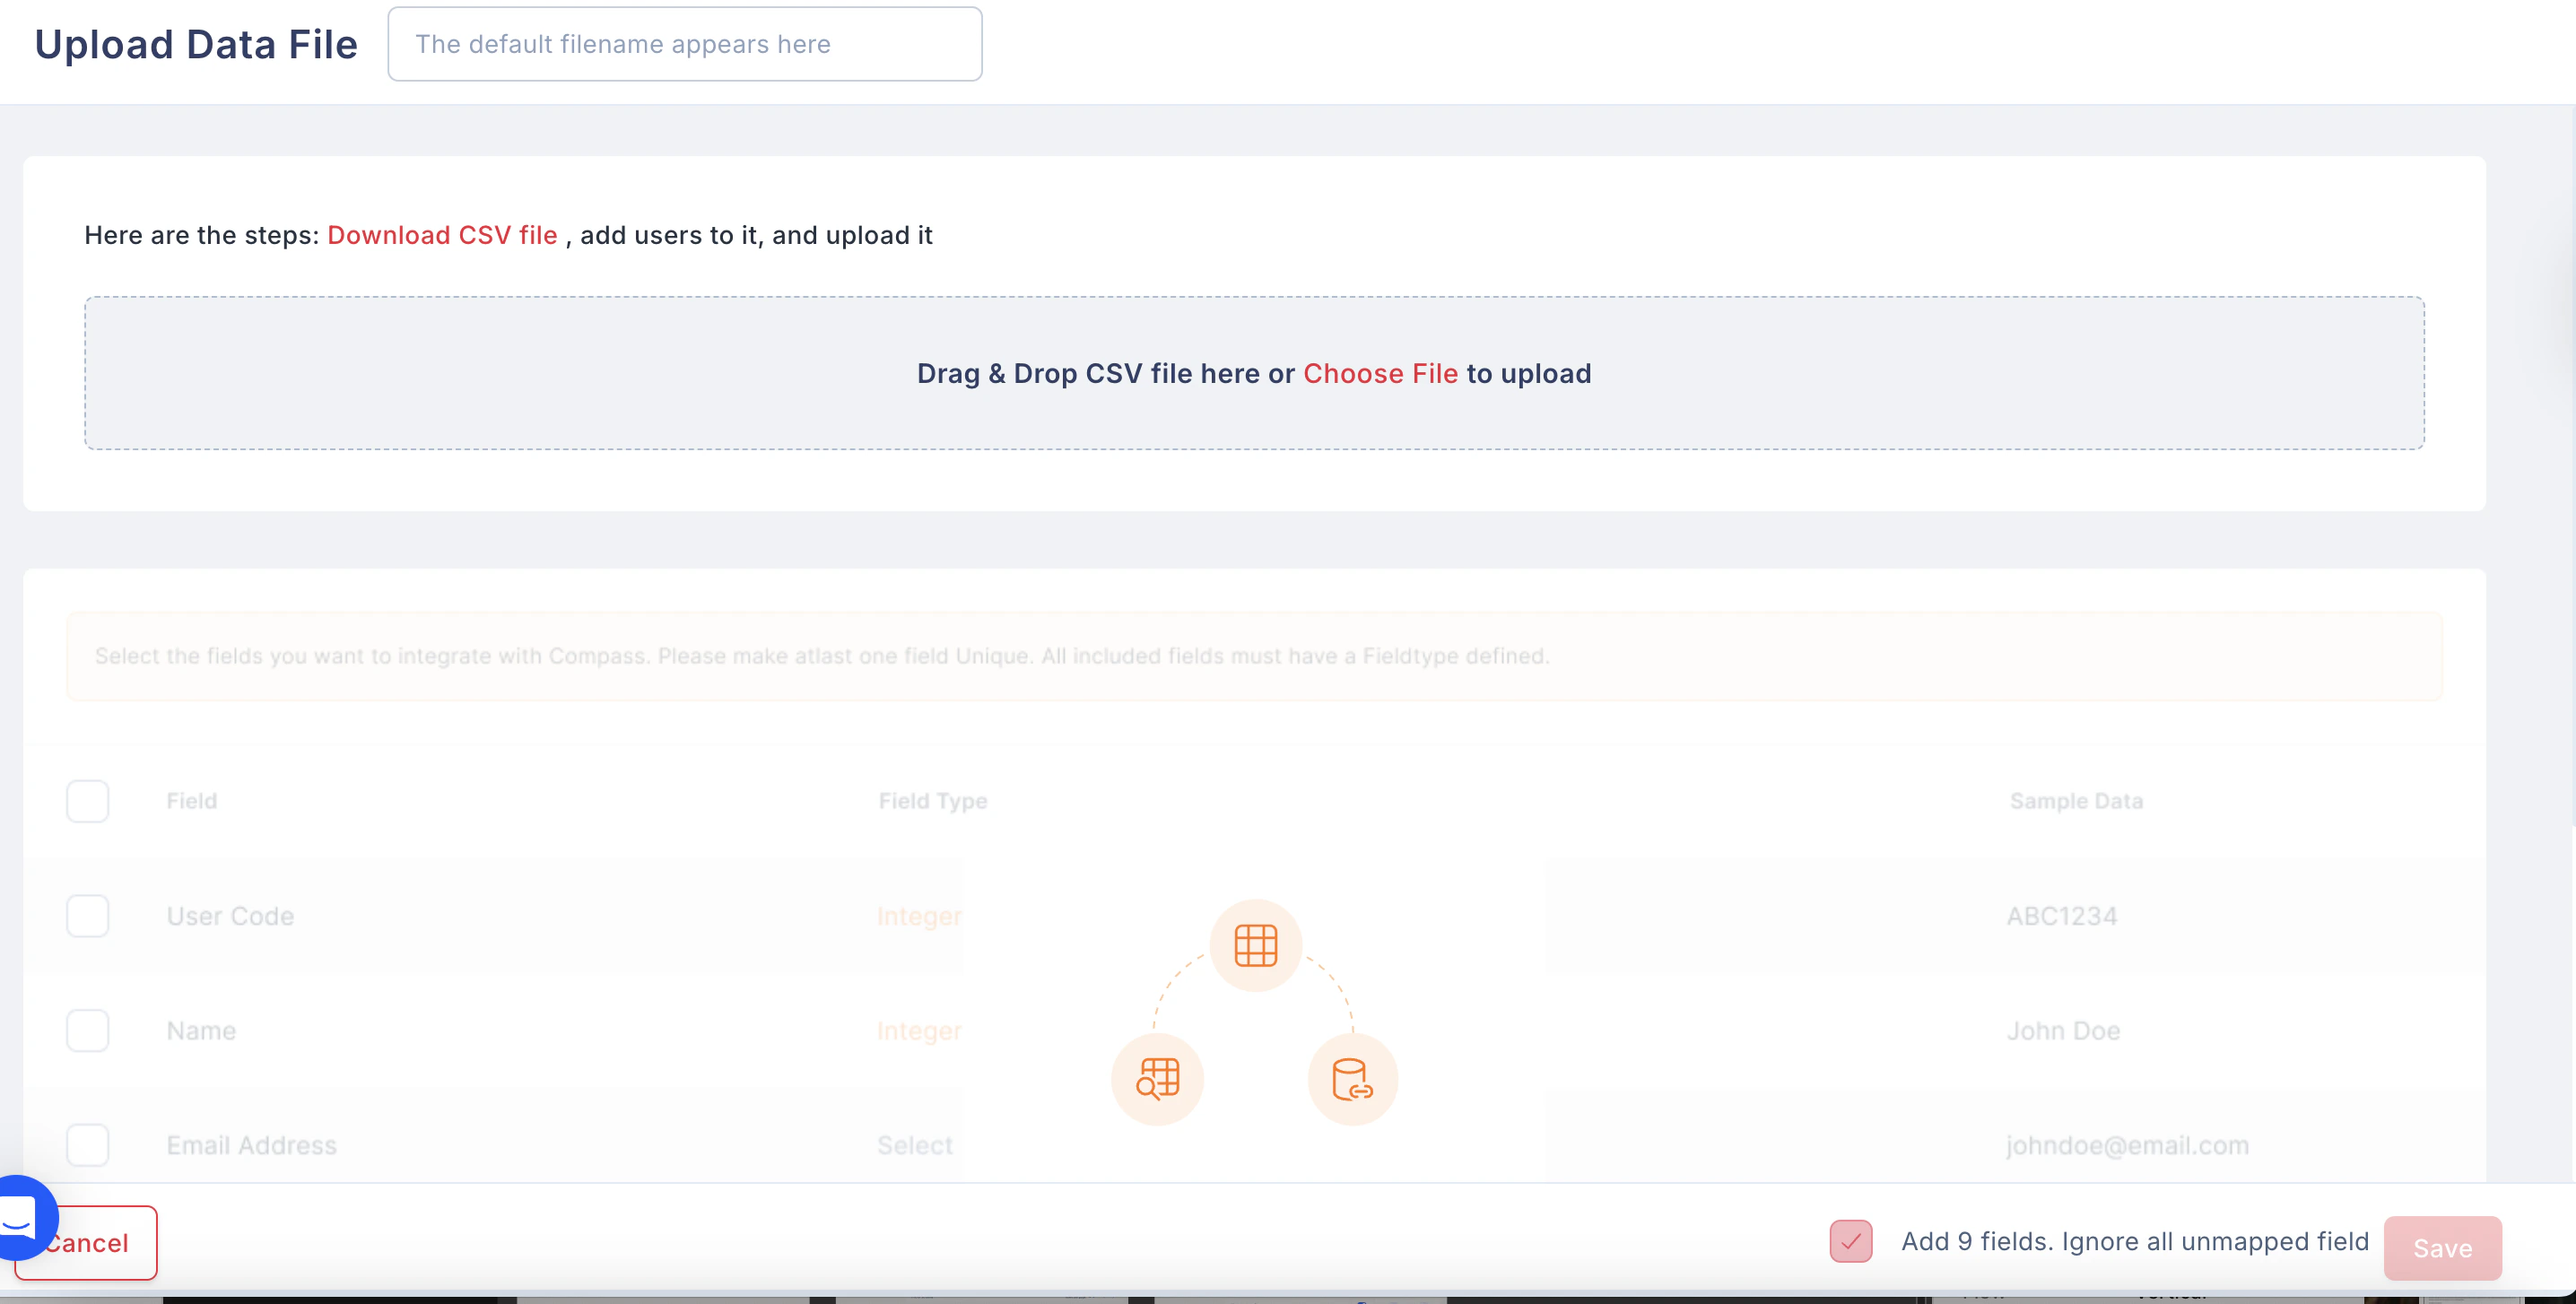
- Select Upload CSV.
- Download the sample CSV template if needed.
- Fill in the user details in the CSV file.
- Upload the file to add multiple users at once.
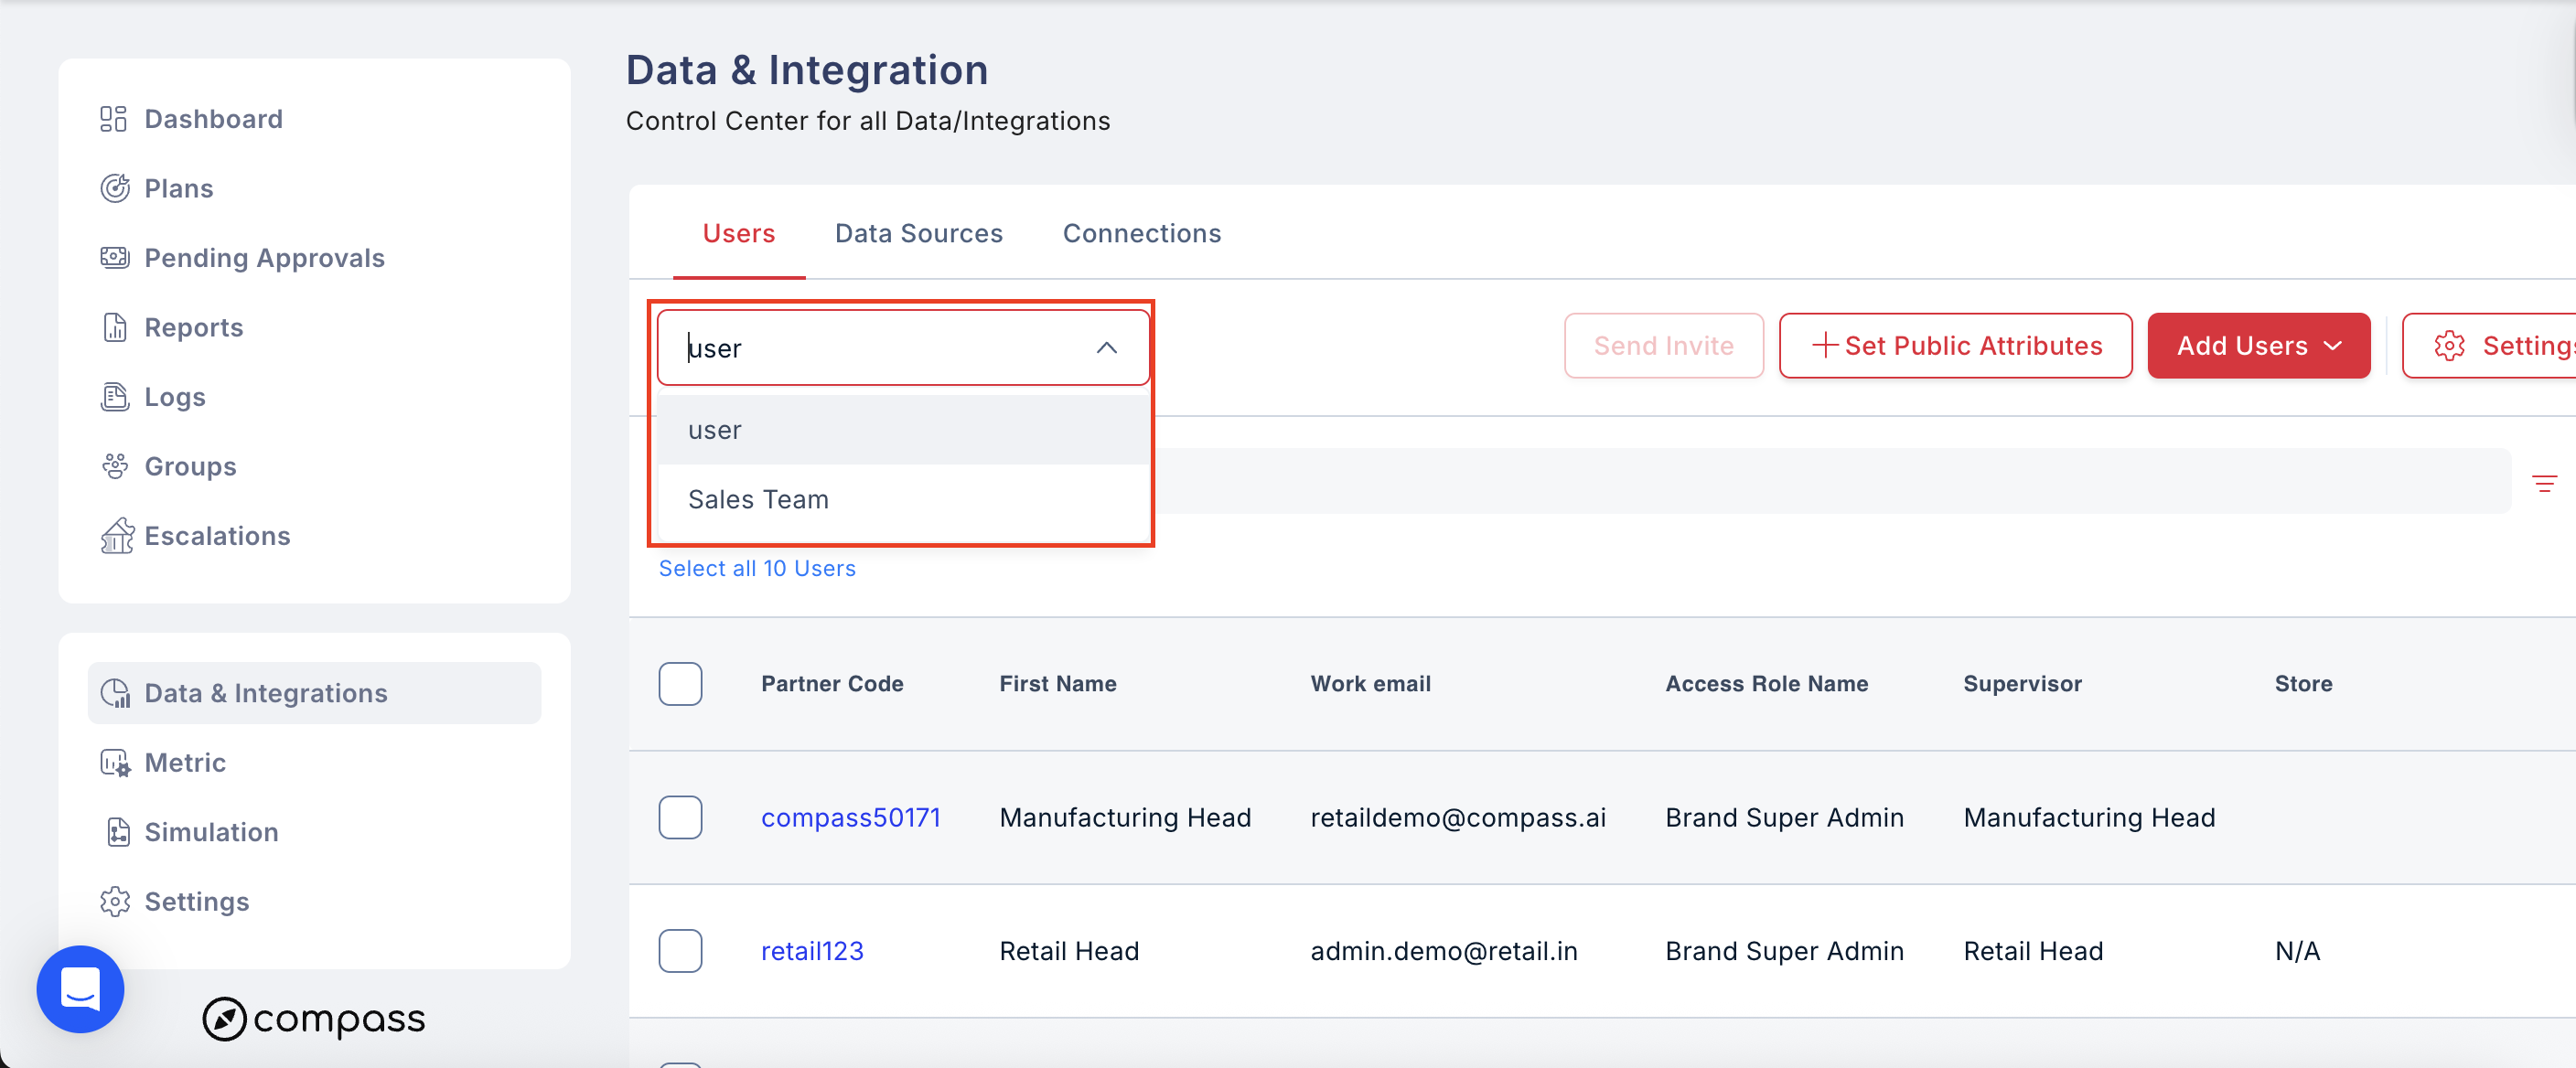
Step 3: View User Groups
- In the Users section, use the dropdown menu to select a user group.
- Once selected, the list of users in that group will be displayed below.
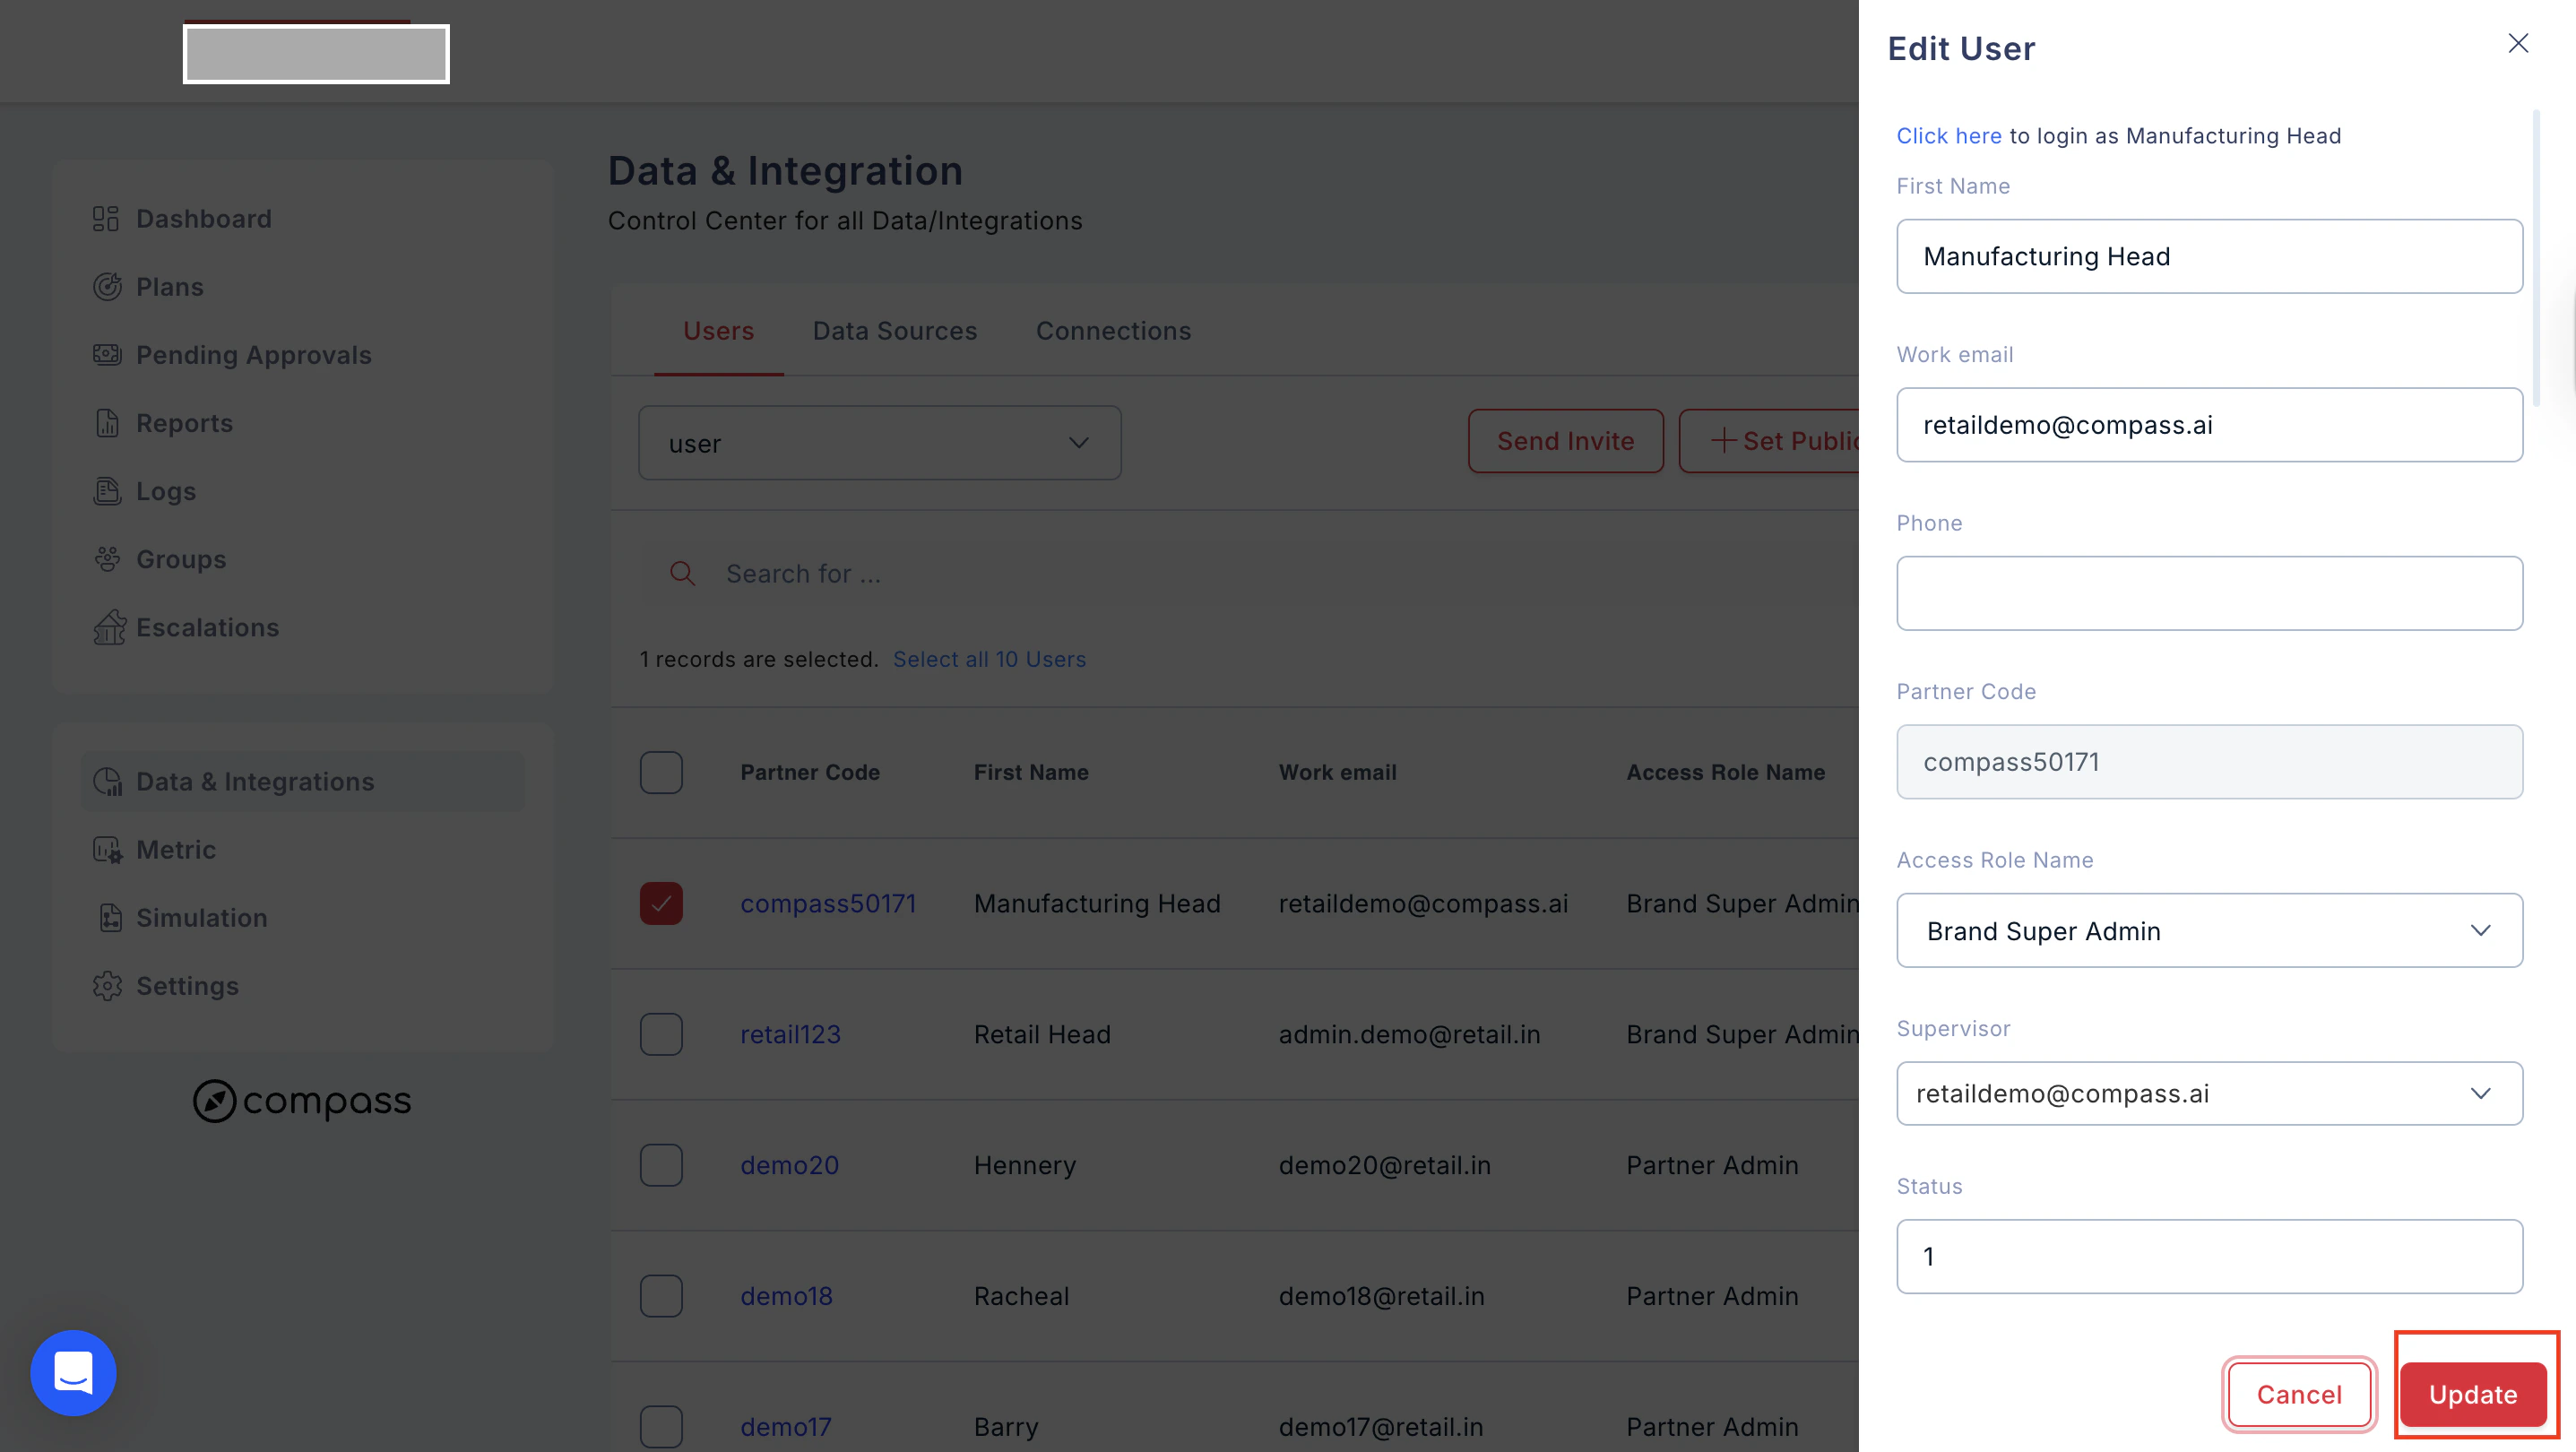
Step 4: Edit User Details
- Click on a specific user name from the list.
- You’ll be taken to the User Details page.
- You can:
- Update first name, phone number, or work email.
- Partner code cannot be edited.
- Change Access Role using the dropdown.
- Select Supervisor and add other details as needed.
- Use the status toggle at the bottom to mark the user as Active or Inactive.
- Click Update to save changes.
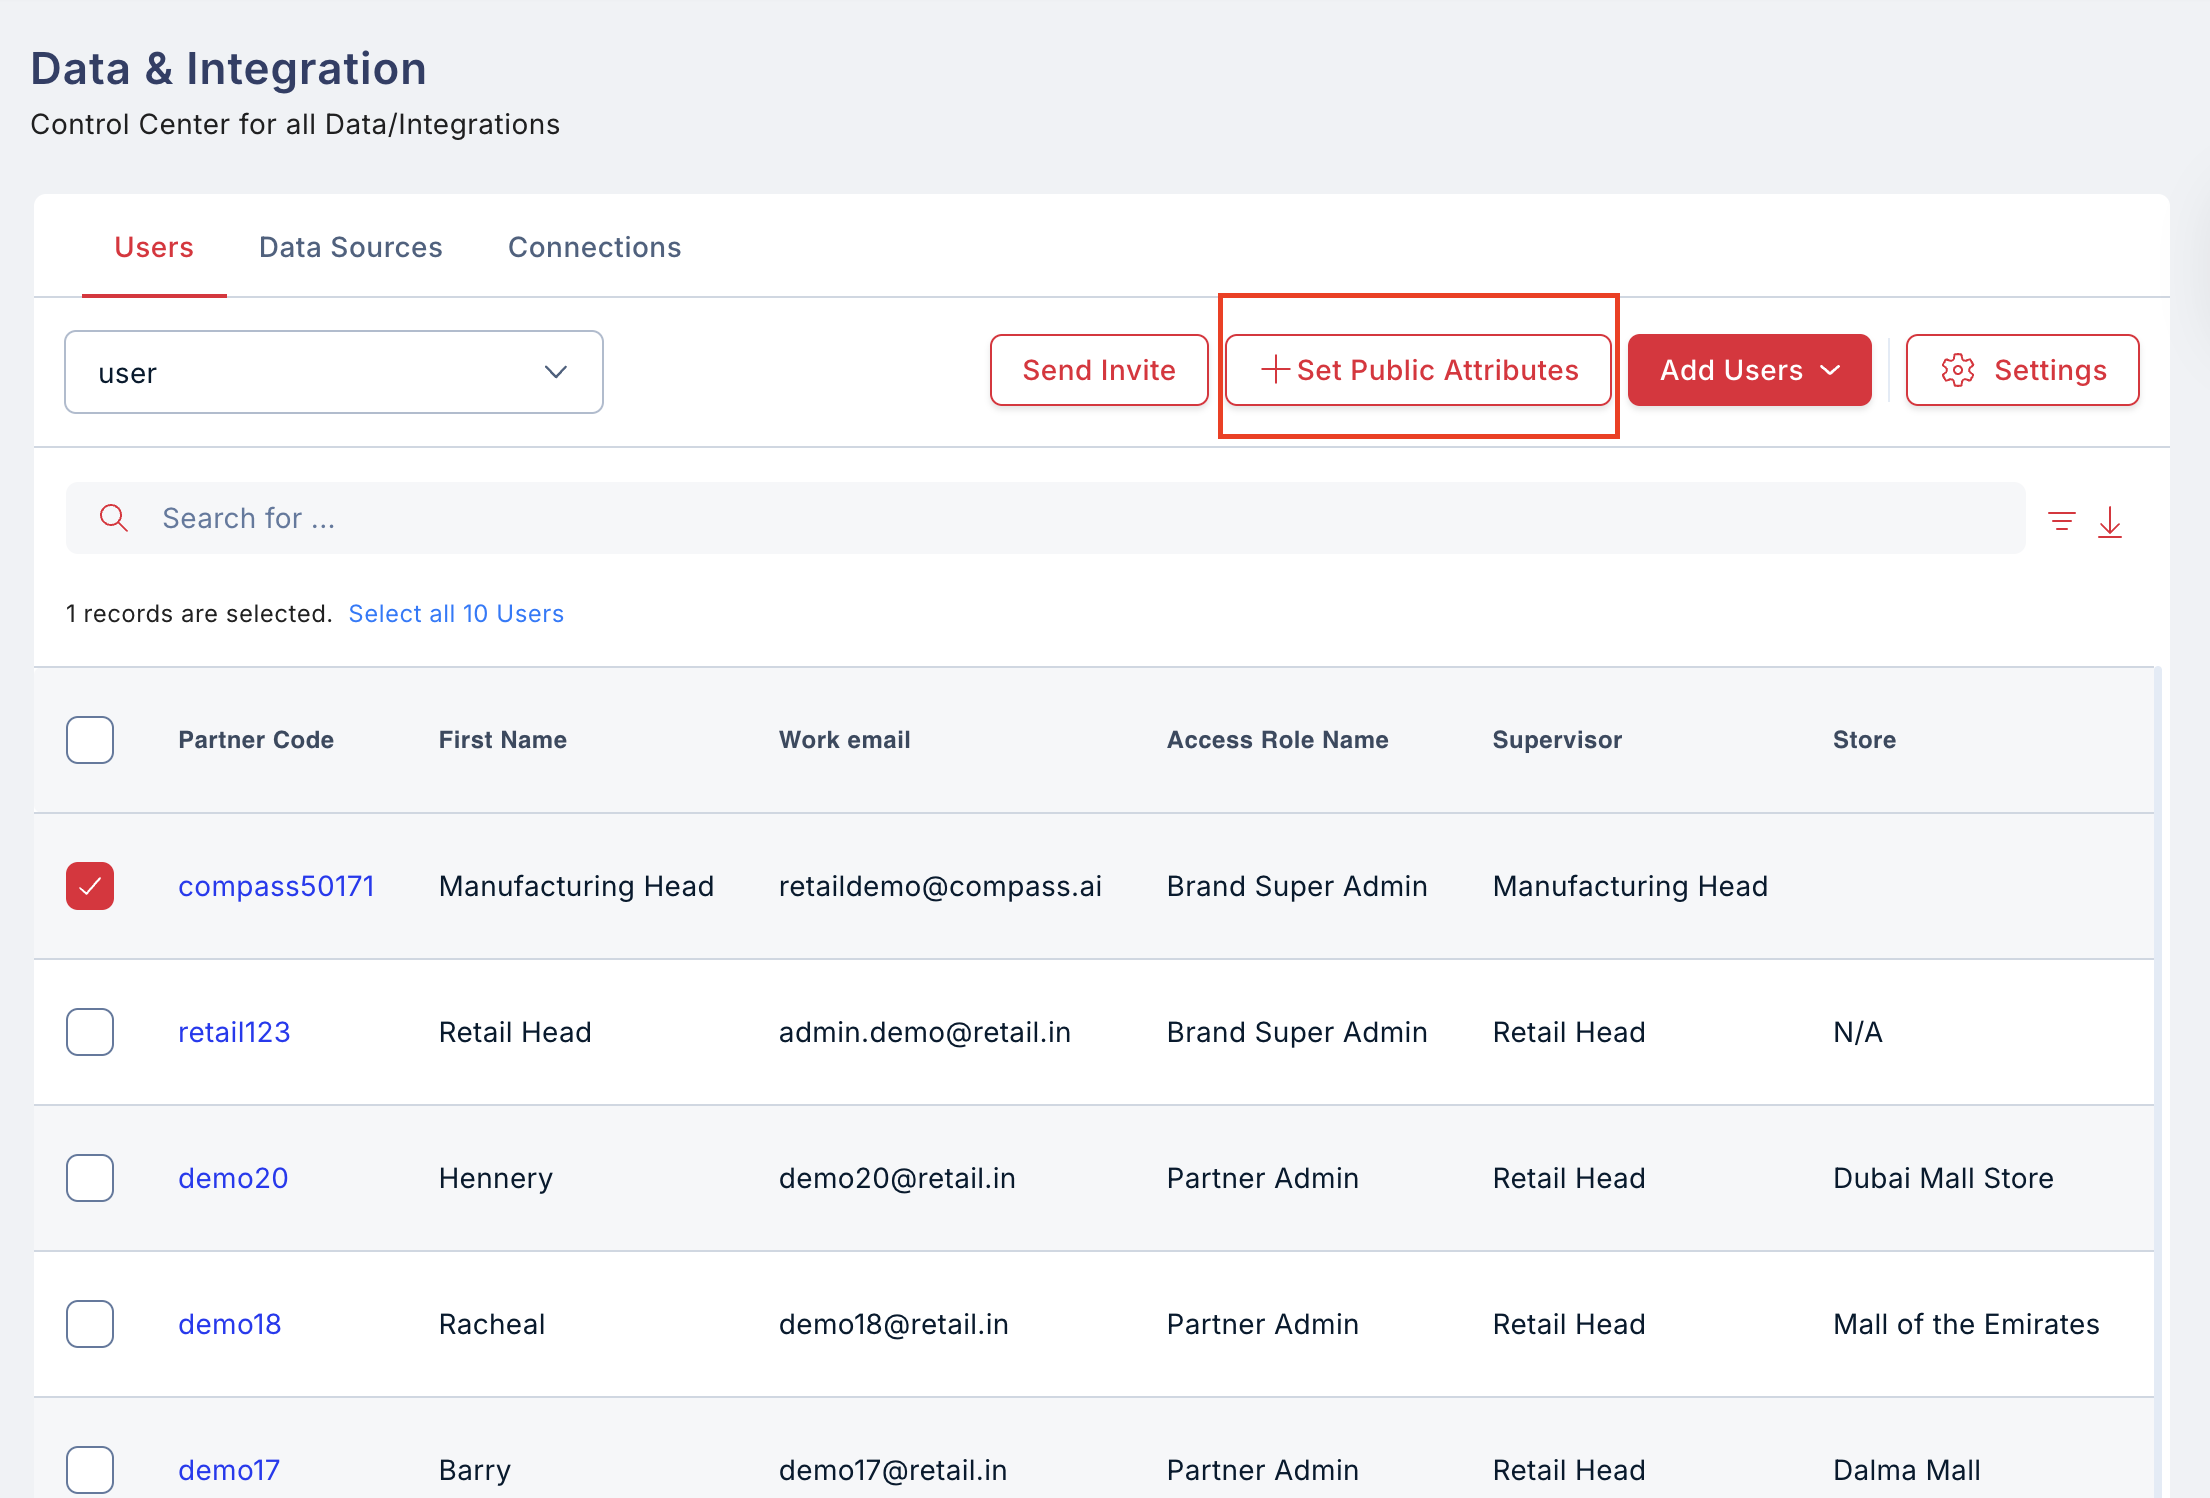
Step 5: Set Public Attributes
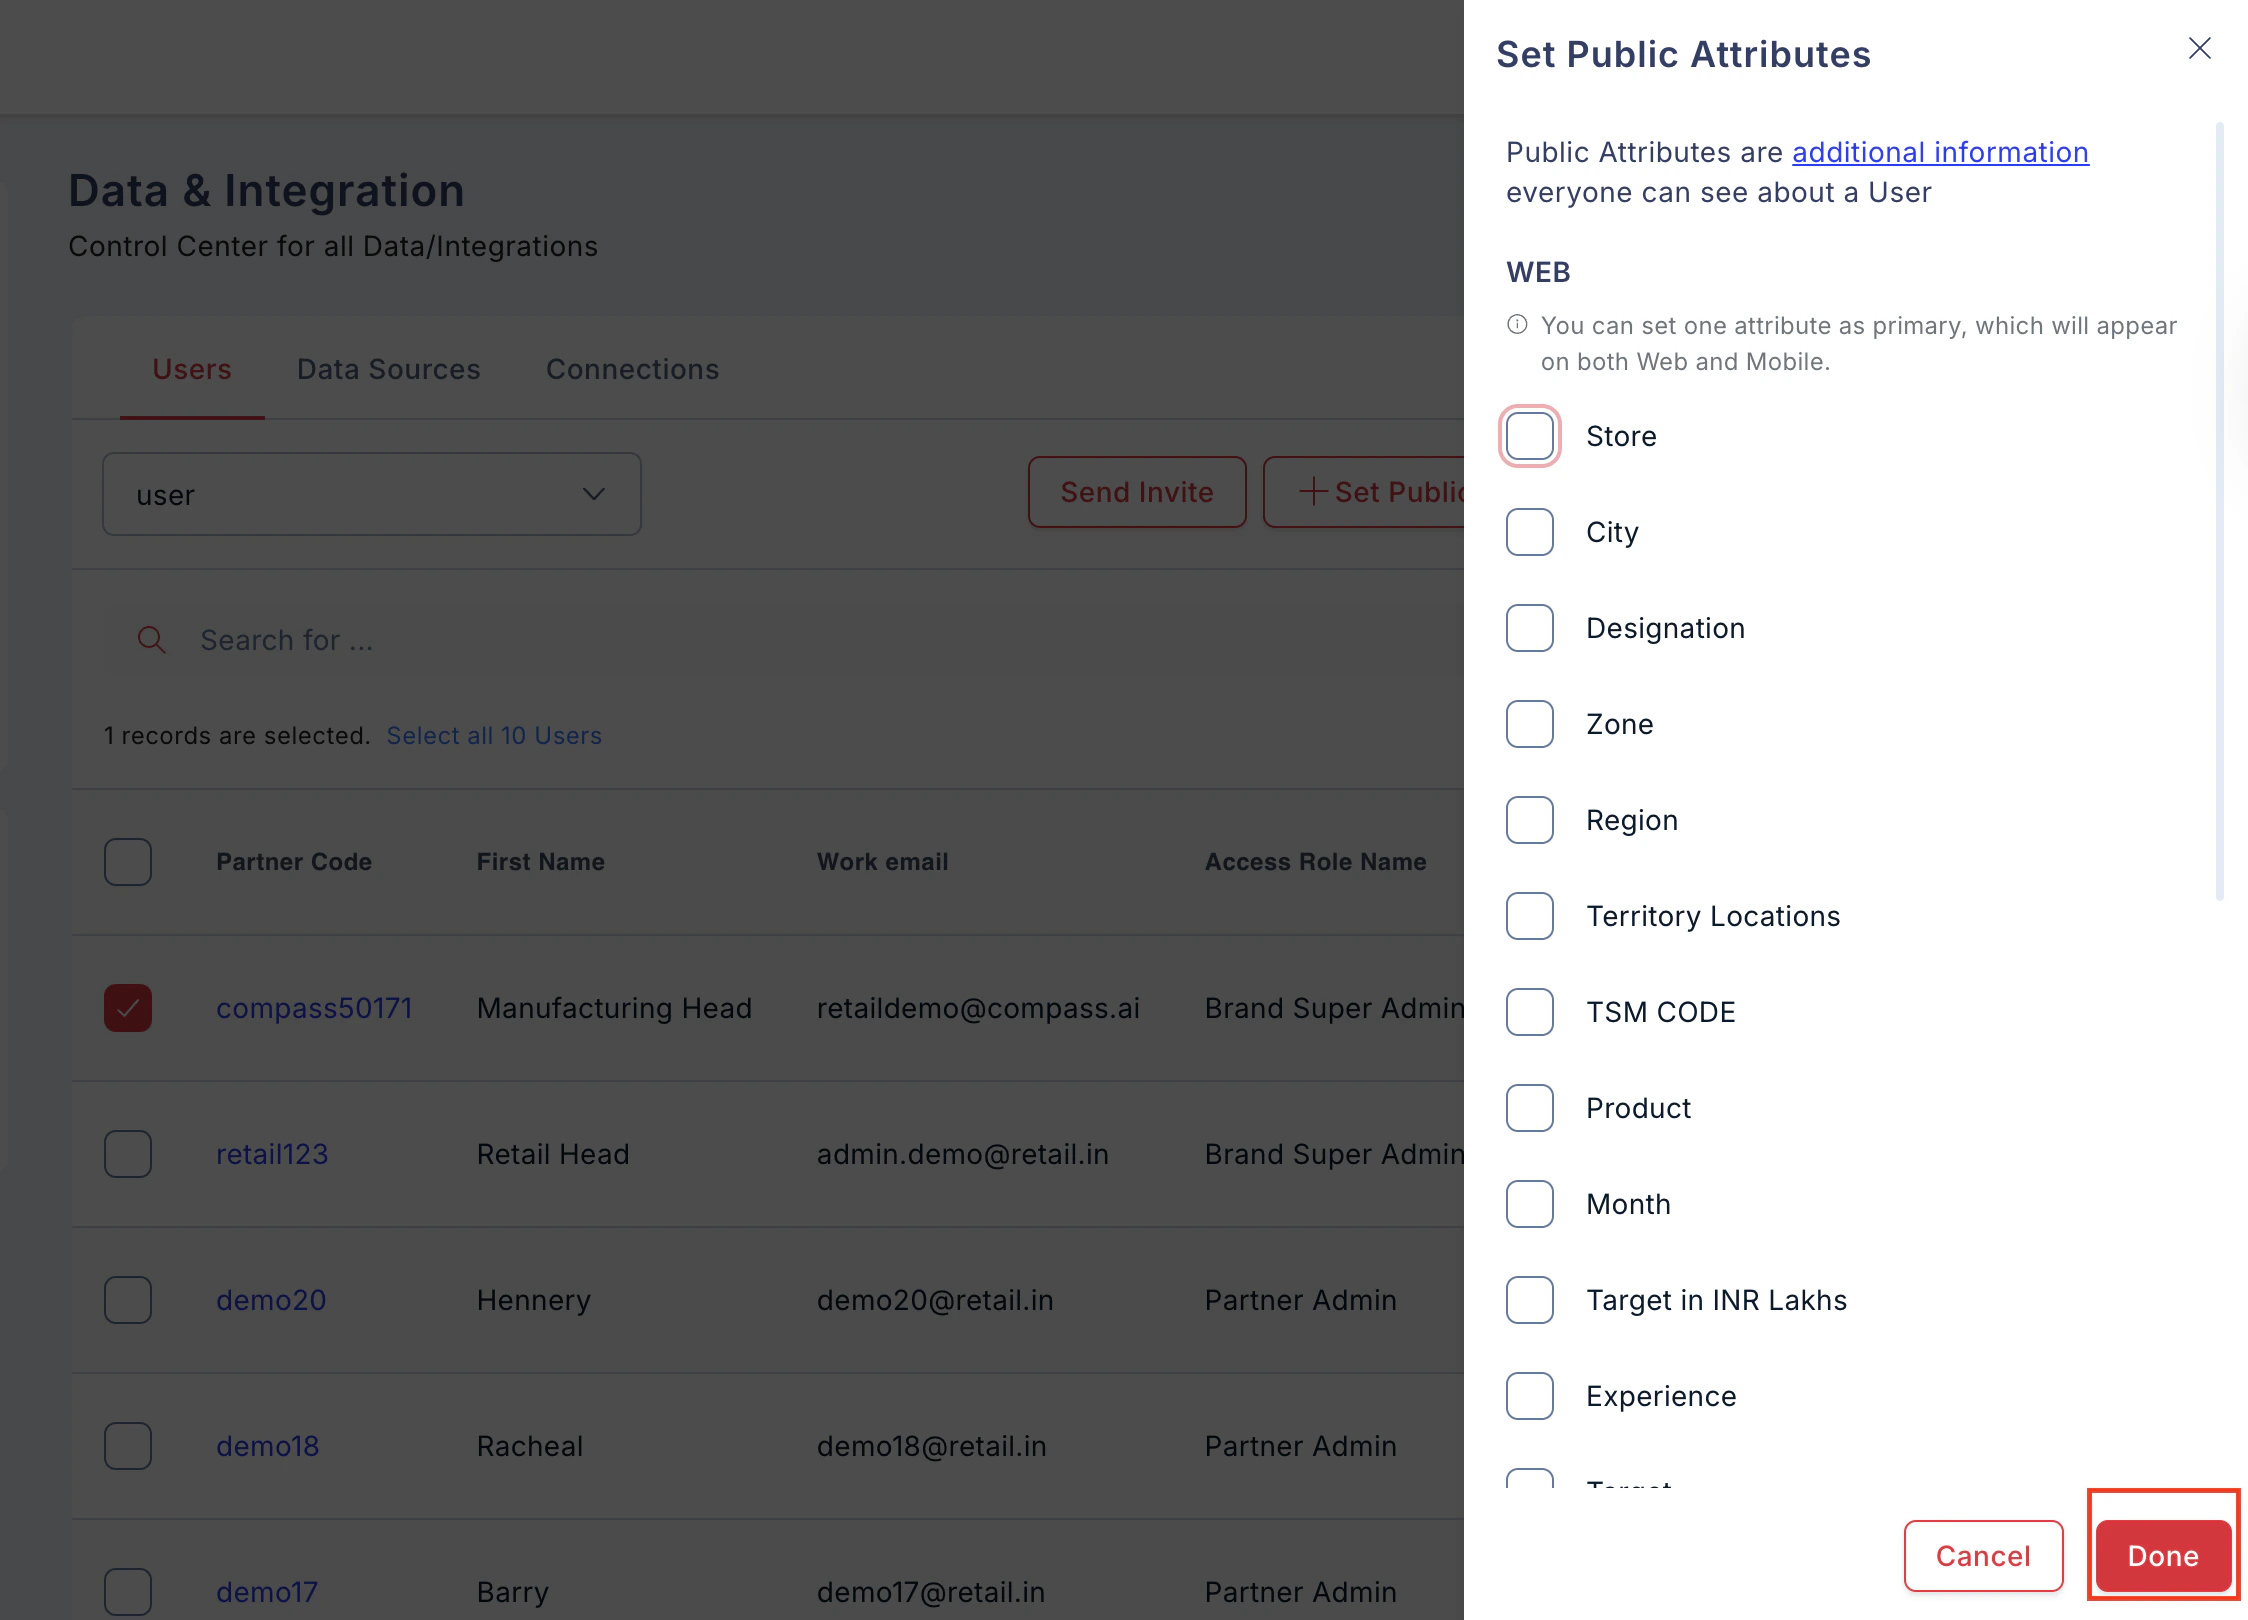
Public attributes are extra information visible to everyone about a user (on both Web and Mobile).- On the User Details page, click Public Attributes at the top right.
- Select the attributes you want to display.
- Mark one attribute as Primary — this will be shown on both Web and Mobile.
- Click Update to save.
Step 6: Manage User Workflows and Roles
- Go to Manage Users.
- Click Settings at the top right corner.
- You’ll find two sections:
- User Approval Workflows
- User Roles
6.1 User Approval Workflows
Approval workflows define who approves what and can be mapped to plans later.- Click Manage Users
- Click on Add User Approval Workflow
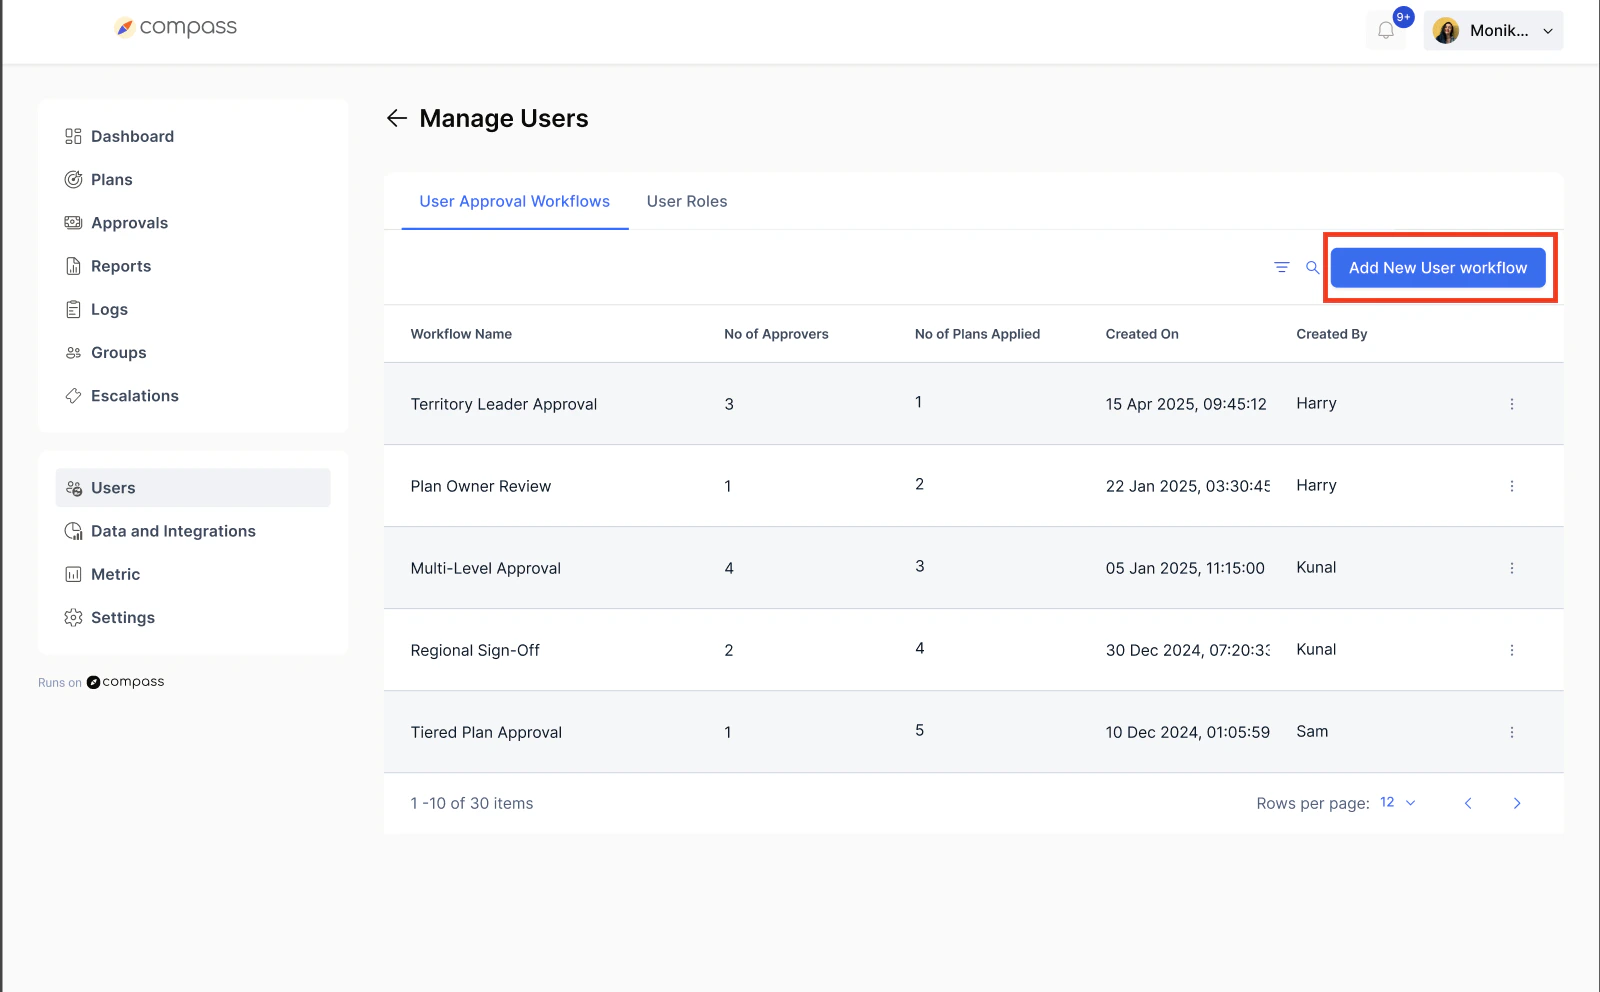
- Click Add New Workflow or Edit an existing one.
- Enter the workflow name.
- Add approvers (you can add multiple approvers by clicking the “+” icon).
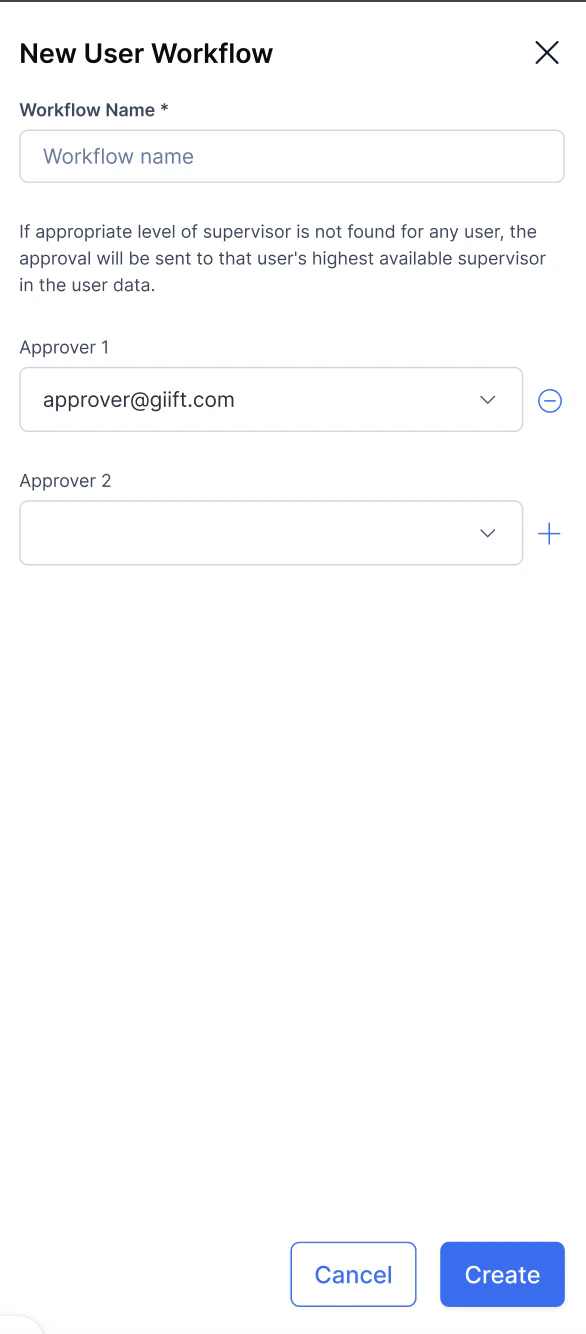
- Save the workflow.
6.2 User Roles
As a Super Admin, you can control what Admins and Managers can access or edit.How to Assign Roles
- Go to User Roles.
- Toggle permissions ON/OFF for each module:
- Earnings
- Groups
- Users
- Data & Integrations
- Transactions
- You can specify:
- Who can view, edit, or revoke earnings.
- Who can create groups.
- Who can add/edit users.
- Who can edit data sources.
- Who can view or download transactions.
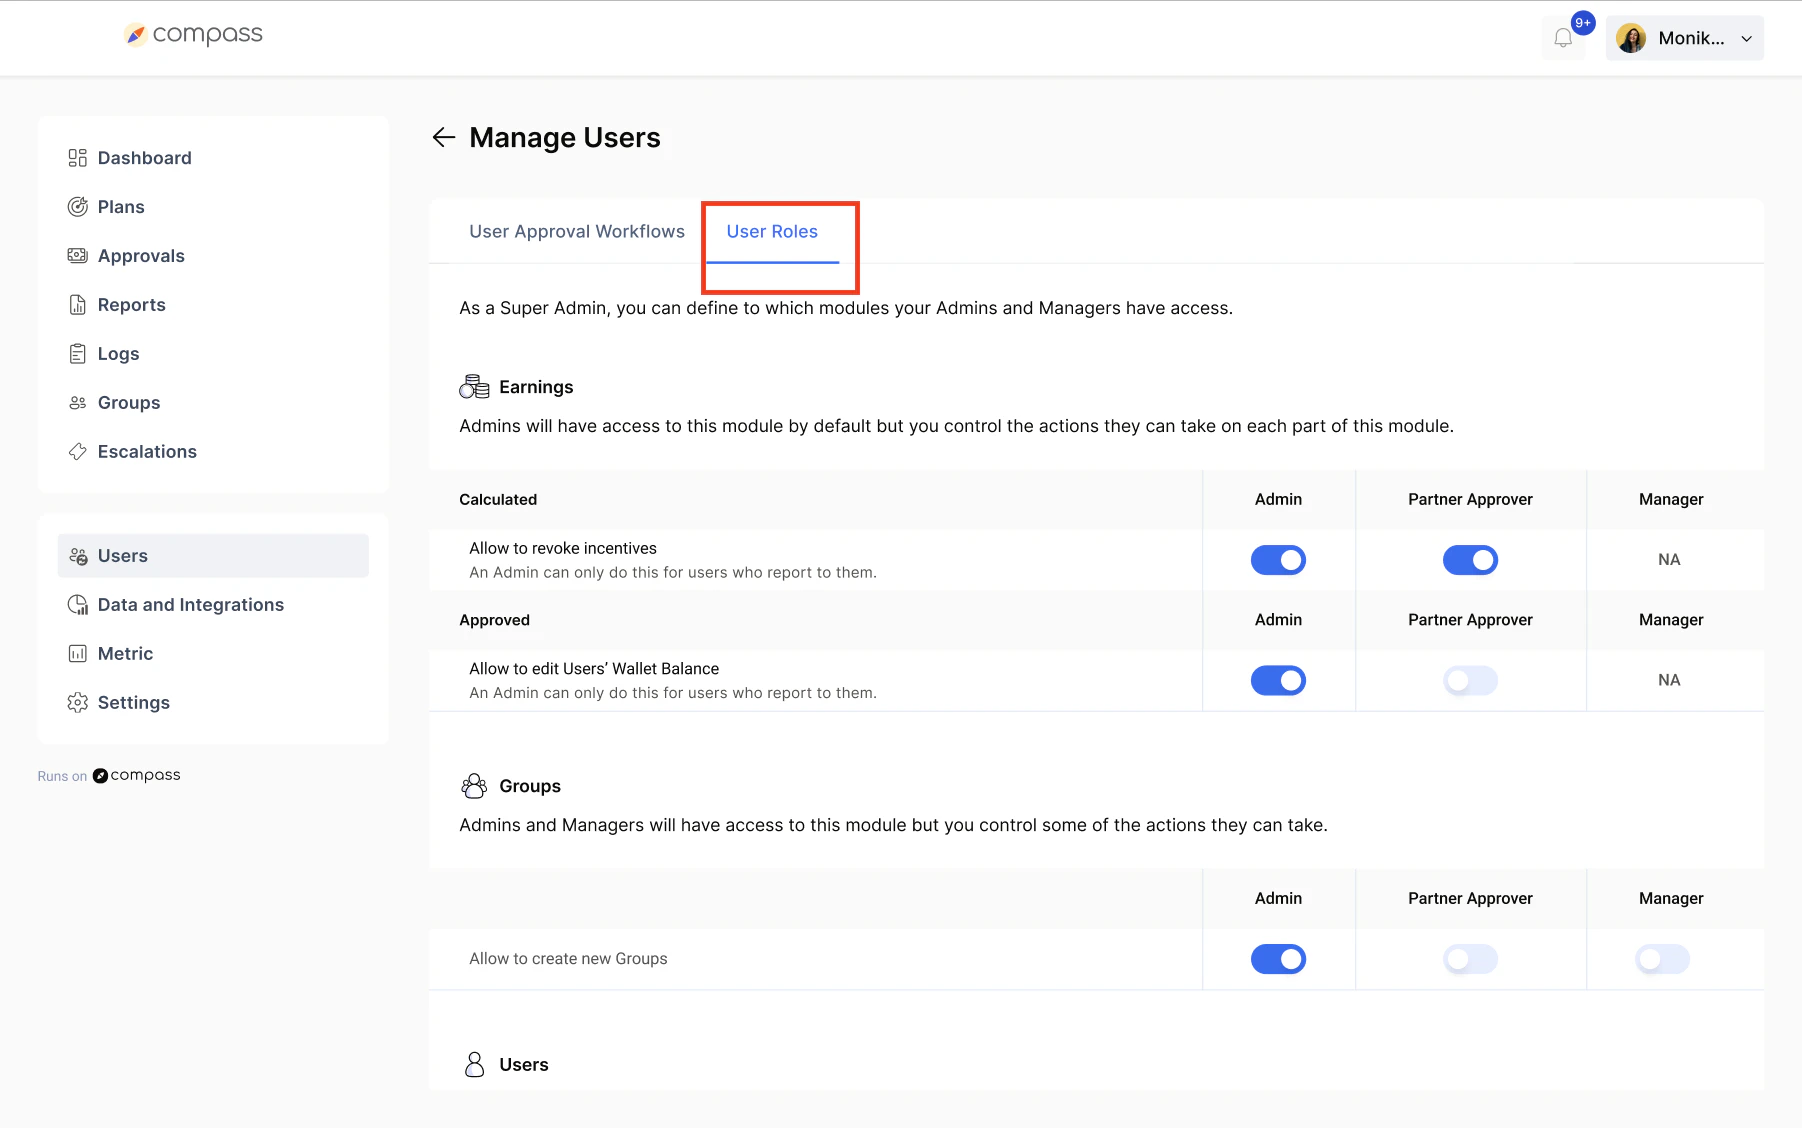
- Admin can revoke earnings for users reporting to them.
- Managers can view transactions but not download them.
- Only Admins can edit data sources.
Summary of Key Actions
Best Practices:
- Keep workflows clear and descriptive for easy mapping.
- Assign roles carefully to avoid accidental access.
- Use bulk upload for faster onboarding of large teams.
- Set a primary public attribute for easy user identification.
Need help? Reach out to your support team or cs@xoxoday.com.