
Using groups
Groups help replace long, scattered email threads and bring structured communication directly to your sales teams within the platform. Creating groups allows admins to:- Communicate updates to IC plan structures or calculation logic to specific user segments, ensuring clarity and alignment.
- Reduce disputes by running short, targeted surveys to gather feedback on incentive plans from the right audience.
- Organize users based on any parameter in your dataset—department, designation, geography, IC structure, territory, and more.
Townhall
Every admin account comes with a system-generated default group called Townhall, which includes all end users on the platform. You can access this group by clicking the Groups tab in the left navigation panel.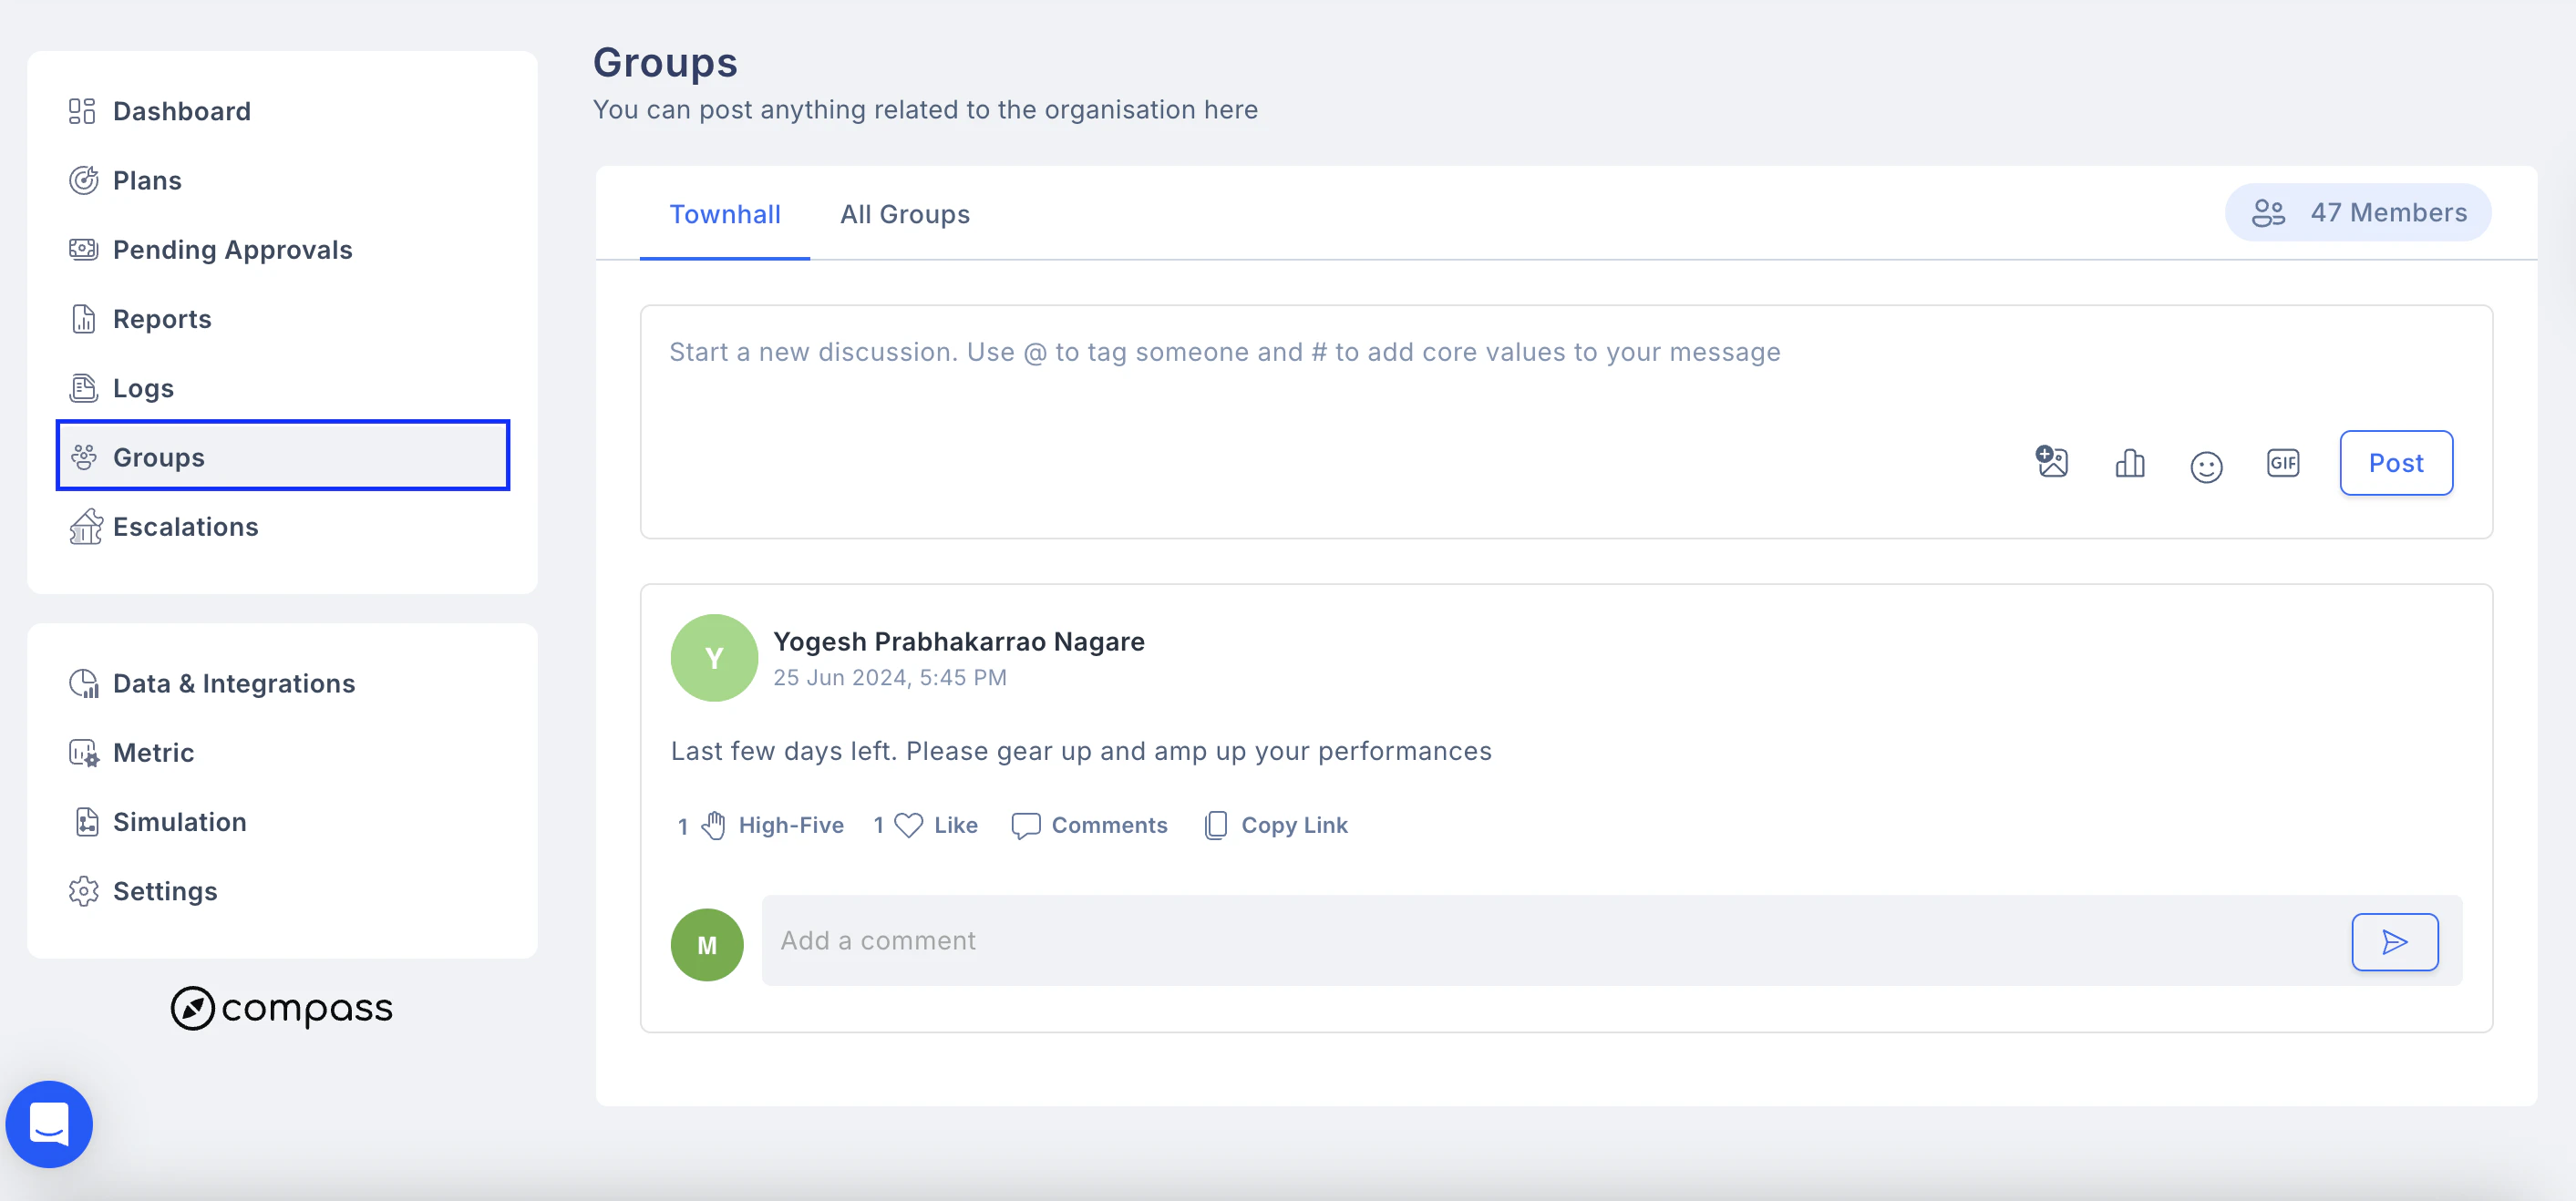
Creating and managing a Group
To create a new group:1
Click the + Add New Group button
Click the + Add New Group button on the top right under the My Groups tab.(Please note that this option is only available to admins)
2
Fill in the group details, including
Fill in the group details, including the display picture, name, description, and membership restrictions.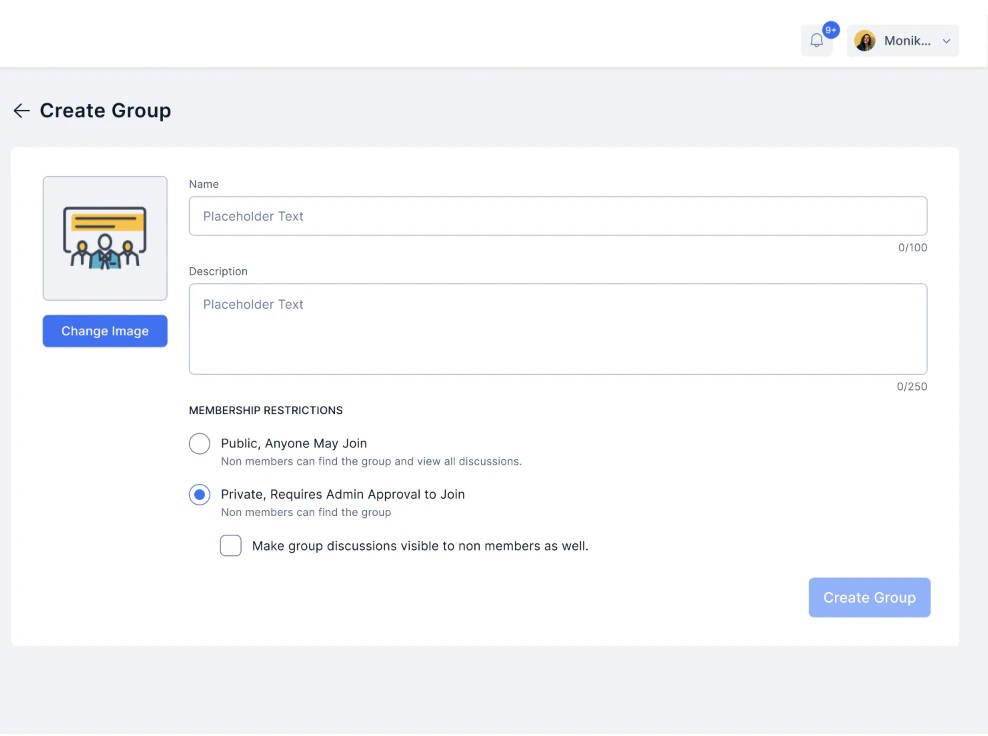
Add members
You can manually add more members to the group by clicking on the blue +add people icon next to the three dots on the group card.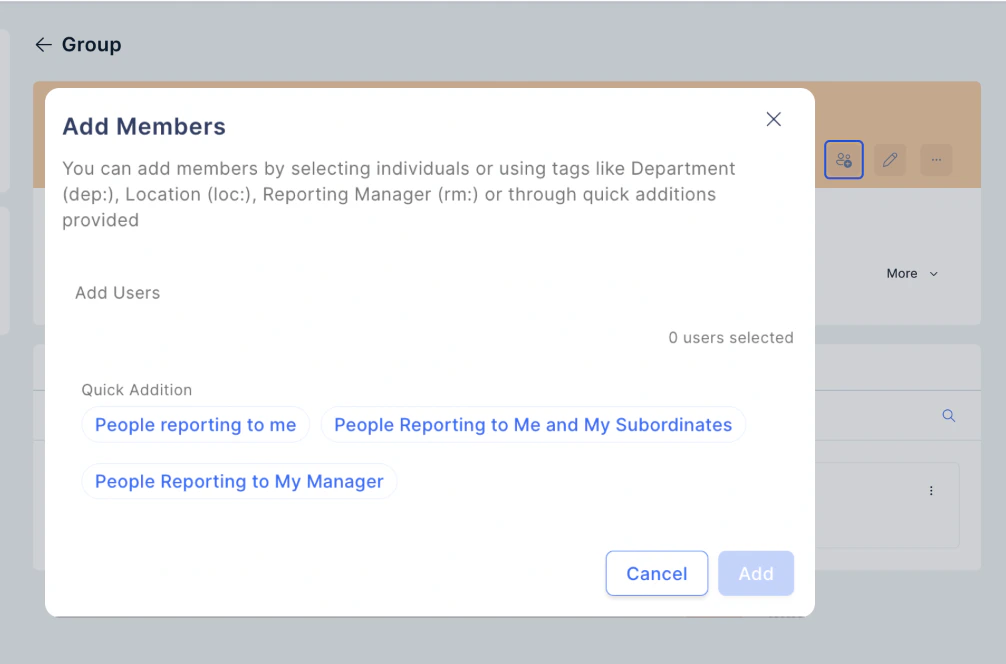
Edit Group Details
You can edit the existing group details, including name, permissions, or its members.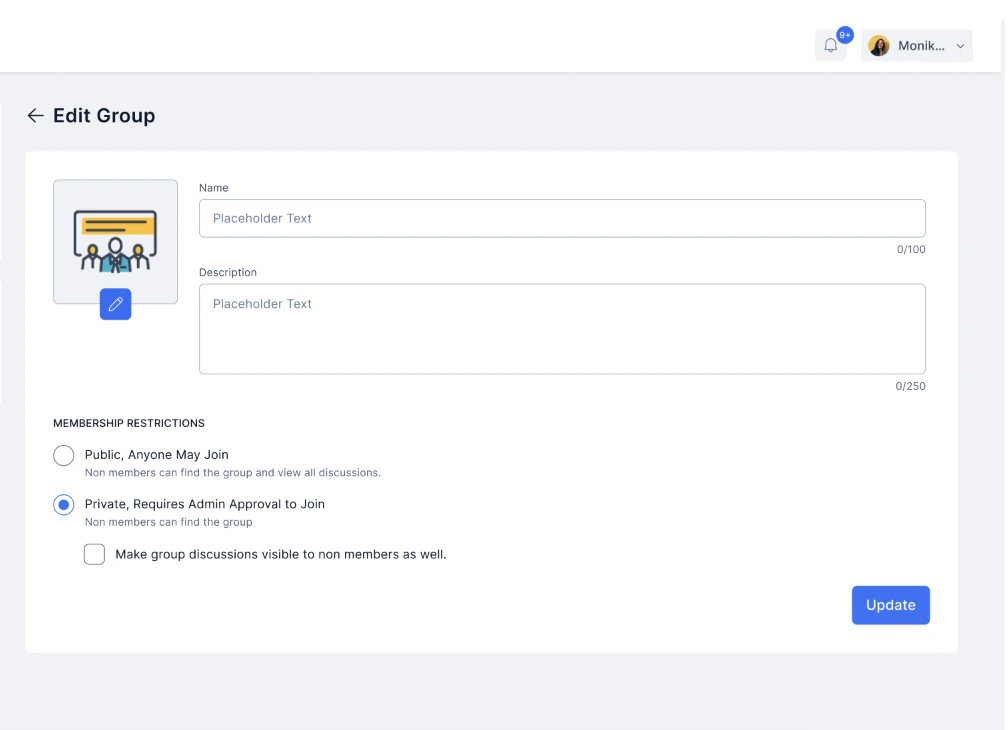
Member Permissions
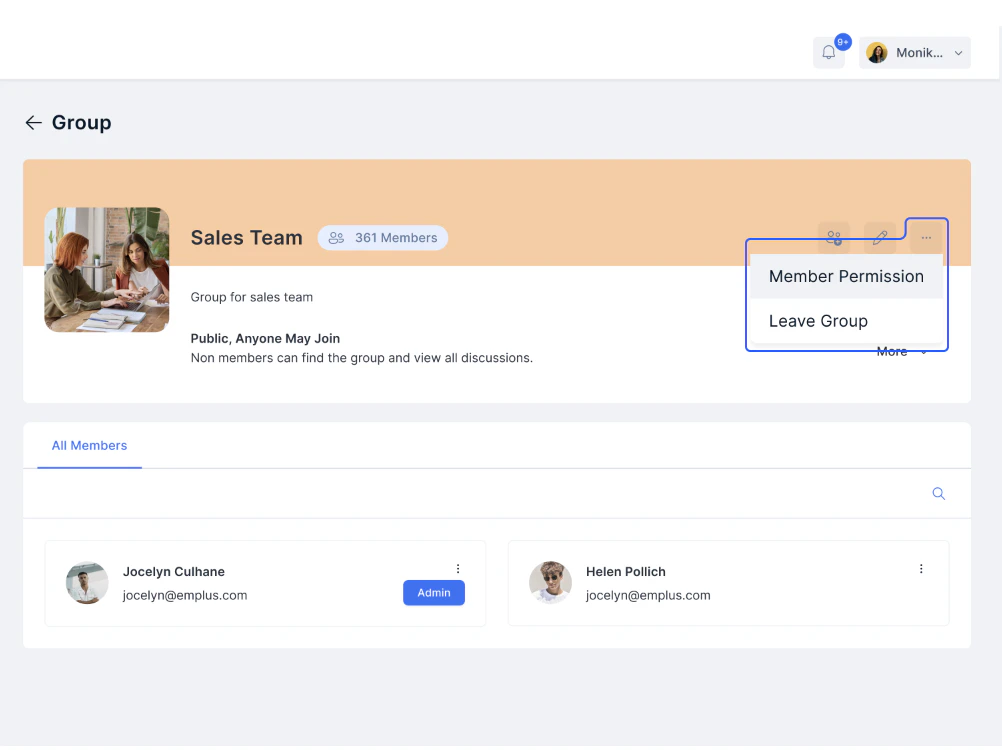
This option, as an admin, allows you to control the actions the end user in the group can take at two levels: Access and Nature of Conversations, as shown in the screenshot below.- Click on the pen icon and then click “Member Permission”.
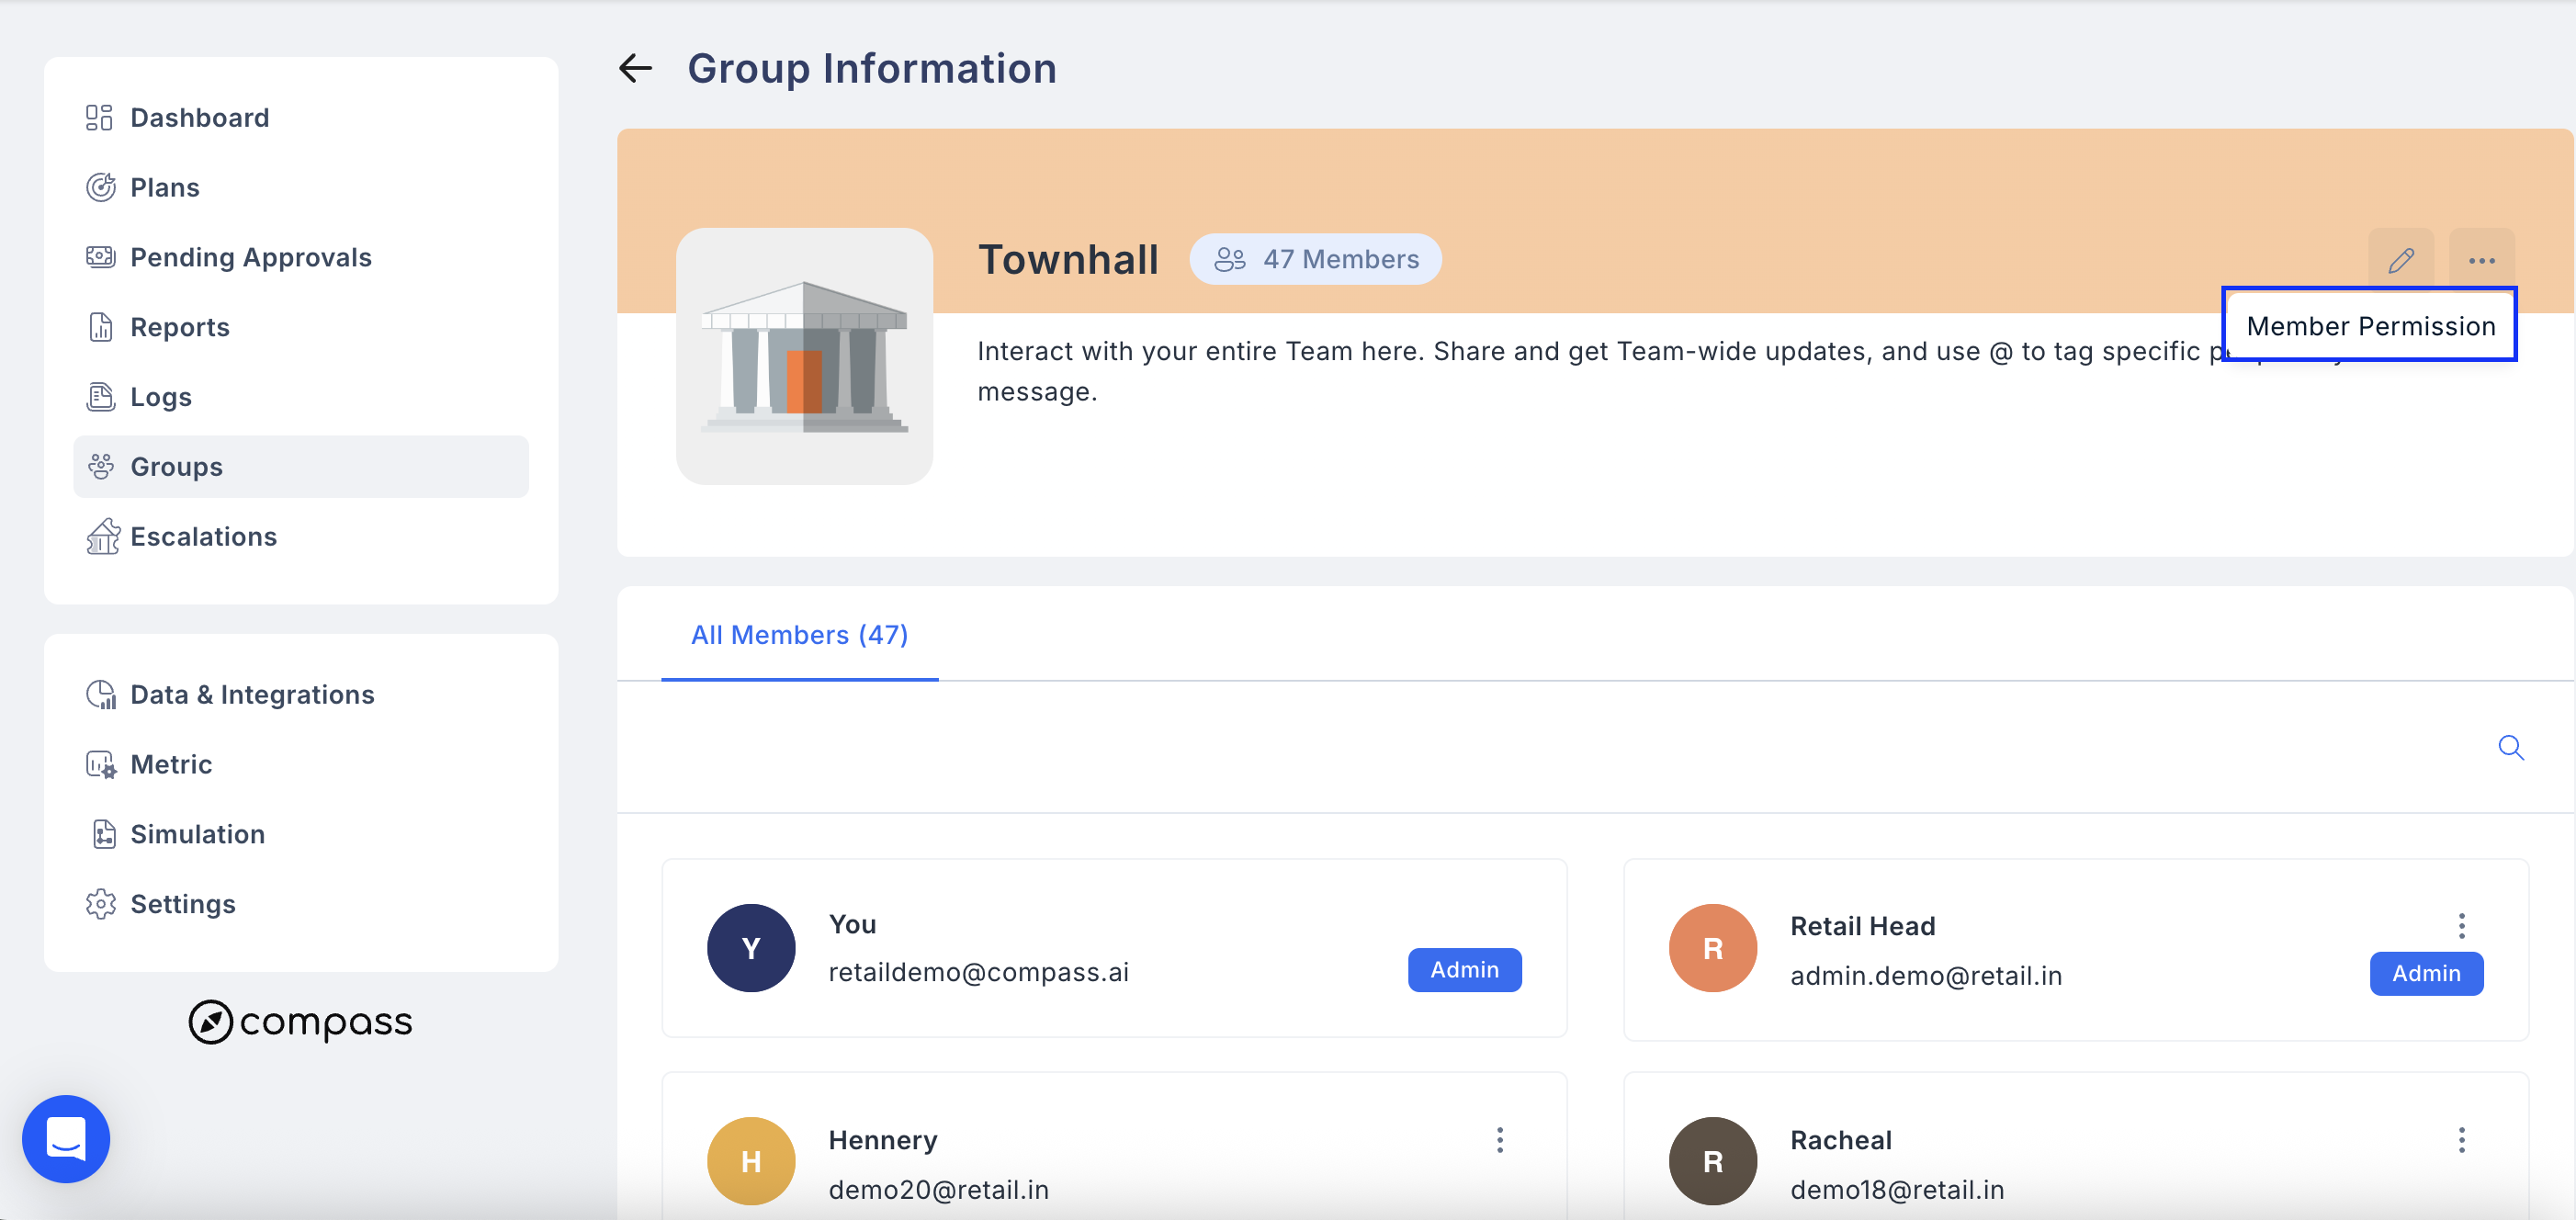
- Manage either the Access Permissions or Nature of conversations by clicking on the pen icon next to each.
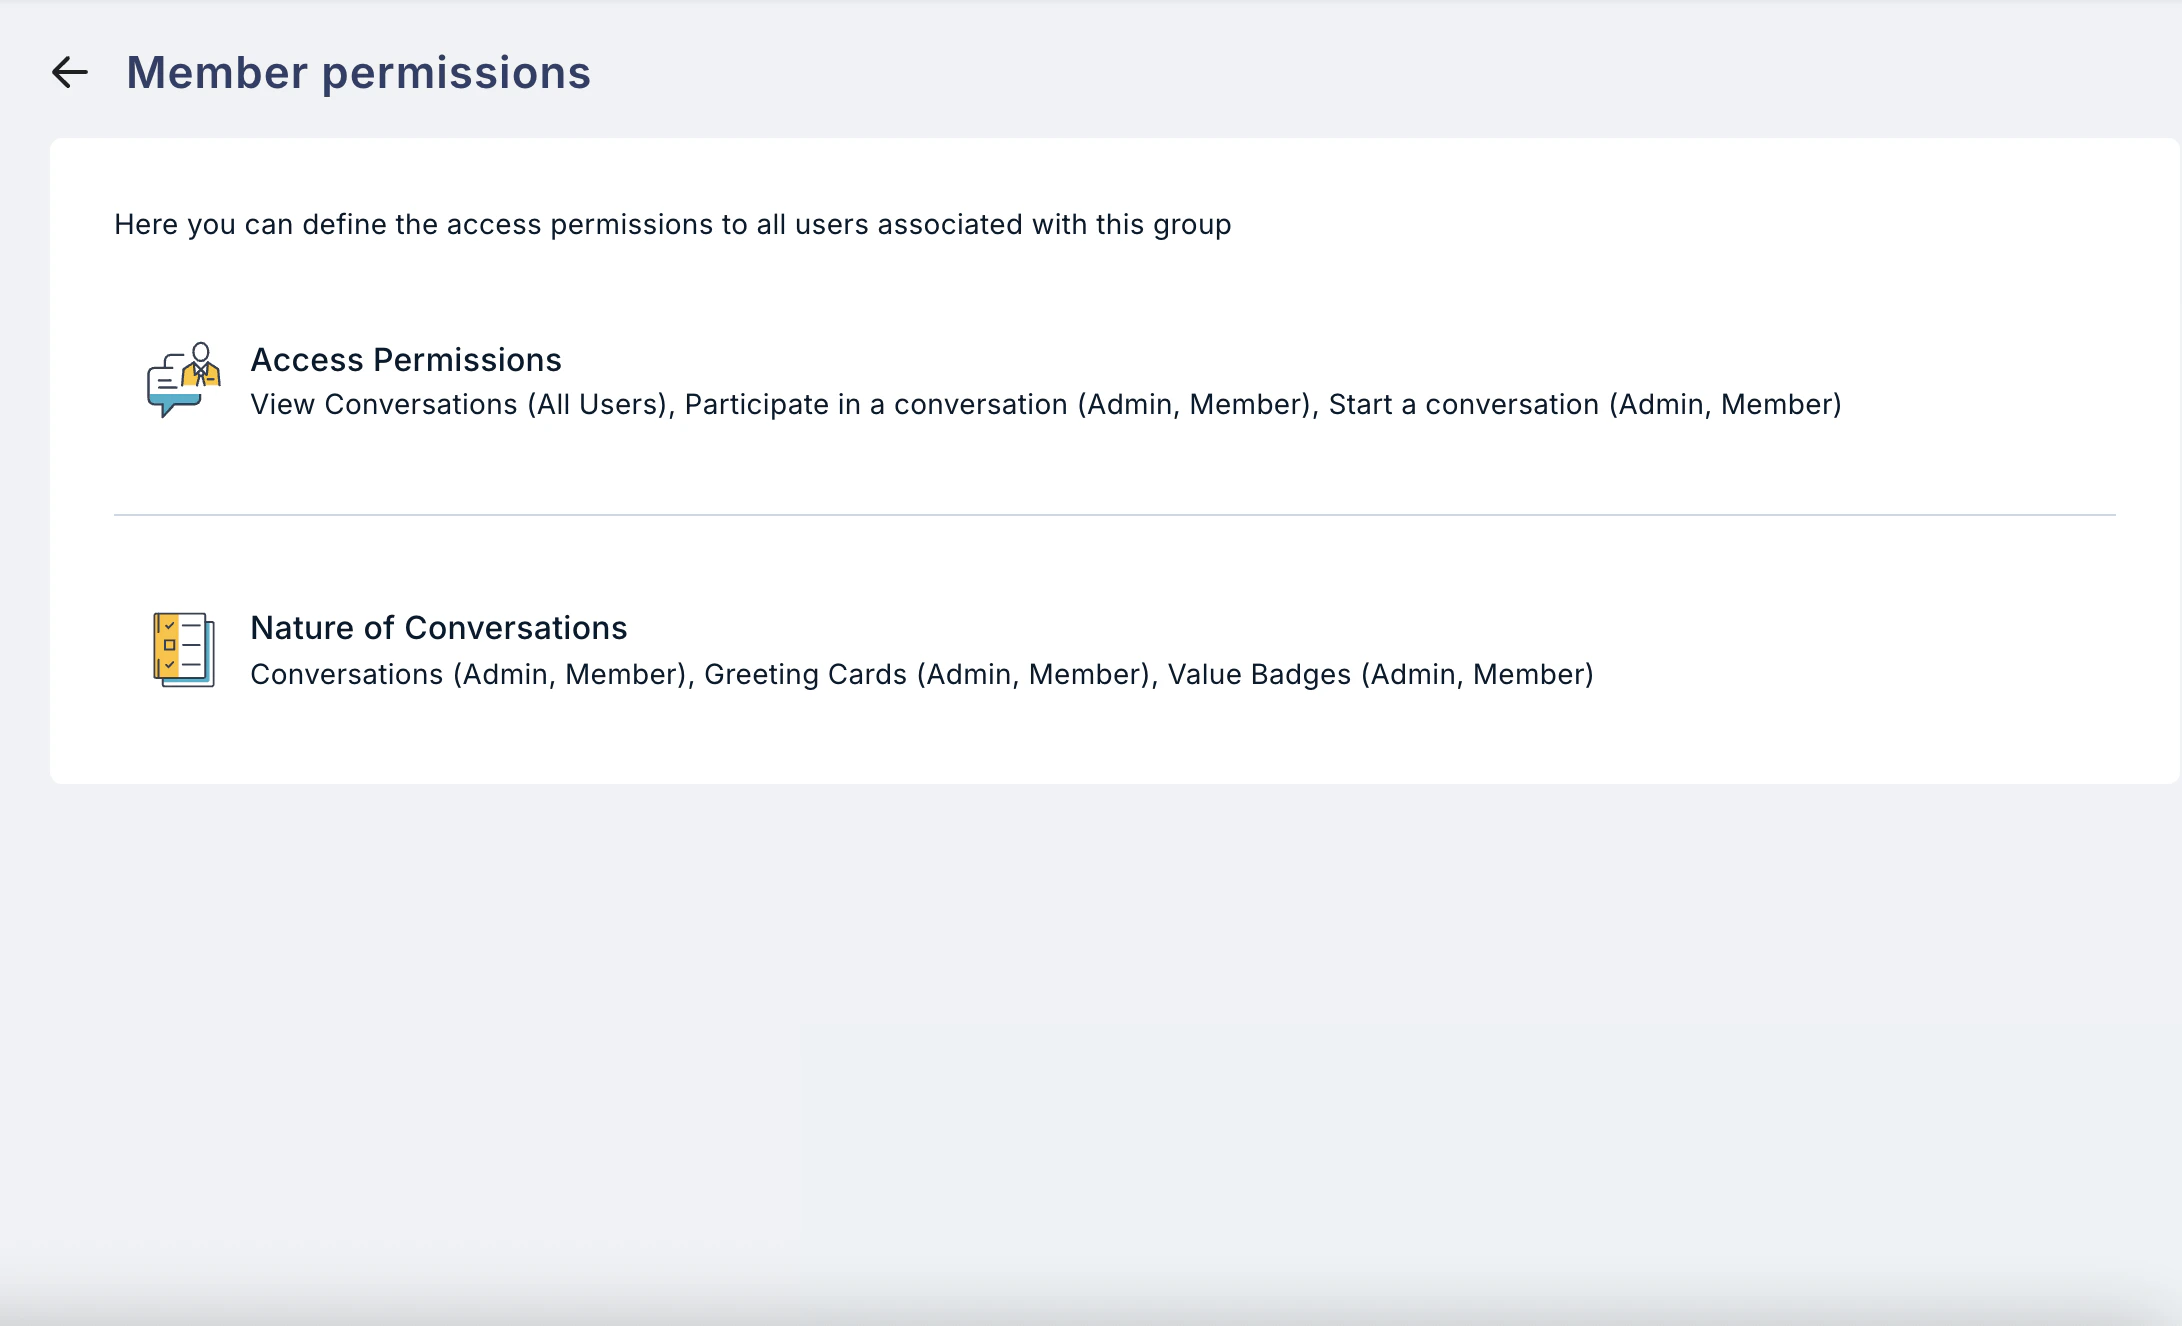
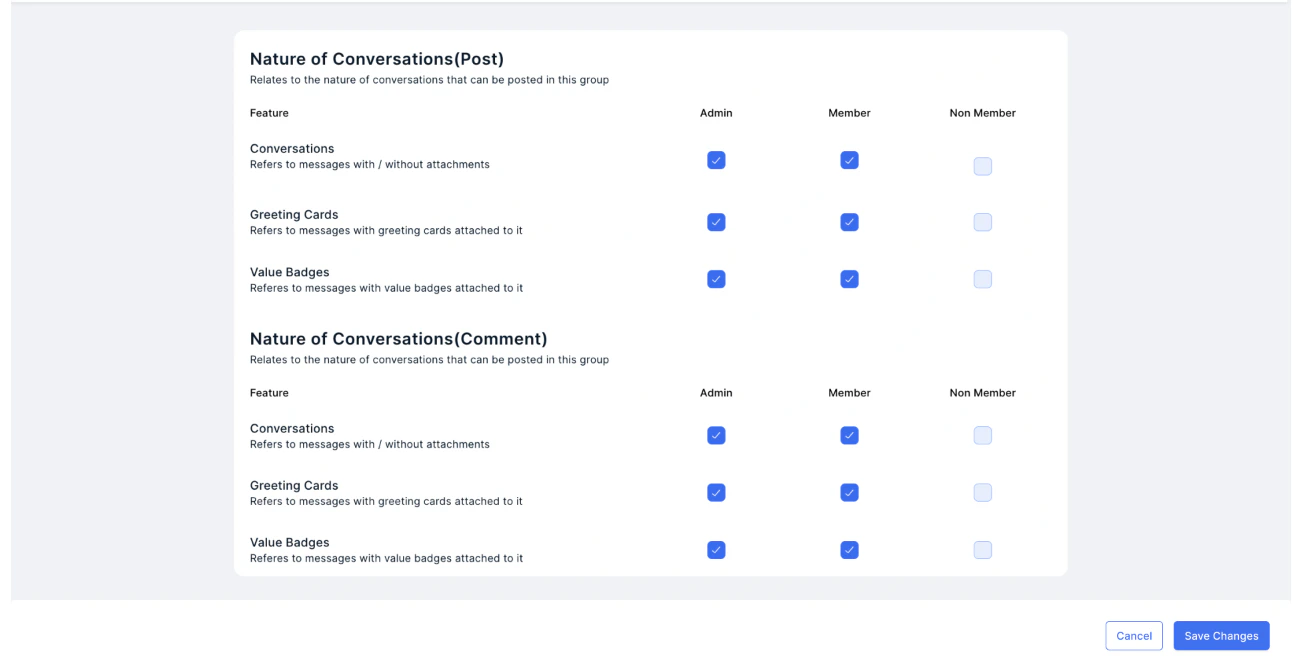
- Check or uncheck the boxes based on the business requirements. Once done, click on “Save Changes”.
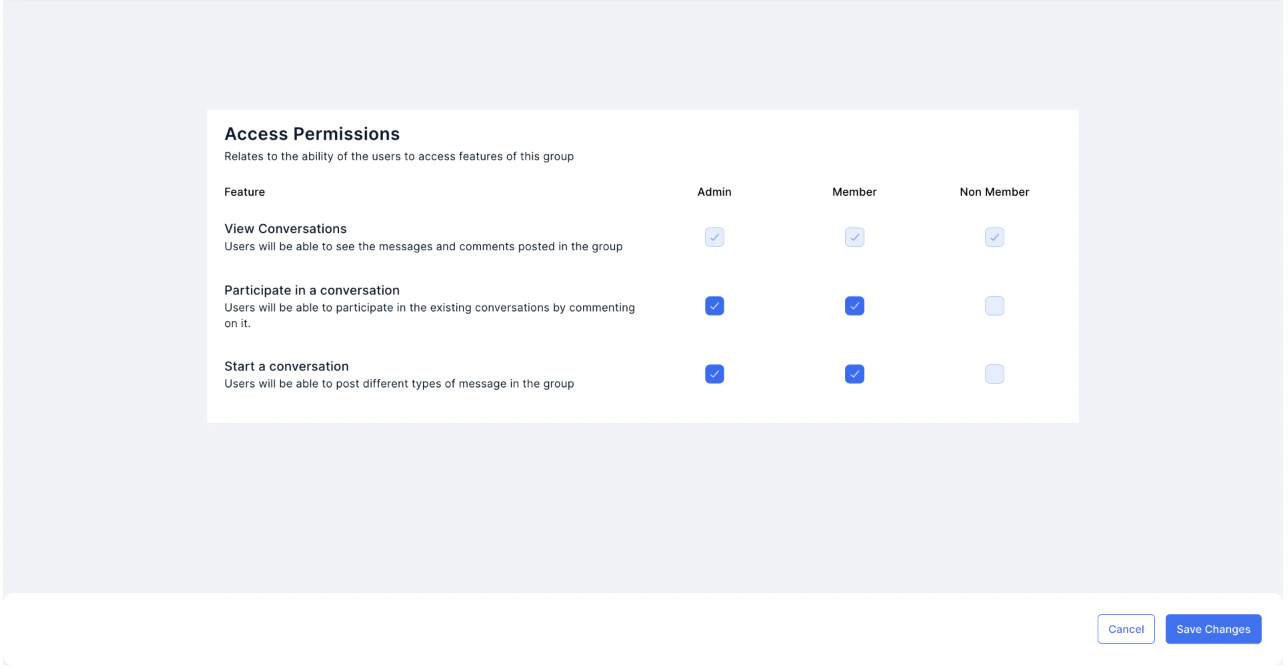
- The screenshots below showcase all the options for restricting or enabling permissions for various types of end users, including admins, members, and non-members.
Content Settings
You can automate messages to highlight employees celebrating special occasions, including birthdays, work anniversaries, leaderboard winners, etc.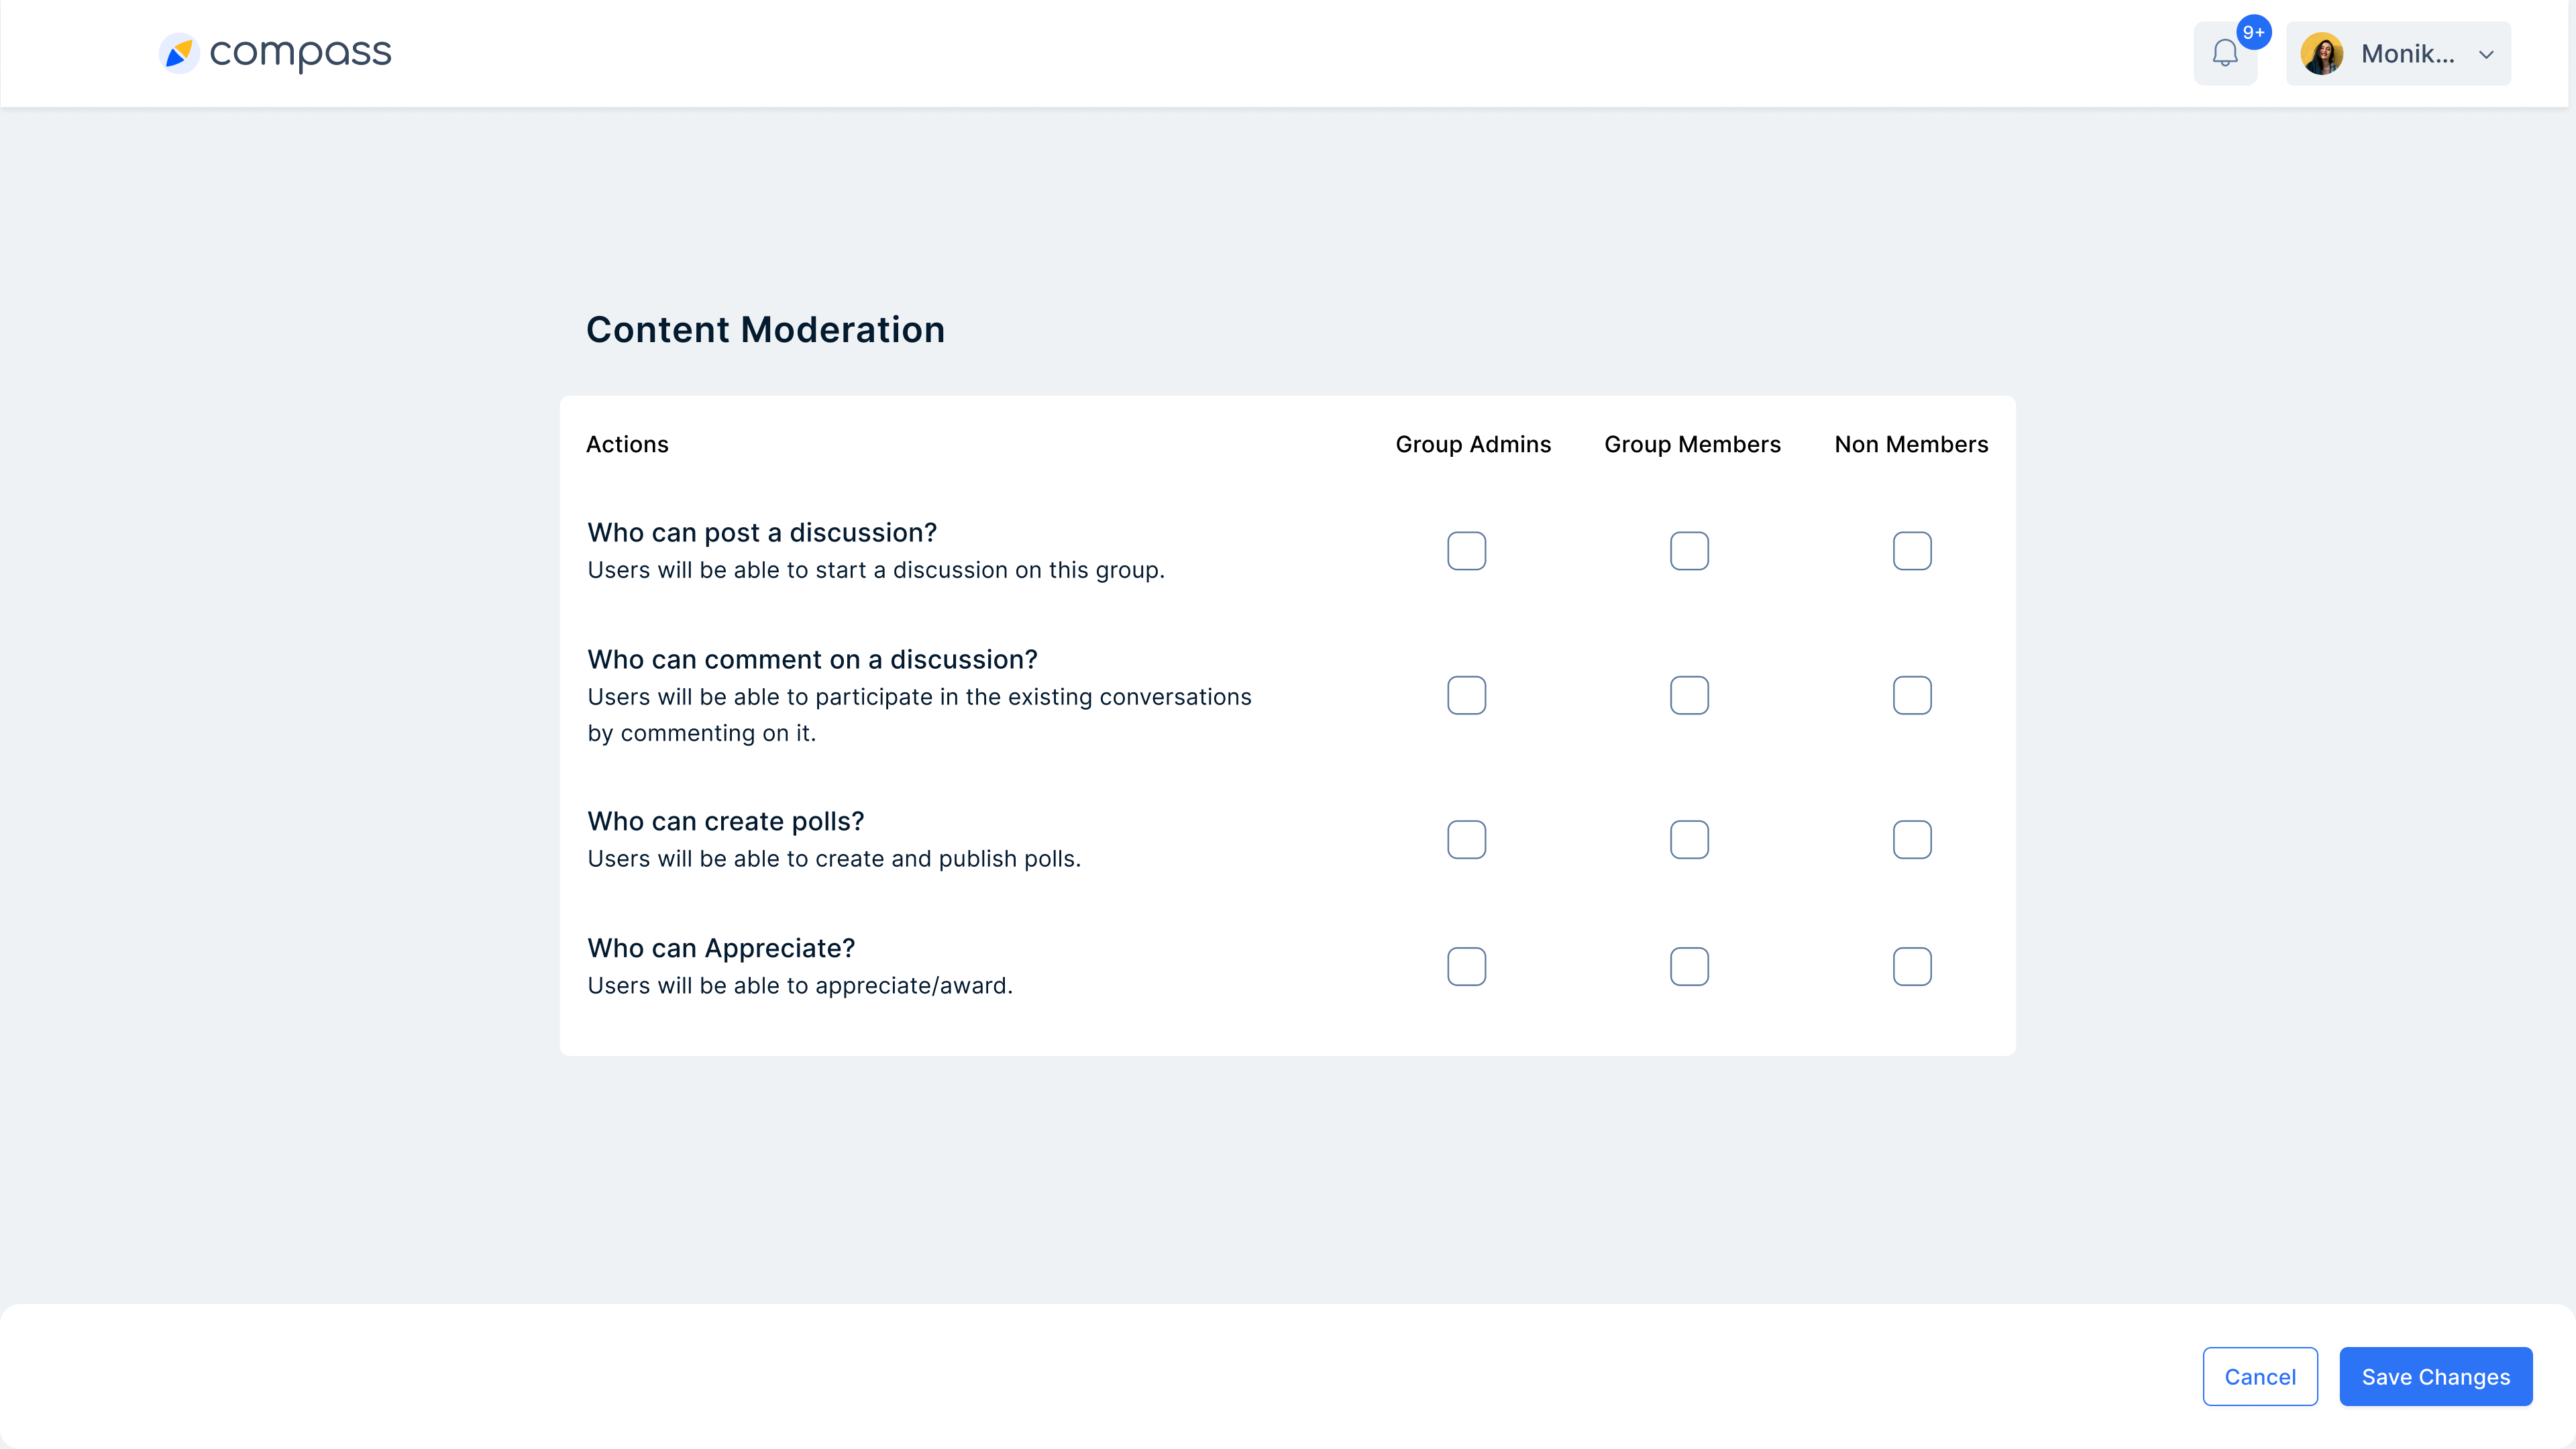
Deleting a group
To delete a group, follow these steps- Remove all the members of the group.
- Leave the group as the admin.
- This will then auto-delete the group.
Need help? Reach out to your support team or Contact Support.