
By default, any active employee can create a group. Super Admins can restrict group creation to managers and admins only under Access Control Settings.
Group types
Empuls supports several categories of groups. Use the type that fits your purpose: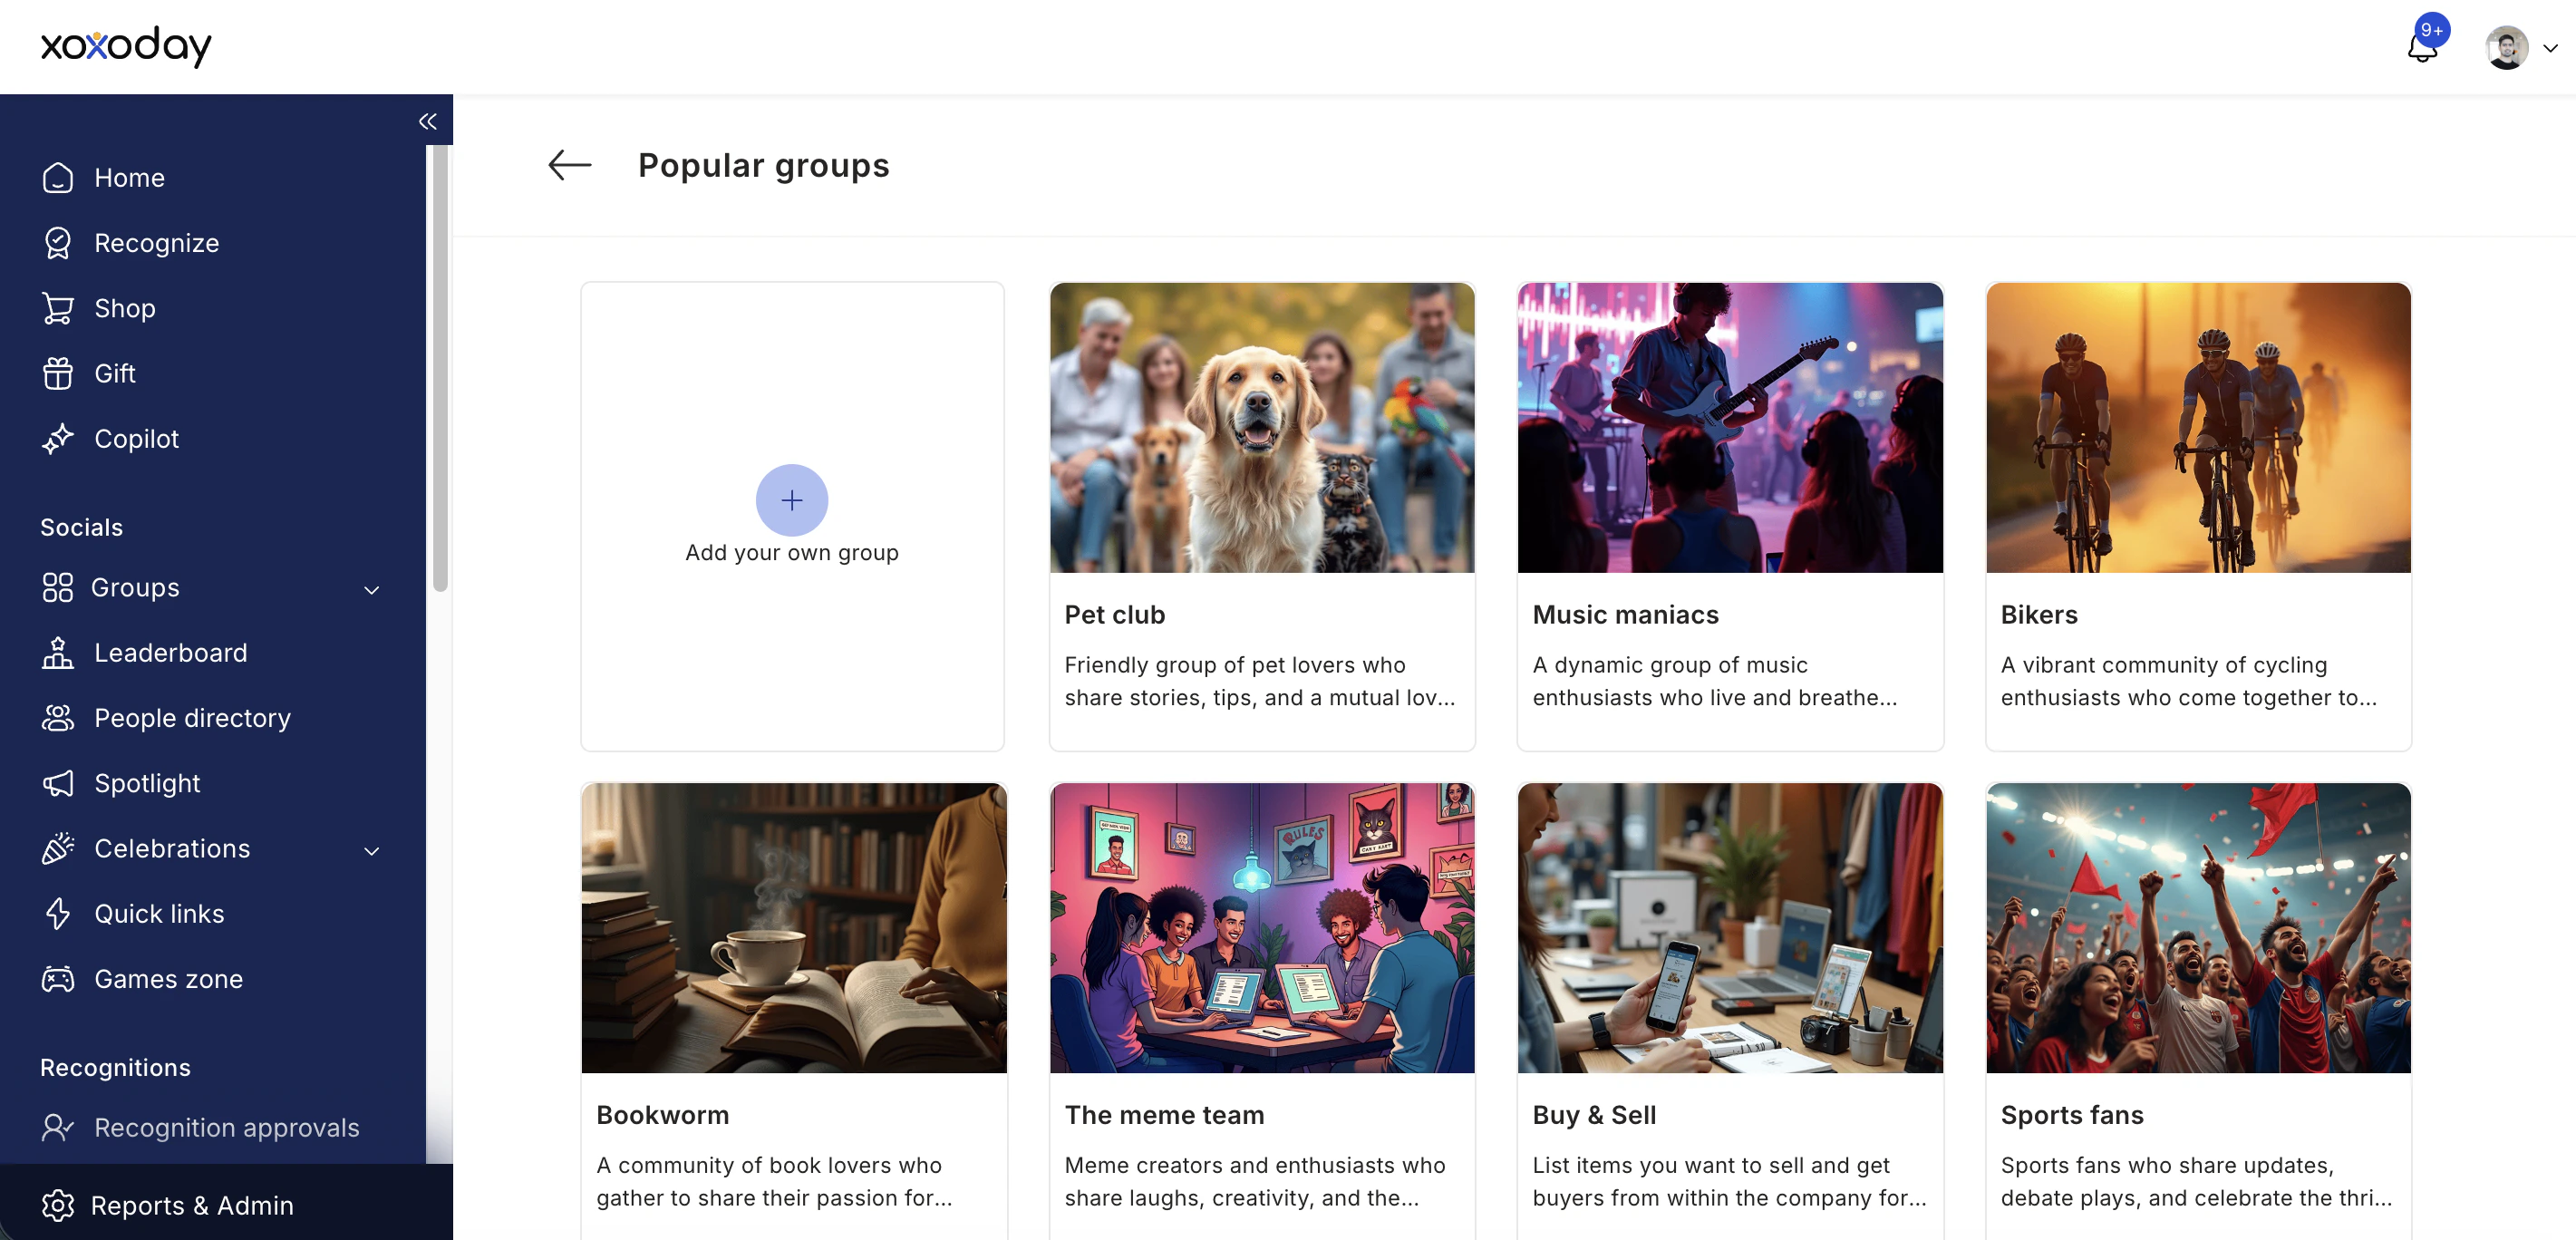
Public vs. private groups
- Public groups — visible to all employees; anyone can join immediately.
- Private groups — membership requires approval from a Group Admin. Non-members can optionally be allowed to view discussions without joining.
Creating a group
1
Navigate to groups
Go to Social > Groups > See All, then click Create Group.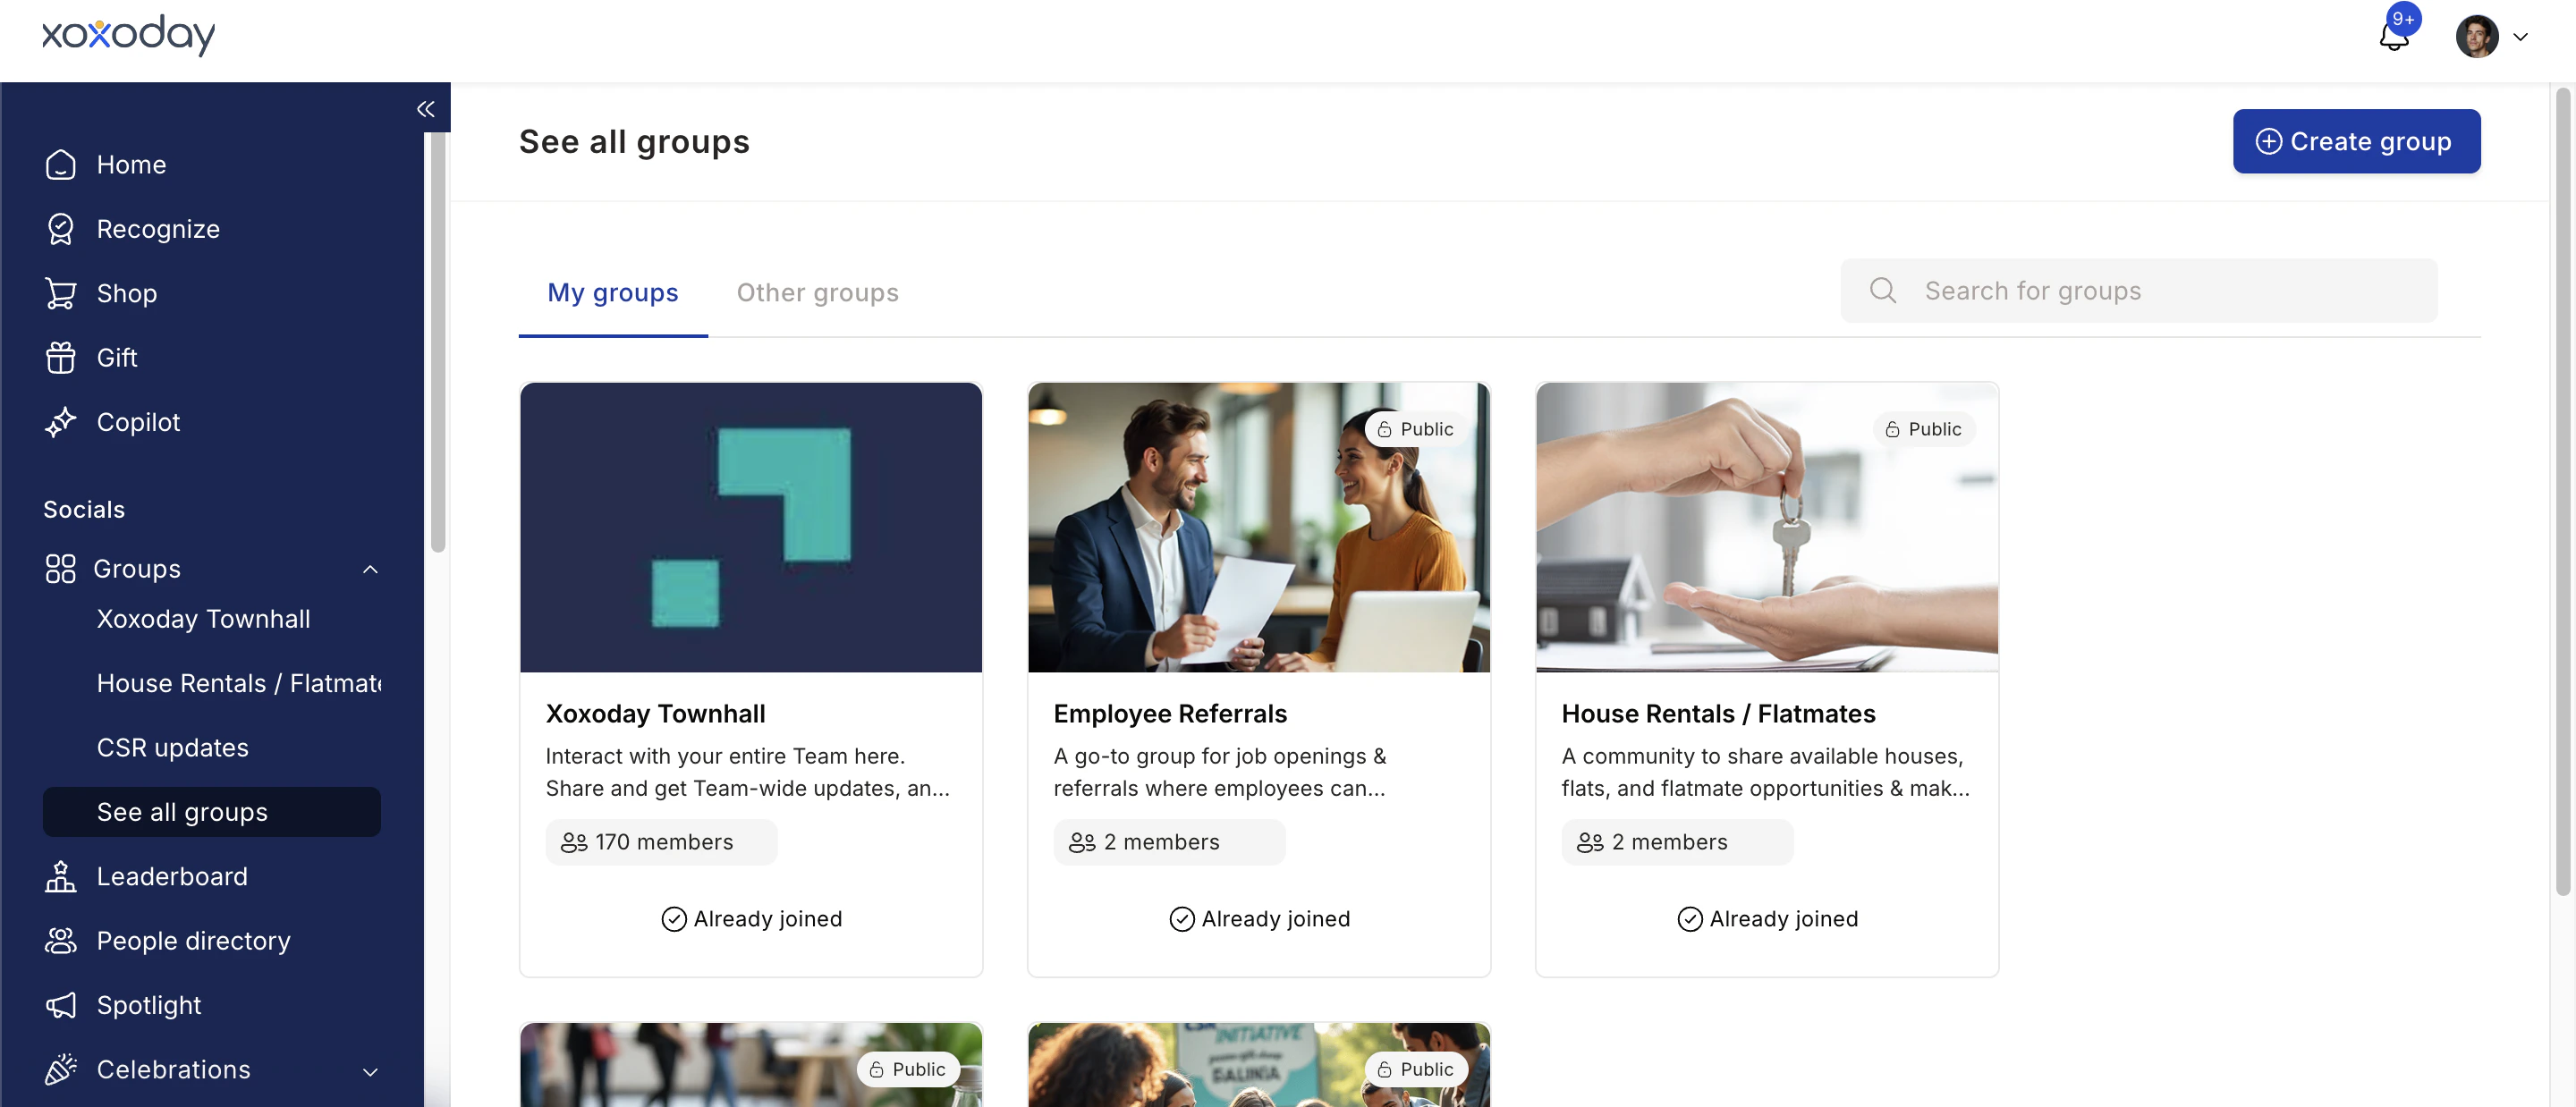
2
Fill in group details
Enter the Name, Description, and Membership Restrictions (public or private). Click Create Group.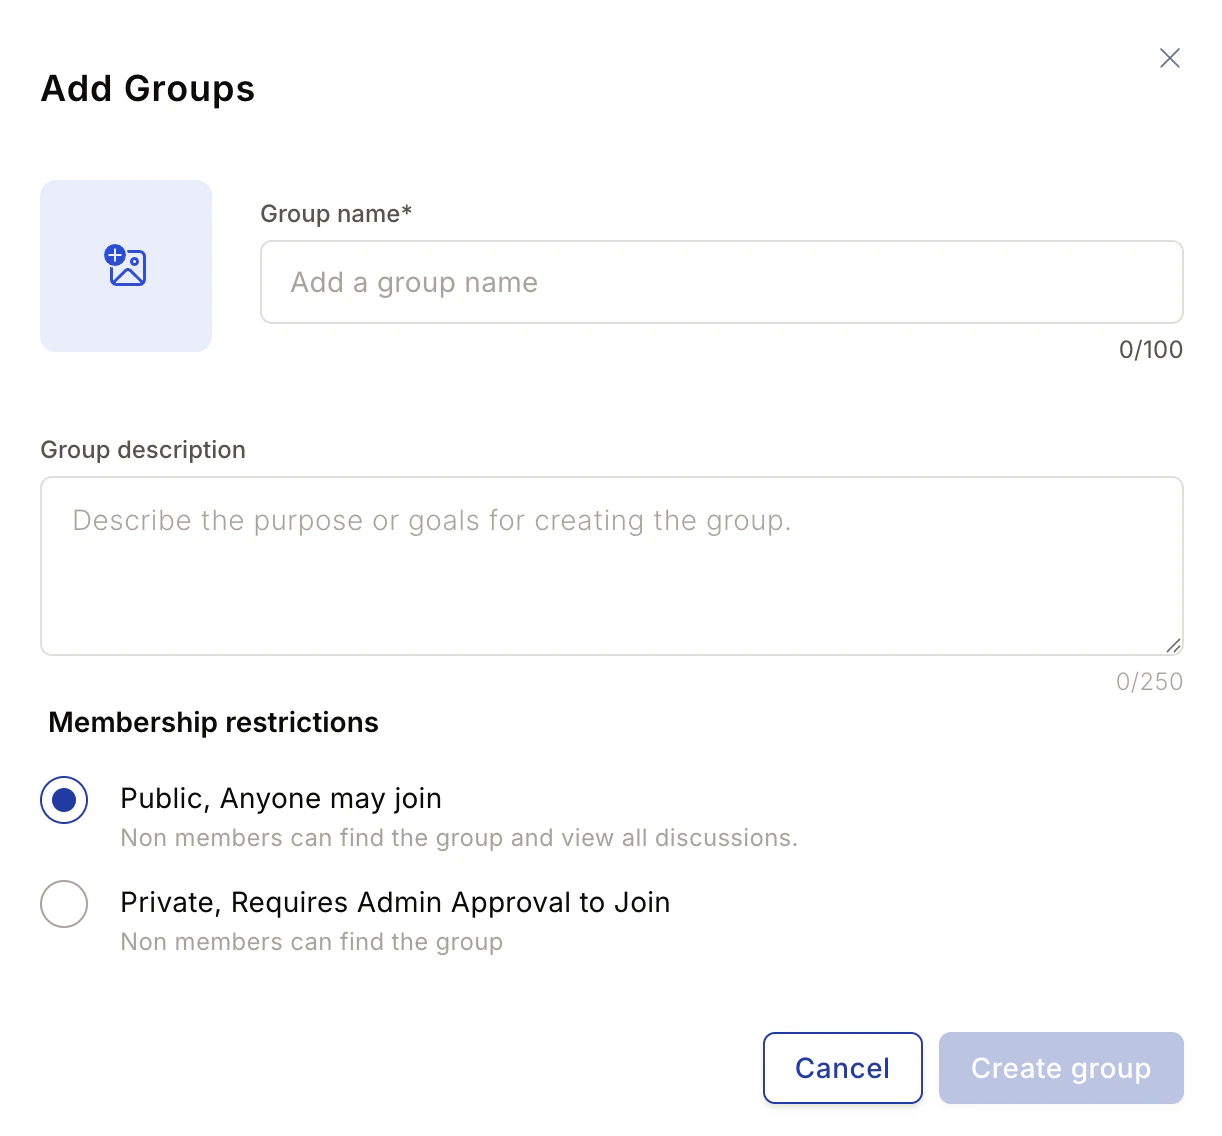
3
Add members
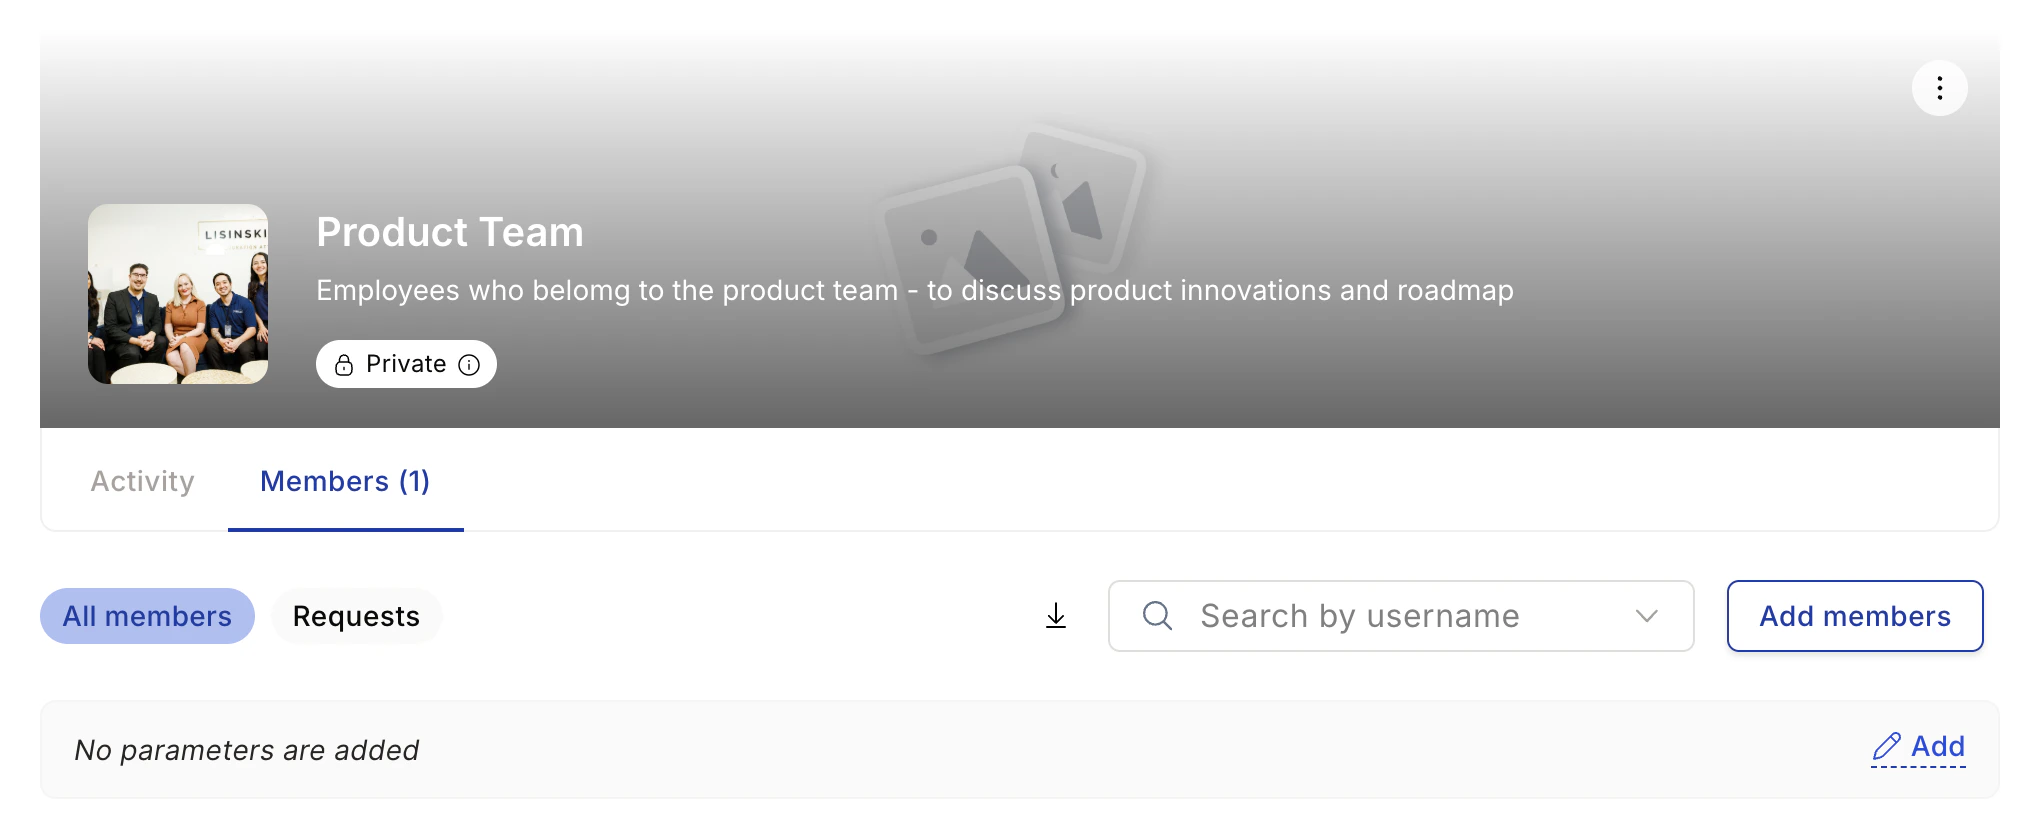
From the group page, click Add Members in the Group Members card on the right. You can:
- Type individual email addresses manually
- Use filters such as All Employees, By Department, or By Location to add members in bulk
- Set up automatic membership rules by configuring parameters
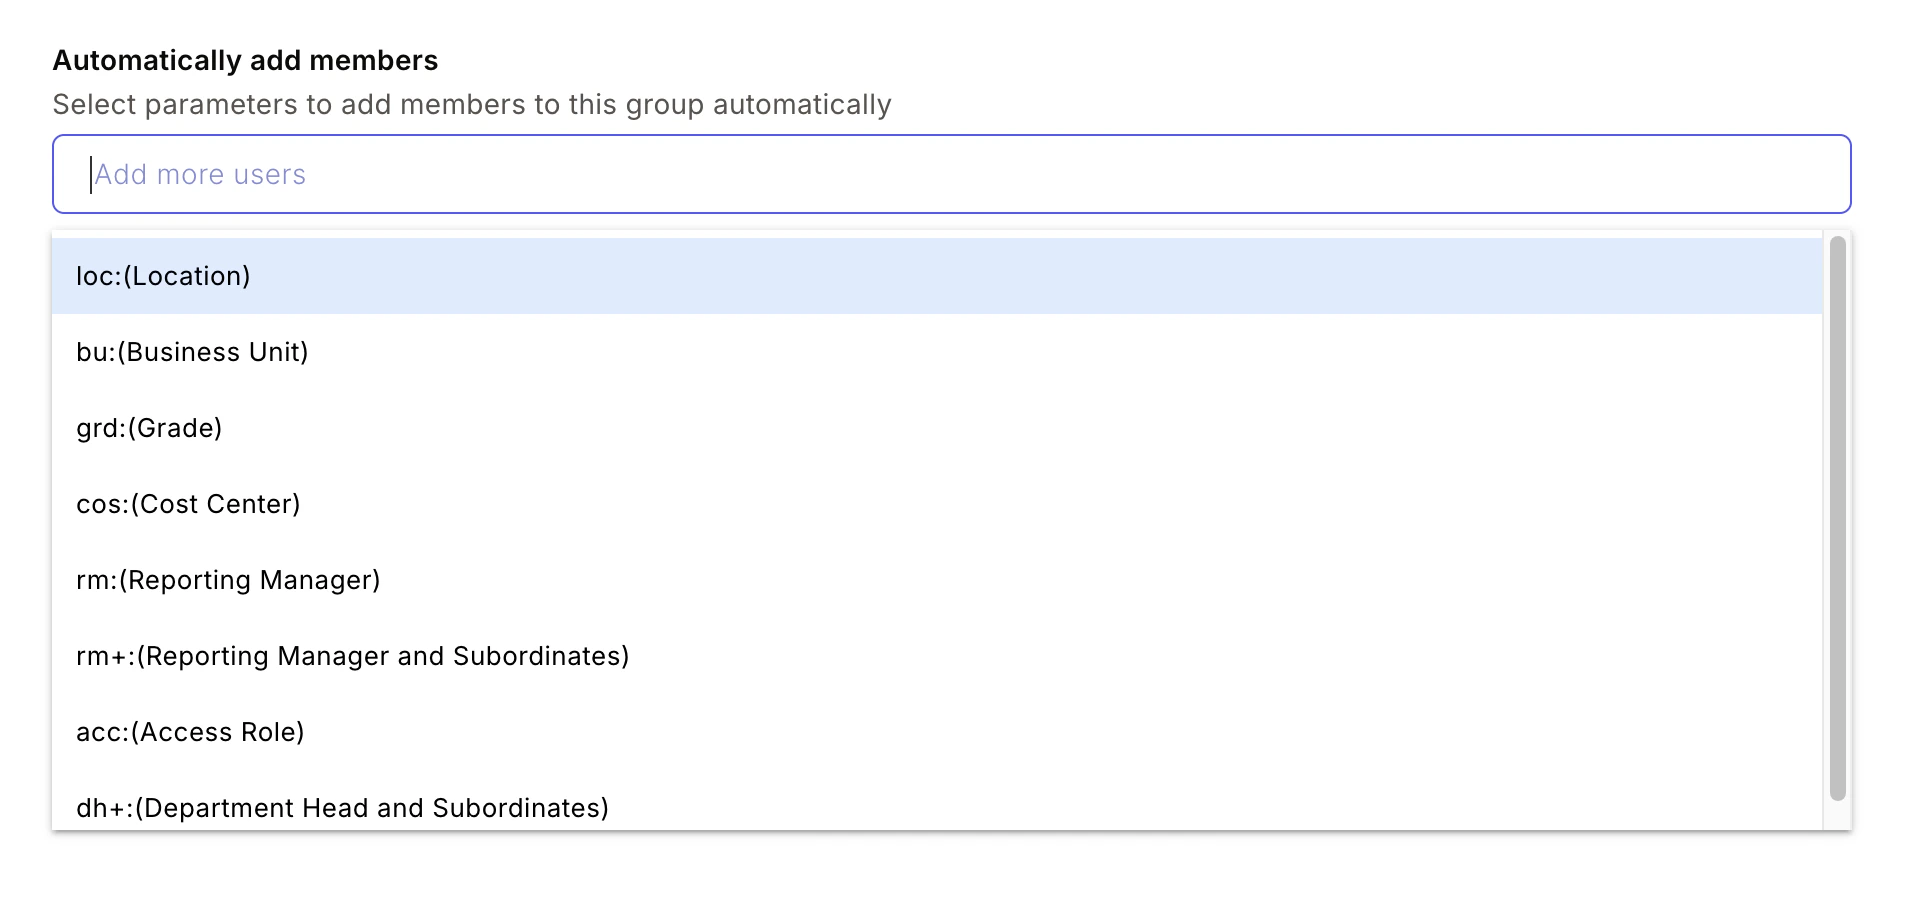
When employees are added to a group, they receive a notification.
Joining a group
1
Browse available groups
Navigate to Social > Groups > See All, then click the Other Groups tab to see all groups you haven’t joined yet.
2
Join a group
Search for the group by name or browse the list. Click Join on the group you want to join.
You can join public groups immediately. For private groups, your request goes to the Group Admin for approval.
Automatic group membership
Instead of manually managing members, you can define smart membership rules that automatically add and remove employees as their profiles change.How it works
Admins can set membership rules based on one or more criteria:- Location (e.g., Bangalore, London)
- Department / Function (e.g., Engineering, Sales)
- Employee Type (e.g., Full-time, Intern)
- Grade / Level
- Business Unit
- Custom attributes from your HRMS
- Auto-join: Employees who match the criteria are added automatically.
- Auto-remove: Employees who no longer match (due to a promotion, location change, or department transfer) are removed automatically.
Setting up automatic membership
1
Open Add Members
Navigate to the group, then click Add Members in the Group Members card.
2
Apply filters
Use the filter dropdowns to define your audience — by department, location, grade, business unit, or other attributes.
3
Enable automation
Check the option to update group members automatically in real time. This enables the auto-join and auto-remove behavior.
4
Save
Click Add to save the rules. Matching employees are added immediately, and membership stays current as employee data changes.
Common automation use cases
Posting in groups
1
Open the group feed
Navigate to the group and click Post at the top of the feed.
2
Write your message
Type your post. Keep it relevant to the group’s purpose, clear, and professional.
3
Add formatting and media
Use bold, italics, and lists for readability. Attach images, videos, documents, or GIFs using the icons in the composer. Documents can be up to 10 MB; videos up to 200 MB.
4
Tag people or values
Use @name to mention a colleague — they’ll receive a notification. Use @group to notify all group members. Use #value to attach a company core value card for peer recognition.
5
Post
Click Post to publish to the group.
Types of content to post in groups
- Announcements — upcoming events, policy updates, important information
- Questions — ask for input, seek advice from colleagues
- Knowledge sharing — tips, articles, resources
- Recognition — celebrate a colleague’s achievement using a value card
- Polls — gather quick opinions from the group
- Community posts — fun, social content to build connection
Managing group settings
Group Admins can update group details, privacy, content moderation, and membership from the group settings panel.1
Open group settings
Navigate to Home > Groups > See All, select the group, then click Group Settings in the About this group card on the right side.
2
Edit group information
Click the pen icon to update the group’s Name, Image, and Description. Click Update to save.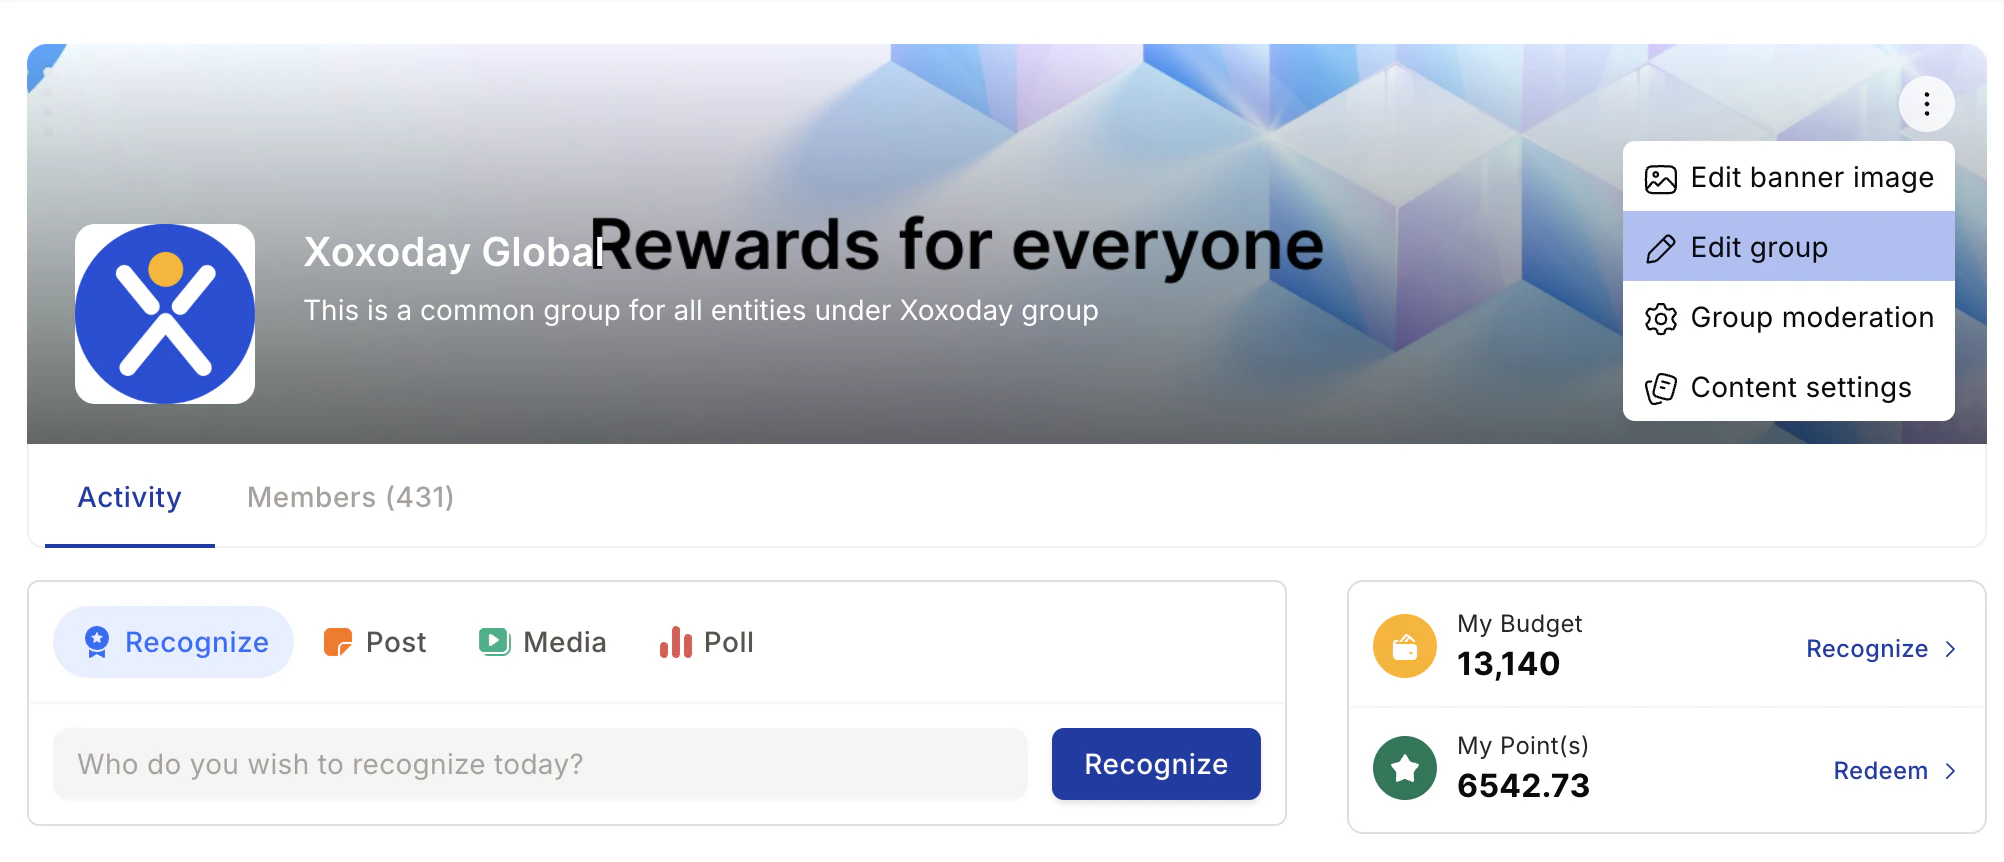
3
Manage privacy
Switch the group between Public and Private to control who can join and view content.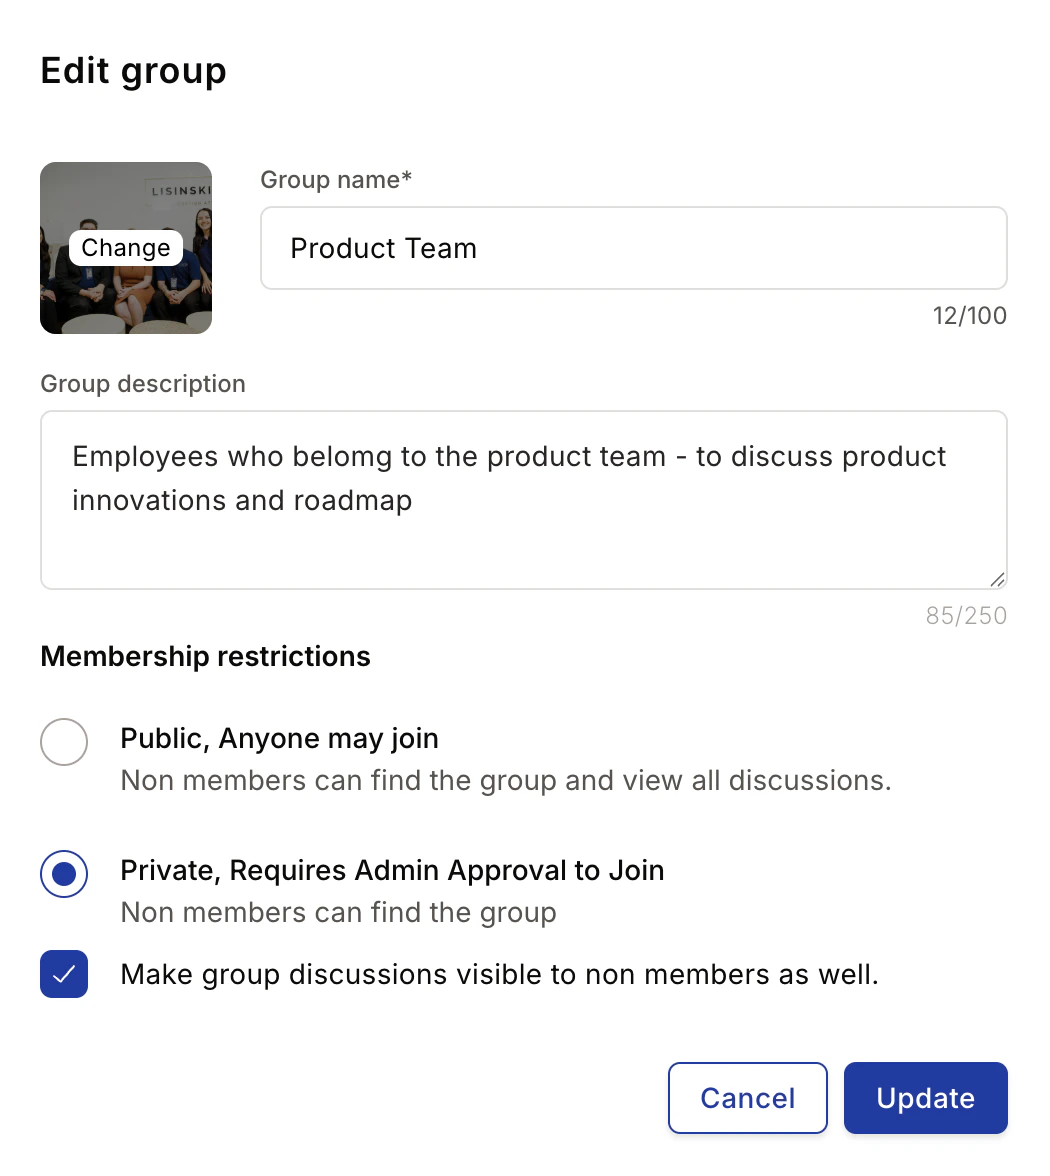
4
Configure content moderation
Click More > Edit to open content settings. Check or uncheck permissions for members, such as the ability to initiate discussions or add comments. Click Update to save.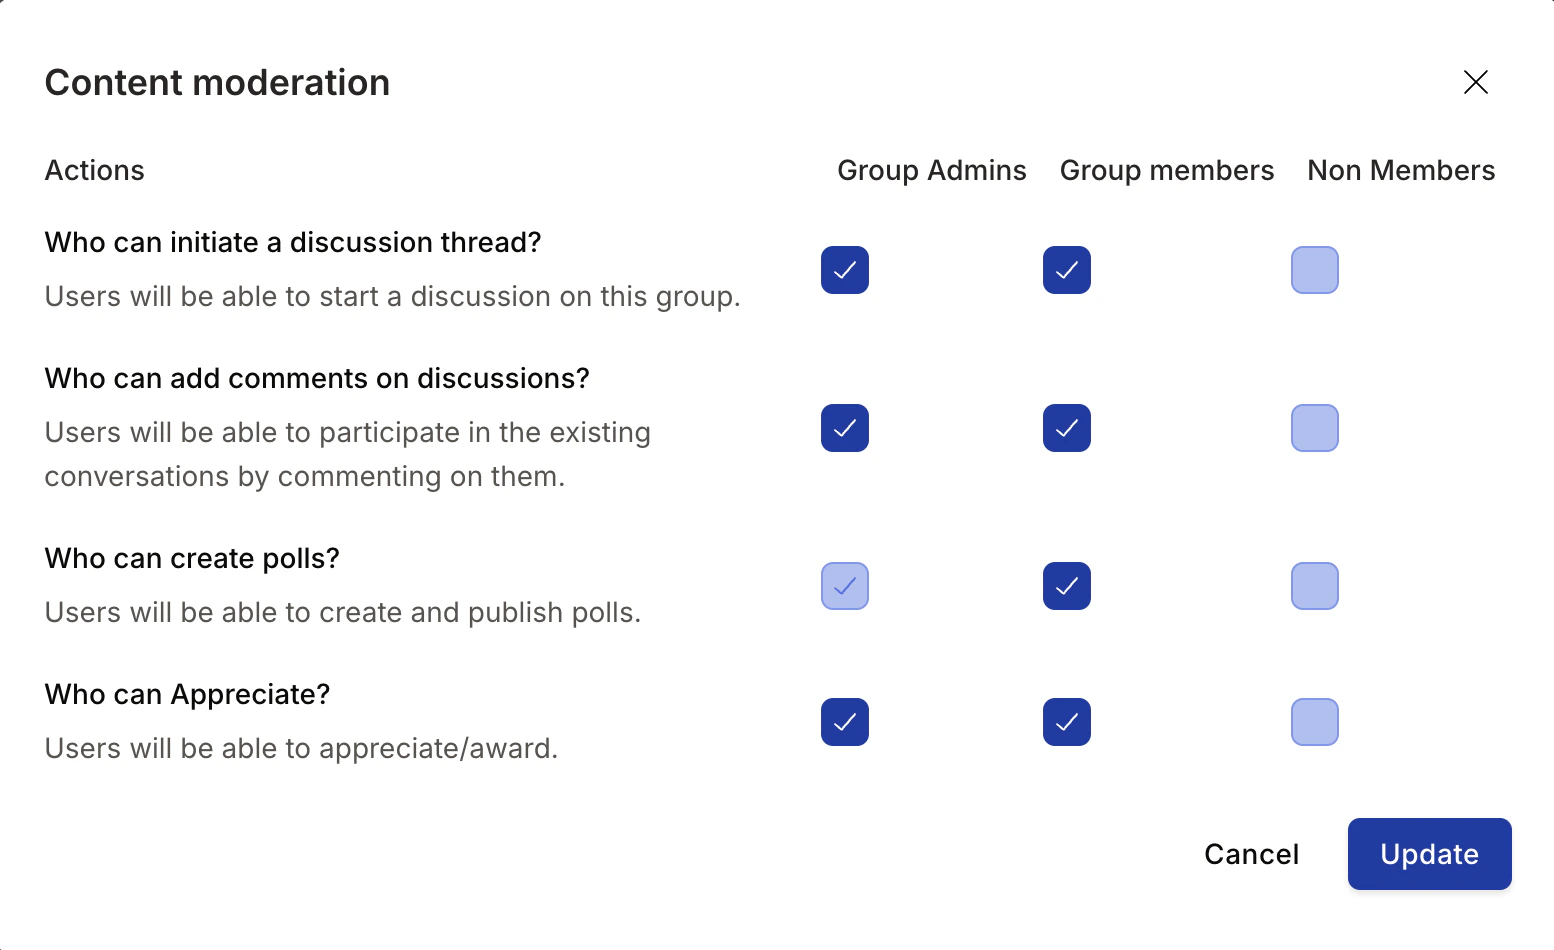
Managing group members
Adding members
Navigate to Group Settings > All Members, then click Add Members. Enter email addresses or apply filters to add multiple employees at once.Removing members
Go to Group Settings > All Members, click the action icon next to a member’s name, and select Remove from Group.Giving and revoking admin rights
- To make someone an admin: Group Settings > All Members > action icon > Make Admin
- To revoke admin access: Group Settings > All Members > action icon > Revoke Admin Access
Archiving, leaving, or deleting a group
Click the three-dot icon on the Group Information page and choose the relevant option:- Leave group — removes you from the group without affecting other members
- Archive group — prevents new posts and comments; older content remains viewable; archived groups appear under My Groups
- Delete group — permanently removes the group and all its content
Best practices
What makes a good group name?
What makes a good group name?
Choose a name that immediately communicates the group’s purpose. Vague names like “Team A” don’t help employees decide whether to join. Clear names like “Engineering — Backend” or “Book Club” work much better.
How many groups should we create?
How many groups should we create?
Start with the essentials: a group for each department, a location group per major office, and a few interest groups to seed community. Let employees create additional groups organically as interest develops.
When should I use public vs. private groups?
When should I use public vs. private groups?
Use public groups for departments, locations, and general interest communities where transparency is fine. Use private groups for leadership discussions, project teams with sensitive information, or exclusive programs.
How do I keep groups active?
How do I keep groups active?
Post consistently. Ask questions, share wins, and run polls. Welcome new members by name. Respond to posts from others — groups thrive when participation is reciprocal.
Related
Social intranet
Overview of all social intranet features including posts, reactions, and feed personalization.
Townhall
Use the Townhall group for company-wide announcements and broadcasts.