> ## Documentation Index
> Fetch the complete documentation index at: https://help-empuls.xoxoday.com/llms.txt
> Use this file to discover all available pages before exploring further.
# Manage employees
> Add employees one at a time or by CSV upload, update profiles and roles, configure access controls, delegate accounts, and set exit policies for unused points.
The employee directory is the foundation of your Empuls instance. Every recognition, survey, and reward depends on having accurate, up-to-date employee records. You can add employees one at a time, import hundreds at once via CSV, update existing records, and control what each user can see and do on the platform.
## Video walkthrough
## Adding a single employee
Use single-user entry when onboarding an individual hire outside of your regular bulk import cycle.
In the Admin Hub, navigate to **Employees > User Management > Manage Employees** and click **Add New User > Add a single user**.
 Fill in the employee's **First Name** and **Email ID**, then assign the appropriate **User Access Role** (Super Admin, General Admin, Manager, or User).
Complete the employee's professional details (department, designation, reporting manager, date of joining) and personal details (date of birth, mobile number if applicable).
The employee is created. They receive an invitation email to activate their account.
Fill in the employee's **First Name** and **Email ID**, then assign the appropriate **User Access Role** (Super Admin, General Admin, Manager, or User).
Complete the employee's professional details (department, designation, reporting manager, date of joining) and personal details (date of birth, mobile number if applicable).
The employee is created. They receive an invitation email to activate their account.
 A new email address that does not already exist in the system cannot be mapped to a Manager role. The email must be in the system first before you can assign it manager-level access.
## Adding employees in bulk
Bulk import is the fastest way to onboard a large group of employees. Empuls accepts CSV and XLSX files using a standard template.
Go to **Employees > User Management > Manage Employees > Add New User > Add multiple user accounts**.
A new email address that does not already exist in the system cannot be mapped to a Manager role. The email must be in the system first before you can assign it manager-level access.
## Adding employees in bulk
Bulk import is the fastest way to onboard a large group of employees. Empuls accepts CSV and XLSX files using a standard template.
Go to **Employees > User Management > Manage Employees > Add New User > Add multiple user accounts**.
 On the Pre-import data settings screen, review the guidelines and download the sample file. Use this template to format your employee data correctly.
 Fill in each employee's details — first name, email, department, designation, reporting manager, date of joining, and any other required fields. Save as CSV or XLSX.
Upload your completed file and verify the data in the preview. Click **Next** to proceed.
Choose whether to send invitation emails immediately or click **Send Invites Later** to add employees to the platform first and invite them at a chosen time. You can trigger invitations later from the Manage Employees page.
Fill in each employee's details — first name, email, department, designation, reporting manager, date of joining, and any other required fields. Save as CSV or XLSX.
Upload your completed file and verify the data in the preview. Click **Next** to proceed.
Choose whether to send invitation emails immediately or click **Send Invites Later** to add employees to the platform first and invite them at a chosen time. You can trigger invitations later from the Manage Employees page.
 Send invitations in advance of a planned launch date so employees have time to activate accounts and complete their profiles before your first recognition program goes live.
## Custom data fields (UDF and URF)
Beyond the standard employee fields, you can request additional custom fields from Empuls support:
* **UDF (User-Defined Fields)** — Custom text fields for additional data points, up to 12 fields maximum.
* **URF (User-Relationship Fields)** — Fields that link employees to one another (e.g., dotted-line manager), up to 8 fields maximum.
Custom fields are labeled **N1, N2**, and so on. Keep an internal record of which label maps to which data point. When uploading via CSV, add the custom field columns to your template so they are mapped correctly during import.
To request custom fields, contact Empuls support at [cs@xoxoday.com](mailto:cs@xoxoday.com).
## Editing employee records
Go to **Reports & Settings > Employees > Manage Employees** and find the user in the list.
In the **Action** column, click the **pen icon** next to the employee's row.
Make the necessary changes and click **Save**.
Send invitations in advance of a planned launch date so employees have time to activate accounts and complete their profiles before your first recognition program goes live.
## Custom data fields (UDF and URF)
Beyond the standard employee fields, you can request additional custom fields from Empuls support:
* **UDF (User-Defined Fields)** — Custom text fields for additional data points, up to 12 fields maximum.
* **URF (User-Relationship Fields)** — Fields that link employees to one another (e.g., dotted-line manager), up to 8 fields maximum.
Custom fields are labeled **N1, N2**, and so on. Keep an internal record of which label maps to which data point. When uploading via CSV, add the custom field columns to your template so they are mapped correctly during import.
To request custom fields, contact Empuls support at [cs@xoxoday.com](mailto:cs@xoxoday.com).
## Editing employee records
Go to **Reports & Settings > Employees > Manage Employees** and find the user in the list.
In the **Action** column, click the **pen icon** next to the employee's row.
Make the necessary changes and click **Save**.
 From the same Action column, you can also:
* **Disable a user** — Deactivate the account to block access without deleting the record.
* **Change email** — Update the employee's email address if it changes.
* **Log in as a user** — Access the employee's account for troubleshooting. Enter a reason for logging in and choose whether to notify the employee.
* **Change password** — Available to Super Admins after enabling the feature by contacting [cs@xoxoday.com](mailto:cs@xoxoday.com).
## Access controls and roles
Empuls uses role-based access control (RBAC) with four built-in roles:
| Role | Access level |
| ----------------- | --------------------------------------------------------------------------------------------------- |
| **Super Admin** | Full access including branding, org budgets, and access controls. Default group admin of Town Hall. |
| **General Admin** | Access configured by Super Admins. Typically manages employees, programs, and reports. |
| **Manager** | Access to team-level reports and recognition for direct reports. |
| **User** | Standard employee access — recognition, surveys, rewards, and social features. |
Super Admins can also create **custom roles** for specialized access needs:
In the top-right menu, click **Manage Access Roles**.
From the same Action column, you can also:
* **Disable a user** — Deactivate the account to block access without deleting the record.
* **Change email** — Update the employee's email address if it changes.
* **Log in as a user** — Access the employee's account for troubleshooting. Enter a reason for logging in and choose whether to notify the employee.
* **Change password** — Available to Super Admins after enabling the feature by contacting [cs@xoxoday.com](mailto:cs@xoxoday.com).
## Access controls and roles
Empuls uses role-based access control (RBAC) with four built-in roles:
| Role | Access level |
| ----------------- | --------------------------------------------------------------------------------------------------- |
| **Super Admin** | Full access including branding, org budgets, and access controls. Default group admin of Town Hall. |
| **General Admin** | Access configured by Super Admins. Typically manages employees, programs, and reports. |
| **Manager** | Access to team-level reports and recognition for direct reports. |
| **User** | Standard employee access — recognition, surveys, rewards, and social features. |
Super Admins can also create **custom roles** for specialized access needs:
In the top-right menu, click **Manage Access Roles**.
 Click **Create Access Role**, enter a **Role Name**, and click **Submit**.
 Click the **pencil icon** next to any role to update its permissions. Click **Submit** to save changes.
## Delegating accounts
When an admin or manager is on leave, you can grant another user temporary access to their account so pending tasks continue without interruption.
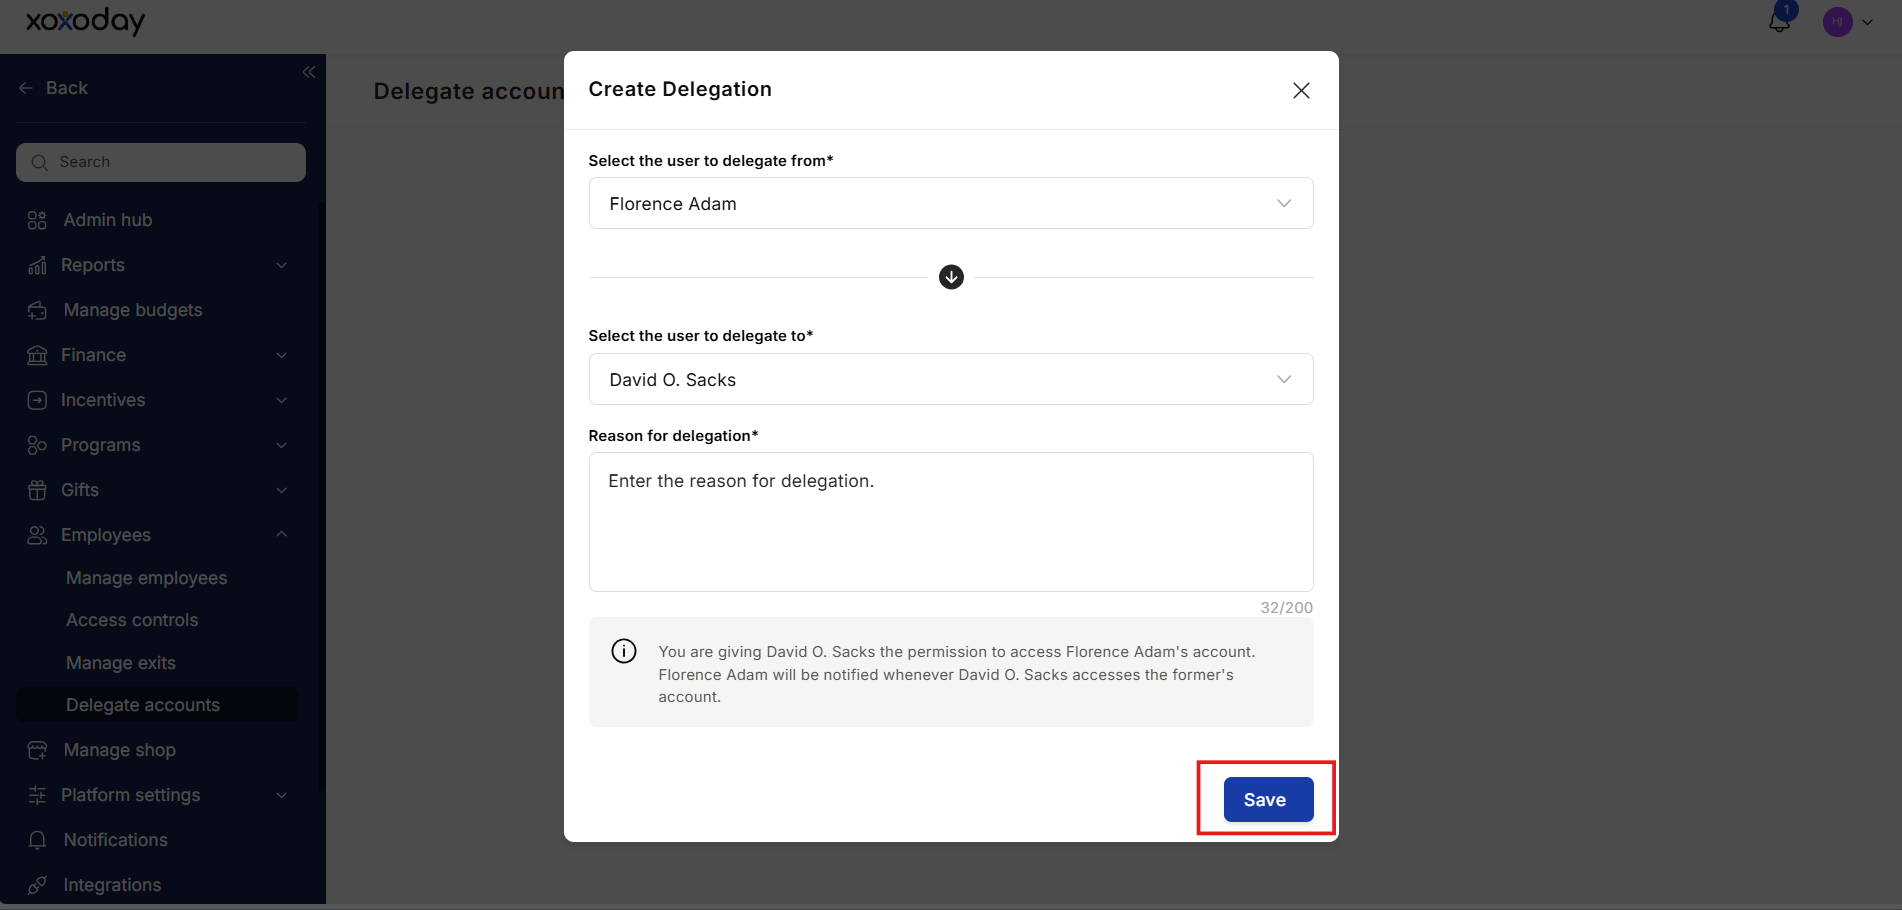
In the Admin Hub, navigate to **Employees > Delegate Accounts** and click **Create Delegation**.
Click the **pencil icon** next to any role to update its permissions. Click **Submit** to save changes.
## Delegating accounts
When an admin or manager is on leave, you can grant another user temporary access to their account so pending tasks continue without interruption.
In the Admin Hub, navigate to **Employees > Delegate Accounts** and click **Create Delegation**.
 Choose the account to delegate and the user who will receive temporary access.
Click **Create Delegation**. The original account holder is notified every time the delegated user accesses the account.
Choose the account to delegate and the user who will receive temporary access.
Click **Create Delegation**. The original account holder is notified every time the delegated user accesses the account.
 The delegated user can switch to the granted account by clicking their **profile icon** and selecting **Switch User**. They must enter a reason before accessing the account. Delegations can be deactivated and reactivated at any time from the Delegate Accounts page.
## Managing employee exits
When an employee leaves your organization, their unredeemed points and budget allocations need to be handled according to your company policy. Configure this in advance under **Employees > Manage Exits**.
Configure your exit policy before your first employee offboarding. If no policy is set, unused personal budget points default to Super Admins, which may not match your organization's intent.
**Budget points with co-owners** — Transfer to a third party or return to the budget owner by default.
**Custom budgets held by exiting employees** — Choose to delete the budget or transfer ownership and points to another employee.
**Personal budget points** — Transfer to another employee, destroy the points, or disable them. If no recipient is selected, points go to the Super Admin by default.
**Reward points (earned credits)** — Choose to transfer unredeemed points to the employee's personal email address for later redemption, or destroy the points permanently.
**Pending nominations** — If the exiting employee had pending award nominations to approve, transfer them to the reporting manager, HRBPO, department head, business unit head, or cost center head.
Yes. During bulk import, select **Send Invites Later** to add employees to the platform without triggering invitation emails. You can send invites at any time from the Manage Employees page.
No. The email address must already exist in the system before it can be mapped to a Manager role. Add the person as a User first, then update their role.
No. Delegations cannot be edited after creation. Deactivate the existing delegation and create a new one to make changes.
Points are automatically transferred to Super Admins if no recipient is specified in the exit policy.
The delegated user can switch to the granted account by clicking their **profile icon** and selecting **Switch User**. They must enter a reason before accessing the account. Delegations can be deactivated and reactivated at any time from the Delegate Accounts page.
## Managing employee exits
When an employee leaves your organization, their unredeemed points and budget allocations need to be handled according to your company policy. Configure this in advance under **Employees > Manage Exits**.
Configure your exit policy before your first employee offboarding. If no policy is set, unused personal budget points default to Super Admins, which may not match your organization's intent.
**Budget points with co-owners** — Transfer to a third party or return to the budget owner by default.
**Custom budgets held by exiting employees** — Choose to delete the budget or transfer ownership and points to another employee.
**Personal budget points** — Transfer to another employee, destroy the points, or disable them. If no recipient is selected, points go to the Super Admin by default.
**Reward points (earned credits)** — Choose to transfer unredeemed points to the employee's personal email address for later redemption, or destroy the points permanently.
**Pending nominations** — If the exiting employee had pending award nominations to approve, transfer them to the reporting manager, HRBPO, department head, business unit head, or cost center head.
Yes. During bulk import, select **Send Invites Later** to add employees to the platform without triggering invitation emails. You can send invites at any time from the Manage Employees page.
No. The email address must already exist in the system before it can be mapped to a Manager role. Add the person as a User first, then update their role.
No. Delegations cannot be edited after creation. Deactivate the existing delegation and create a new one to make changes.
Points are automatically transferred to Super Admins if no recipient is specified in the exit policy.