> ## Documentation Index
> Fetch the complete documentation index at: https://help-empuls.xoxoday.com/llms.txt
> Use this file to discover all available pages before exploring further.
# Workline
> Learn how the Workline and Empuls Integration works and helps automate employee lifecycle management.
## Before You Begin
Ensure you have admin access to both Workline and Empuls accounts. Obtain your Workline API credentials from the integration settings.
## How It Works
Workline integration automates complete employee management in Empuls. When new employees are hired in Workline, they're automatically added to Empuls. Profile changes sync continuously, and when employees exit, they're automatically removed. This seamless synchronization ensures your engagement platform always reflects your current workforce.
Edit existing employee data in Empuls, simply by updating their Workline profile.
Once this integration is enabled, the data will sync between Empuls and your Workline account once every 24 hours.
##
## How to Set Up This Integration?
Please contact your Workline account manager and request them to share the below details, with respect to your Workline account:
* \*\*Client Details Needed from Workline: \*\*API Key
* \*\*Access token URL being used: \*\*[https://app.Workline.com/connect/token?grant\_type=Worklineapi](https://app.adrenalin.com/connect/token?grant_type=Adrenalinapi)
* \*\*API being used: \*\*[https://api.Workline.com/v1/employees](https://api.adrenalin.com/v1/employees)
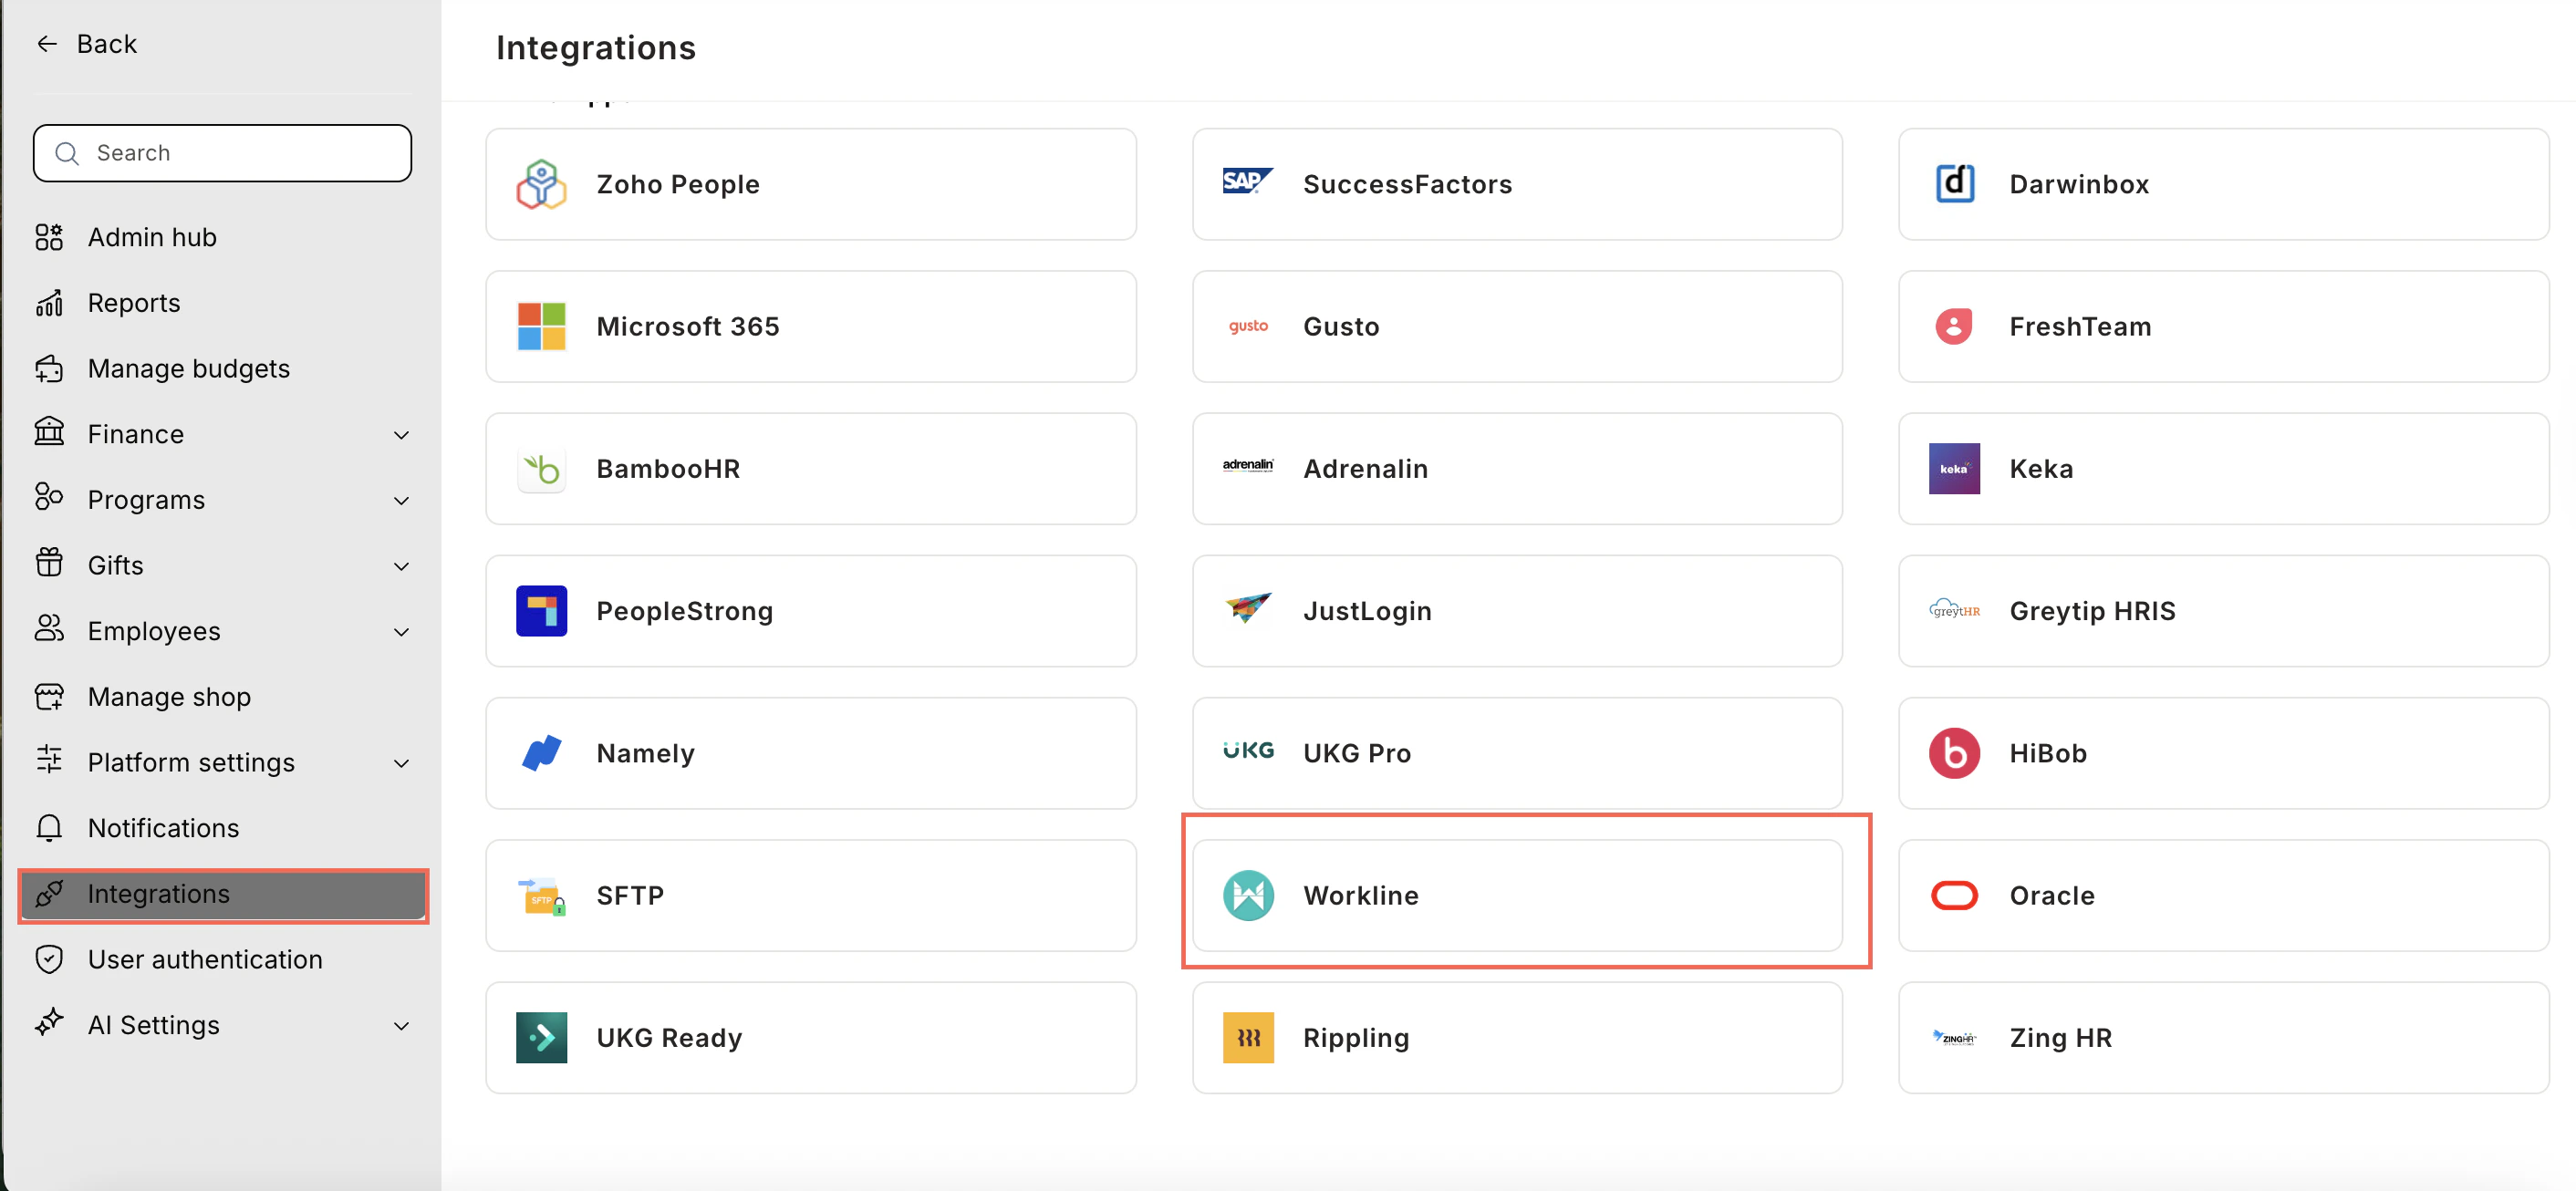
Go to **Admin Dashboard** by clicking on "**Reports and Settings**" and navigate to "**Integrations.**"
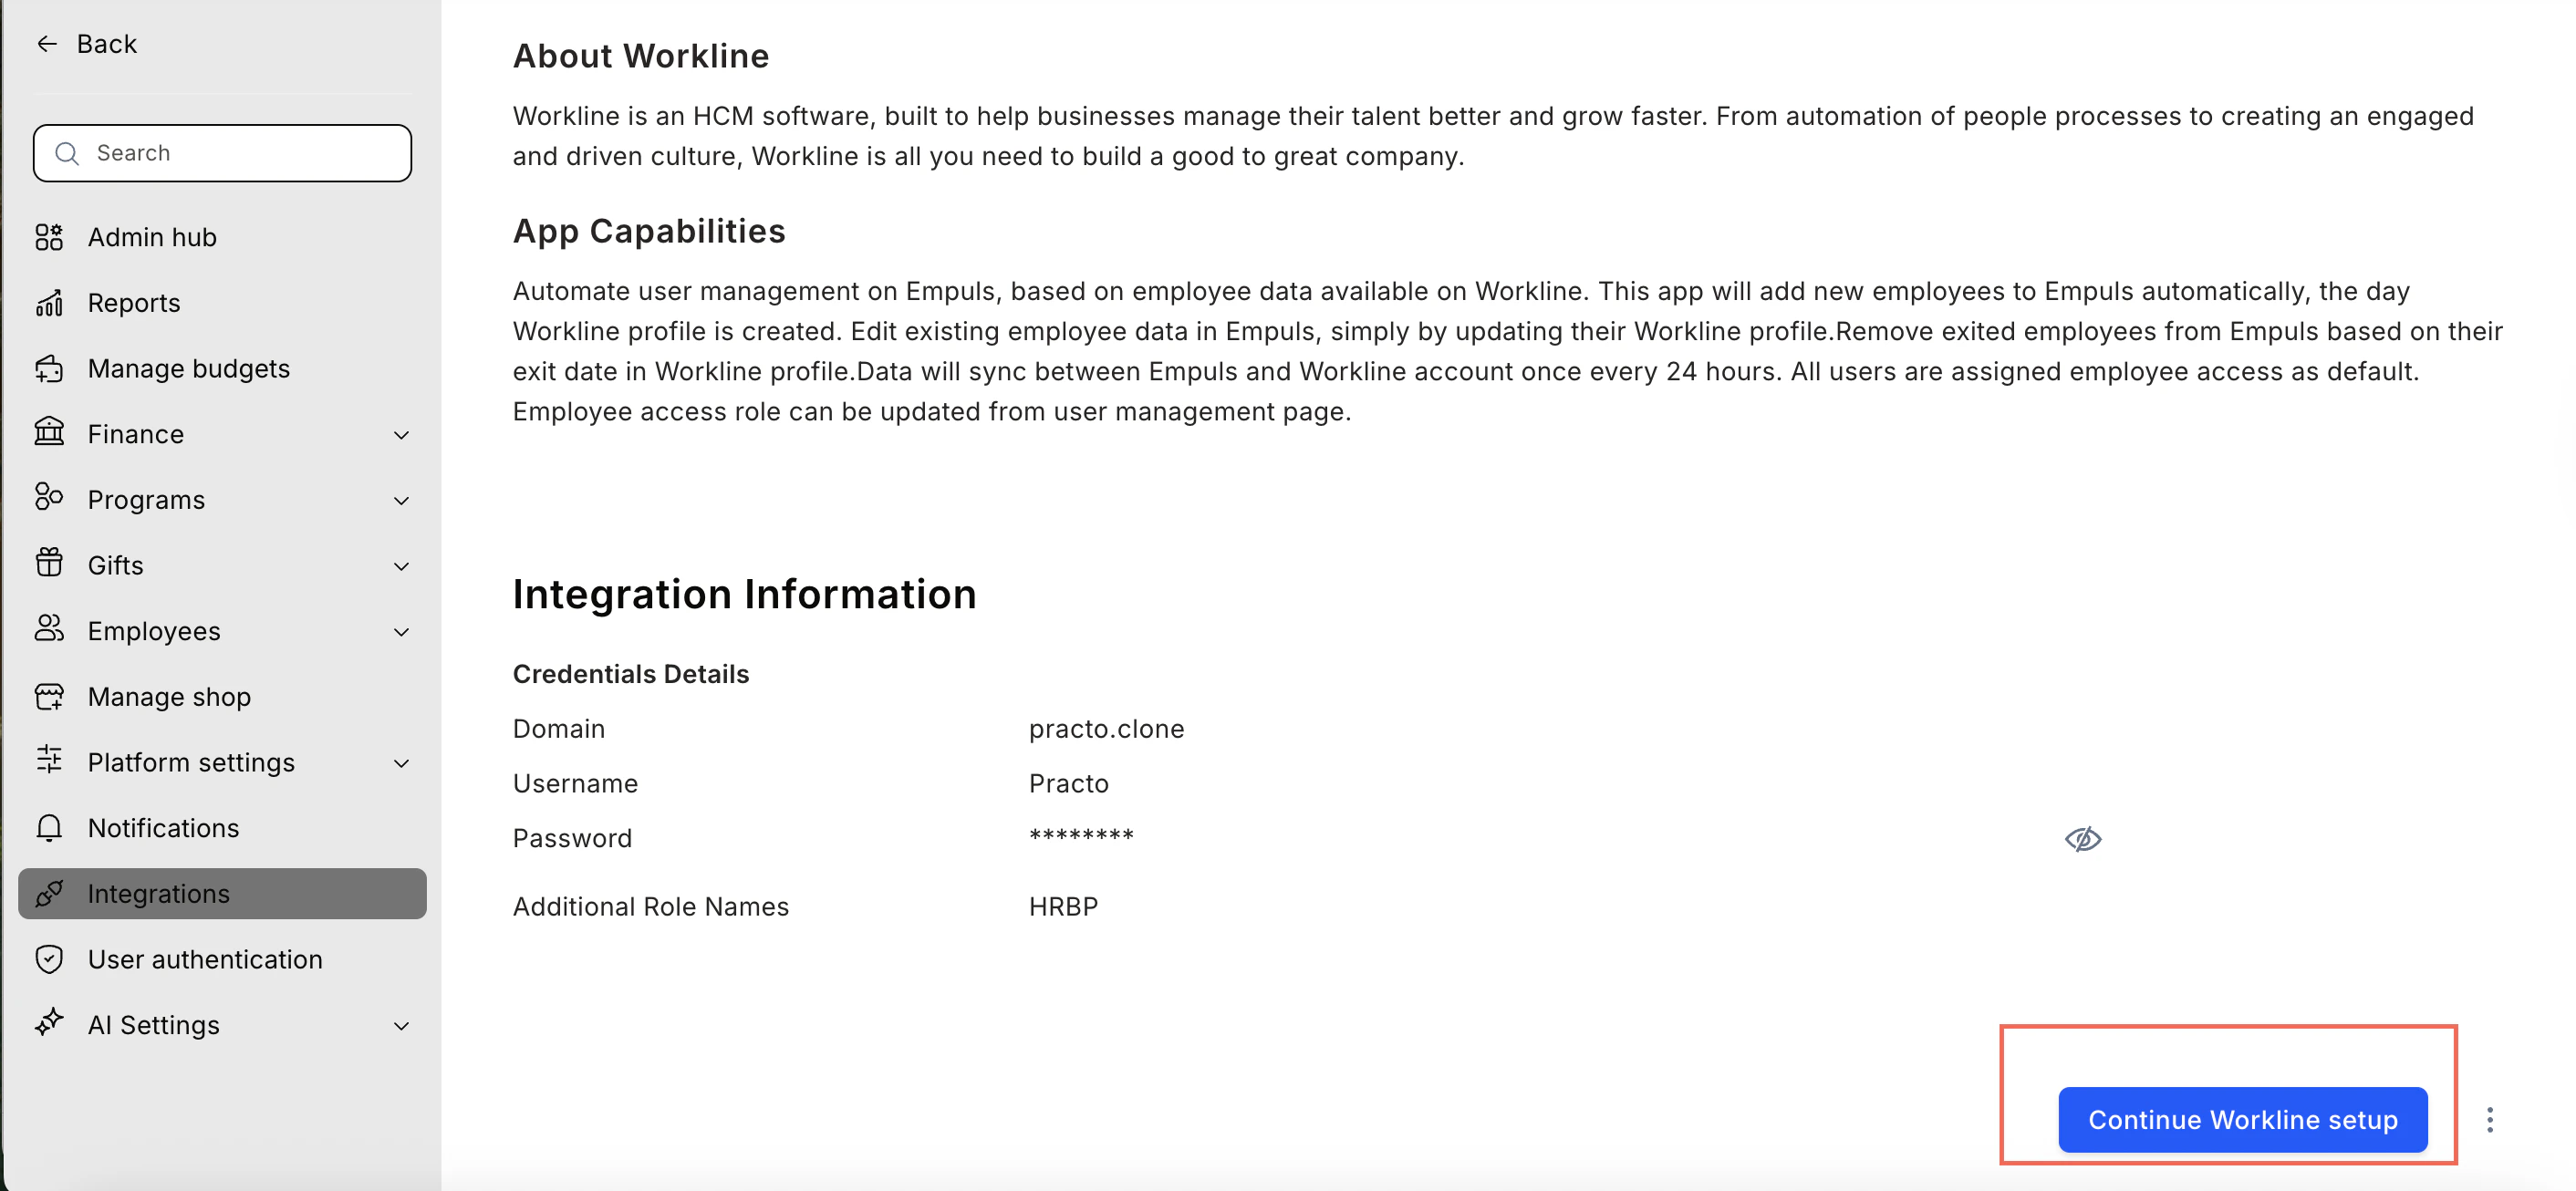
 Click on\*\* “Continue Workline Setup”. \*\*
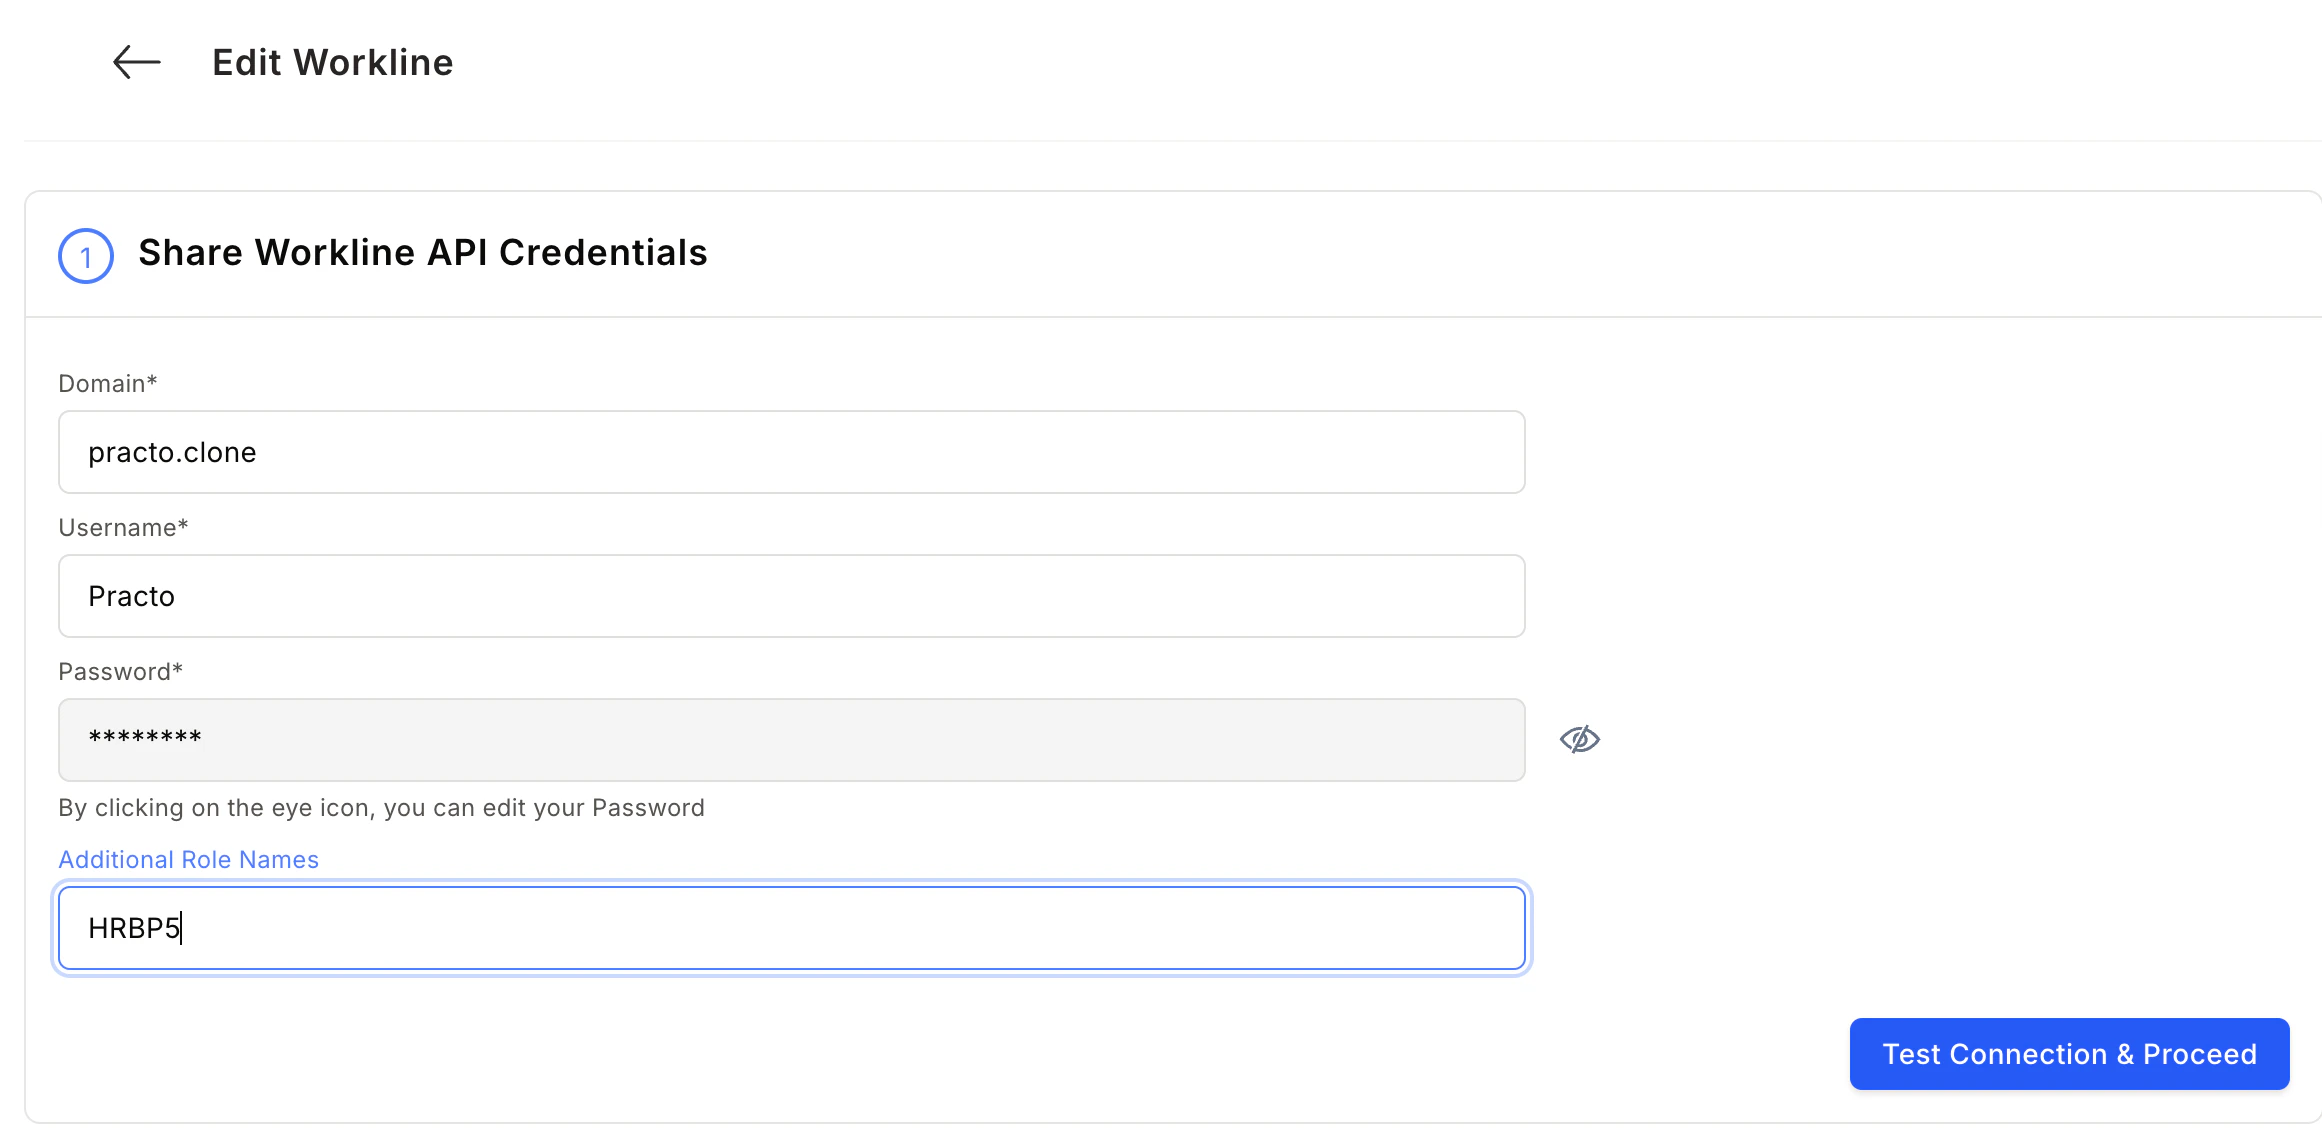
 Add the details to proceed.
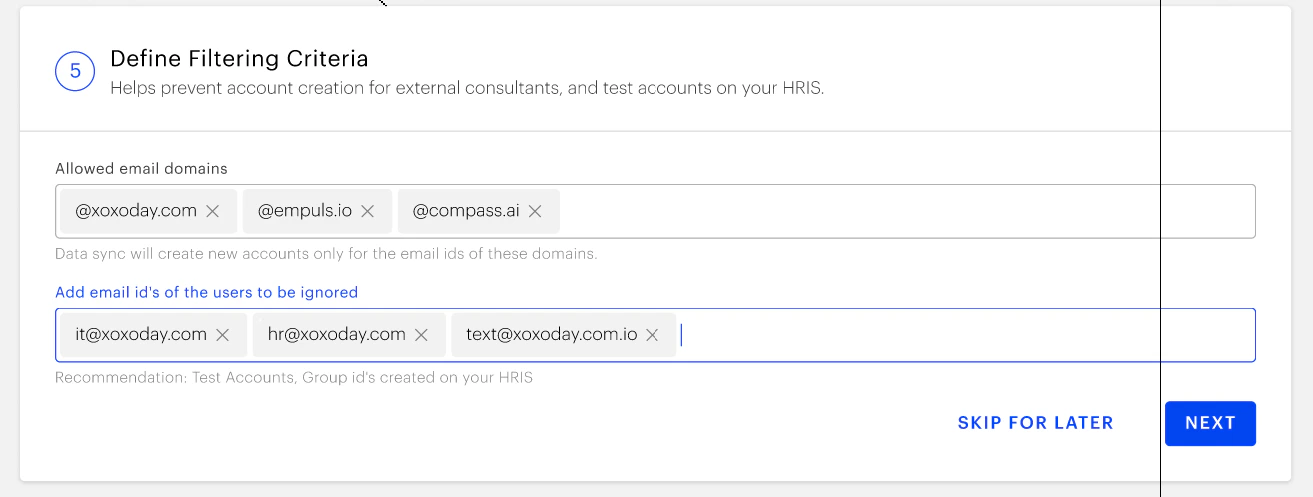
 Define filtering criteria to avoid account creation for external consultants. Click on **NEXT.**
 In this step, you can choose between two data sync options:
* Run Date Sync Once Now: Select this option to launch your Empuls account immediately. This will create accounts for all employees and send invites.
* Schedule First Data Sync for Later: Select this option to schedule employee account creation to a later date and time. This will help you plan and execute employee account creation on Empuls to coincide with your internal launch announcements.
In this step, you can choose between two data sync options:
* Run Date Sync Once Now: Select this option to launch your Empuls account immediately. This will create accounts for all employees and send invites.
* Schedule First Data Sync for Later: Select this option to schedule employee account creation to a later date and time. This will help you plan and execute employee account creation on Empuls to coincide with your internal launch announcements.
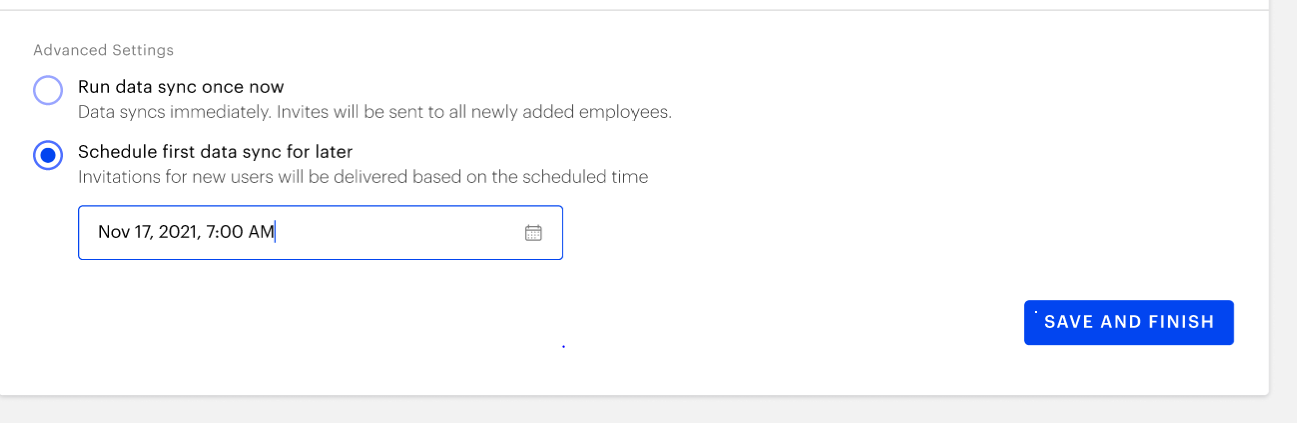 Select the date and time of your choice. Click on **Save and Finish.**
## **Fields collected from API:**
Here are the fields for the Workline API:
* **Employee Name**
* **Salutation**
* **First Name**
* **Middle Name**
* **Last Name**
* **Father's Name**
* **Date of Birth (DOB)**
* **Gender**
* **Date of Joining (DOJ)**
* **Company**
* **Business Unit**
* **Grade**
* **Function**
* **Team**
* **Role**
* **Designation**
* **Segment**
* **Country**
* **Region**
* **Location**
* **Workstation**
* **Secondary Location**
* **Reporting Manager Employee ID**
* **Reporting Manager Name**
* **Skip Level Manager ID**
* **Skip Level Manager Name**
* **Personal Mobile Number**
* **Office Mobile Number**
* **Alternative Mobile Number**
* **Office Email**
* **Personal Email**
* **Employee Status**
* **Last Working Day (LWD)**
* **Separation Reason**
* **Separation Mode**
* **HRBP ID**
* **Business Head ID**
Feedback, questions or need support? Email [cs@xoxoday.com](mailto:cs@xoxoday.com)
Select the date and time of your choice. Click on **Save and Finish.**
## **Fields collected from API:**
Here are the fields for the Workline API:
* **Employee Name**
* **Salutation**
* **First Name**
* **Middle Name**
* **Last Name**
* **Father's Name**
* **Date of Birth (DOB)**
* **Gender**
* **Date of Joining (DOJ)**
* **Company**
* **Business Unit**
* **Grade**
* **Function**
* **Team**
* **Role**
* **Designation**
* **Segment**
* **Country**
* **Region**
* **Location**
* **Workstation**
* **Secondary Location**
* **Reporting Manager Employee ID**
* **Reporting Manager Name**
* **Skip Level Manager ID**
* **Skip Level Manager Name**
* **Personal Mobile Number**
* **Office Mobile Number**
* **Alternative Mobile Number**
* **Office Email**
* **Personal Email**
* **Employee Status**
* **Last Working Day (LWD)**
* **Separation Reason**
* **Separation Mode**
* **HRBP ID**
* **Business Head ID**
Feedback, questions or need support? Email [cs@xoxoday.com](mailto:cs@xoxoday.com)