> ## Documentation Index
> Fetch the complete documentation index at: https://help-empuls.xoxoday.com/llms.txt
> Use this file to discover all available pages before exploring further.
# Rippling
> Seamlessly integrate Emplus with Rippling.
## Before You Begin
You'll need admin access to both Rippling and Empuls. Generate your Rippling API token from the Rippling admin dashboard.
## Why this Integration?
This integration automates the user account management processes in Empuls based on the employee data available in your Rippling account.
With this integration, you can :
* Add new employees to Empuls automatically when their Rippling profile is created.
* Edit existing employee data in Empuls simply by updating their Rippling profile.
* Remove exited employees from Empuls based on their exit date/status in Rippling.
Once this integration is enabled, the data will sync between Empuls and your Rippling account once every 24 hours.
## How to set up this integration?
Log in to your Empuls account and go to **Admin Dashboard** by clicking on "**Reports and Admin**". Navigate to "\*\*Integrations" \*\*on the left hand dashboard.
Click on \*\*Rippling \*\*and add \*\*Enable. \*\*
Click on **Establish Connection** to initiate the integration. This will redirect you to your Rippling portal in the new tab. Please make sure you allow popups.
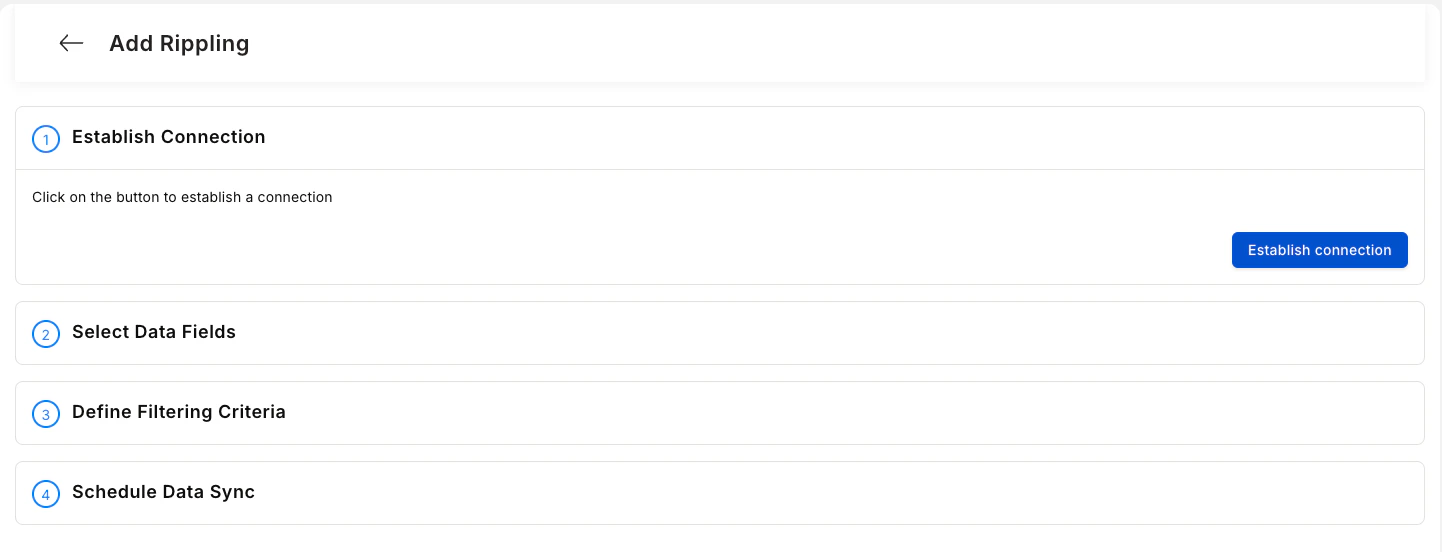 Once you complete all the steps on the Rippling portal, you will be redirected back to your Empuls integration page. Please follow the steps mentioned in the video attached at the bottom of this article on how to proceed with installation on the Rippling Platform.
Select Data Fields. Once done, click on **Continue.**
Once you complete all the steps on the Rippling portal, you will be redirected back to your Empuls integration page. Please follow the steps mentioned in the video attached at the bottom of this article on how to proceed with installation on the Rippling Platform.
Select Data Fields. Once done, click on **Continue.**
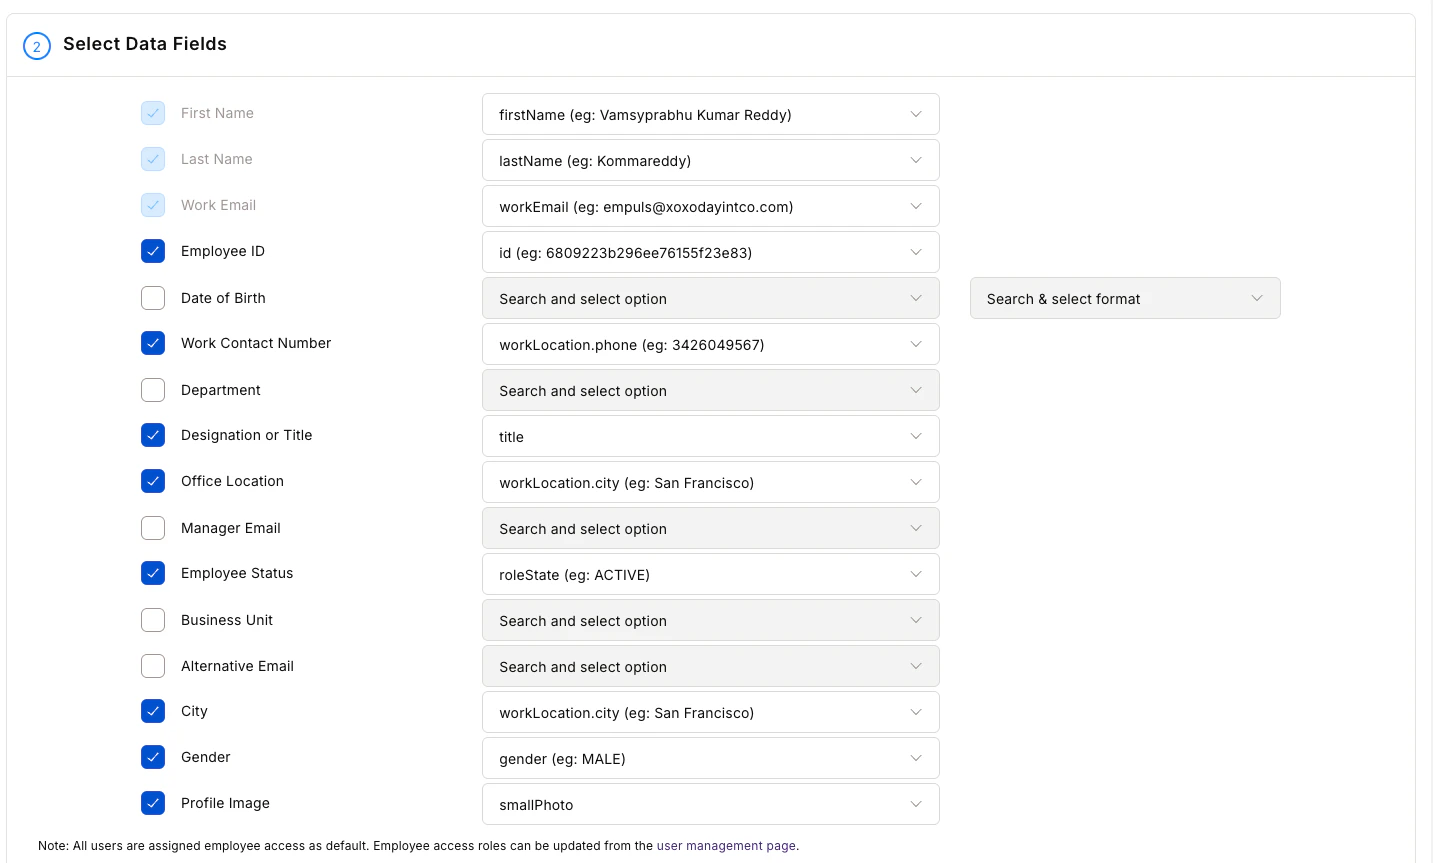 Data can be mapped for multiple fields like
1. First name
2. Last name
3. Official email
4. Employee code/ID
5. Grade
6. Department
7. Designation
8. Date of birth
9. Date of Joining
10. Mobile number
11. Business Unit
12. Cost center
13. Location
14. Contact/Mobile number and many more
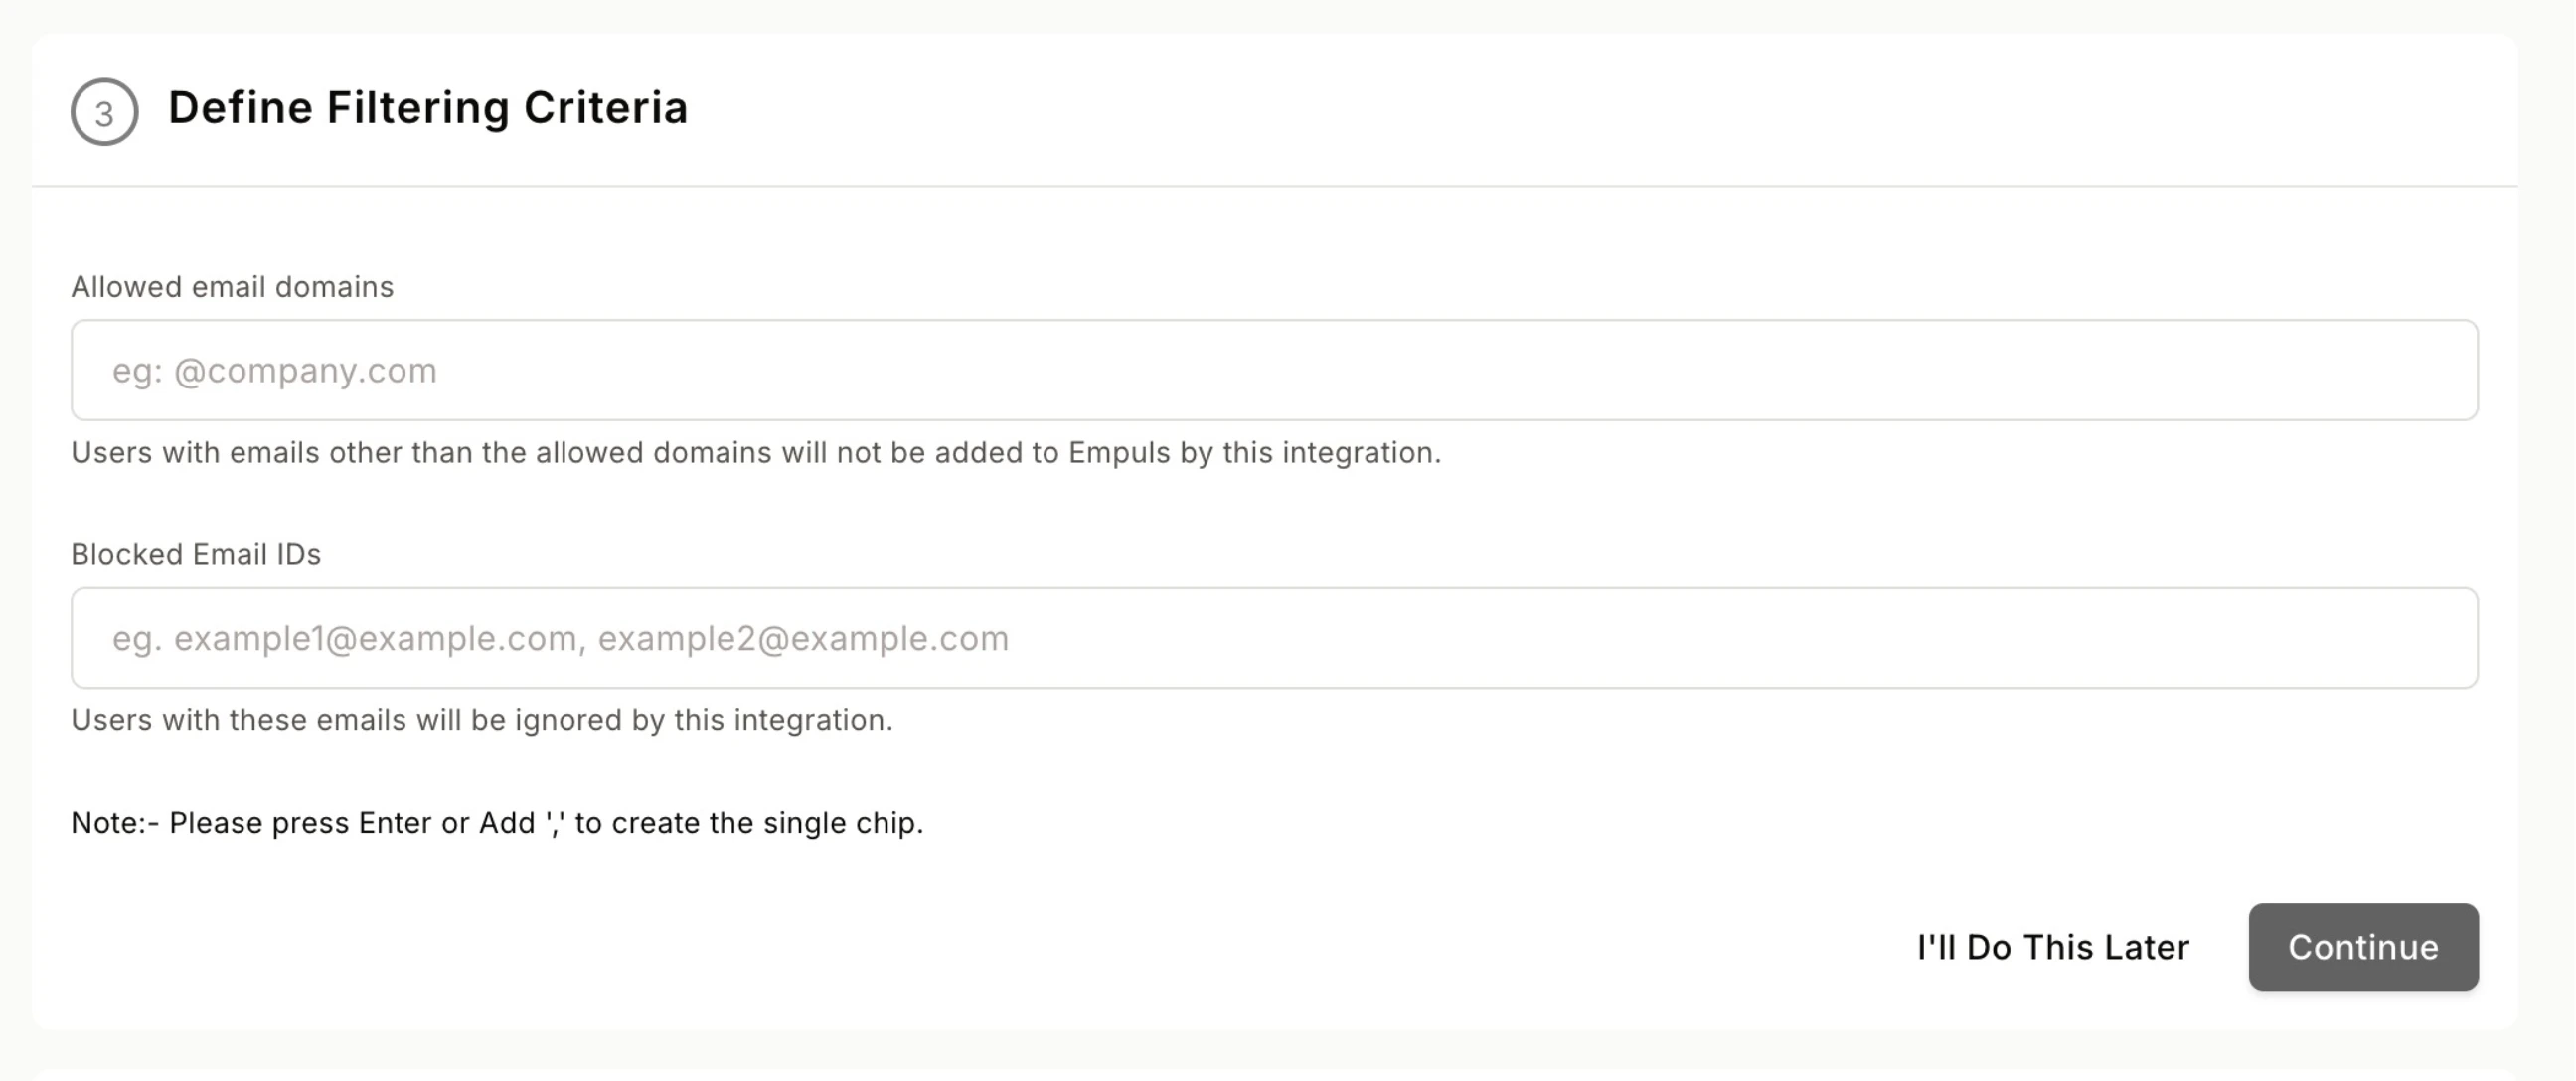
\*\*Define Filtering Criteria. \*\*This is an optional step; you can also choose to do this at a later step. **Continue** to proceed.
Data can be mapped for multiple fields like
1. First name
2. Last name
3. Official email
4. Employee code/ID
5. Grade
6. Department
7. Designation
8. Date of birth
9. Date of Joining
10. Mobile number
11. Business Unit
12. Cost center
13. Location
14. Contact/Mobile number and many more
\*\*Define Filtering Criteria. \*\*This is an optional step; you can also choose to do this at a later step. **Continue** to proceed.
 Admins can download employee data in CSV format before uploading to Empuls to validate that the data fields are mapped and no record is repeated.
In this step, you can choose between two data sync options:
* \*\*Run Date Sync Once Now: \*\*Select this option to launch your Empuls account immediately. This will create accounts for all employees and send invites.
* **Schedule First Data Sync for Later:** Select this option to schedule employee account creation to a later date and time. This will help you plan and execute employee account creation on Empuls to coincide with your internal launch announcements.
Admins can download employee data in CSV format before uploading to Empuls to validate that the data fields are mapped and no record is repeated.
In this step, you can choose between two data sync options:
* \*\*Run Date Sync Once Now: \*\*Select this option to launch your Empuls account immediately. This will create accounts for all employees and send invites.
* **Schedule First Data Sync for Later:** Select this option to schedule employee account creation to a later date and time. This will help you plan and execute employee account creation on Empuls to coincide with your internal launch announcements.
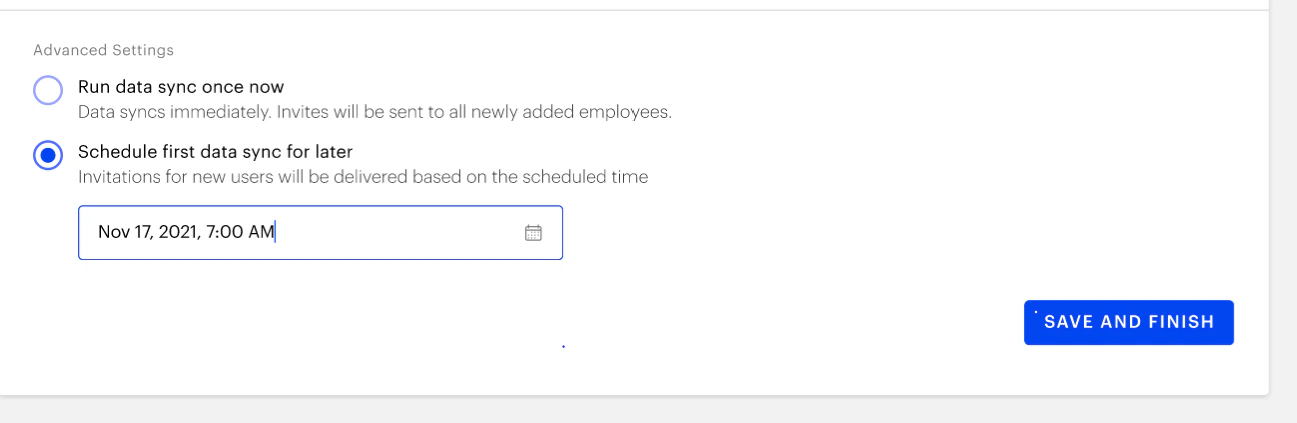 Select the date and time of your choice. Click on **Save and Finish.**
You will now see a message confirming that the Rippling Integration has been enabled successfully.
## **How to edit this configuration**
Log in to your Empuls account.
Go to **Admin Dashboard** by clicking on "**Reports and Settings**".
Navigate to "**Integrations.**"
Navigate to the **Active Integrations** section and click on the \*\*Rippling \*\*app.
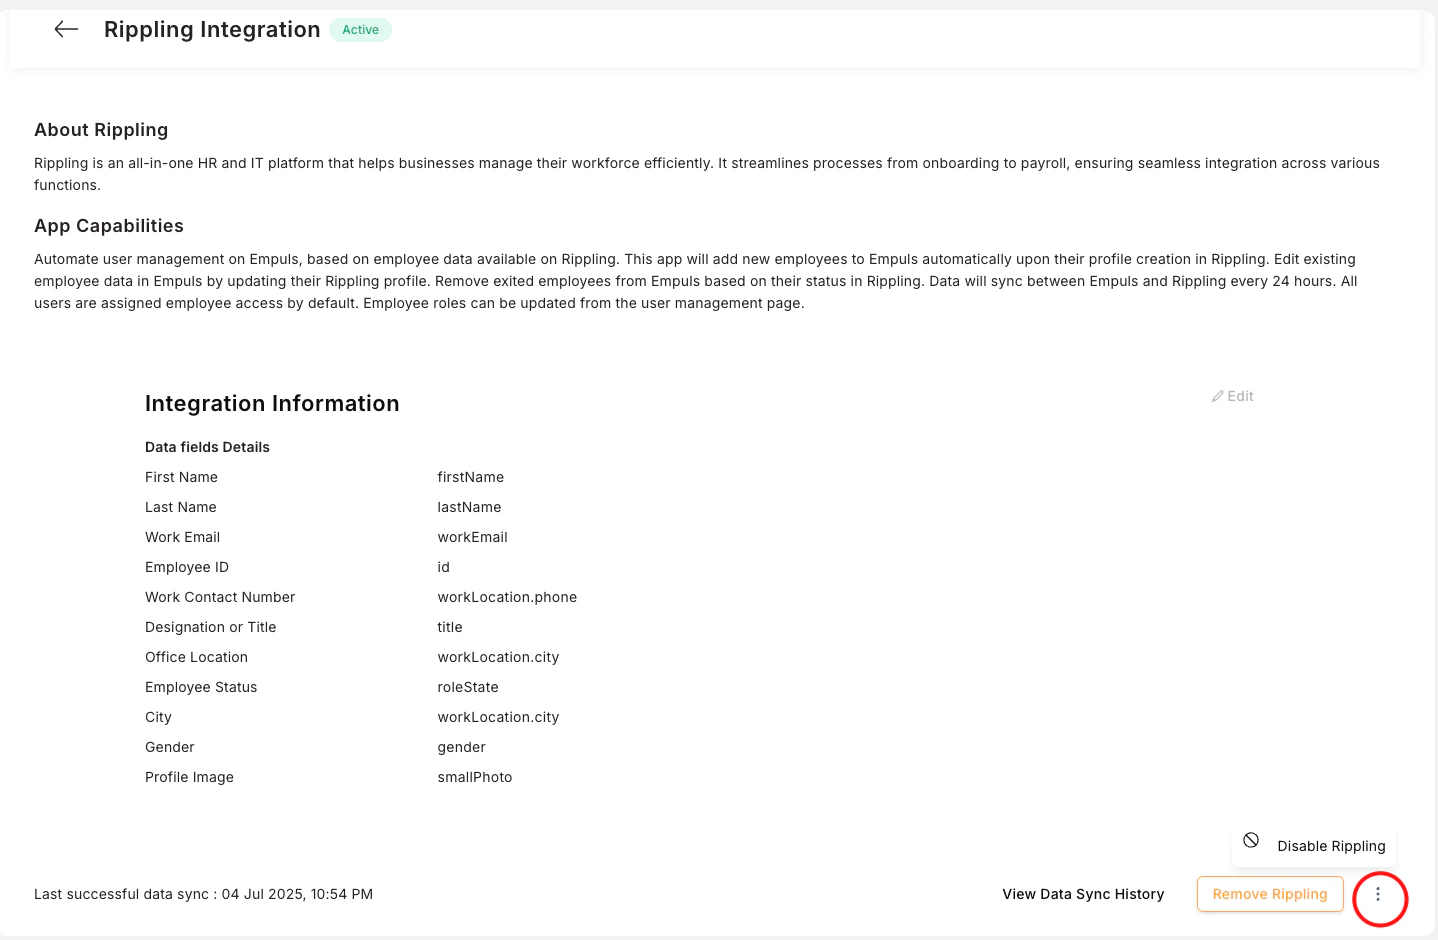
Click the three dots beside the REMOVE Ripplingtext box.Then click on\*\* Disable Rippling.\*\*
Select the date and time of your choice. Click on **Save and Finish.**
You will now see a message confirming that the Rippling Integration has been enabled successfully.
## **How to edit this configuration**
Log in to your Empuls account.
Go to **Admin Dashboard** by clicking on "**Reports and Settings**".
Navigate to "**Integrations.**"
Navigate to the **Active Integrations** section and click on the \*\*Rippling \*\*app.
Click the three dots beside the REMOVE Ripplingtext box.Then click on\*\* Disable Rippling.\*\*
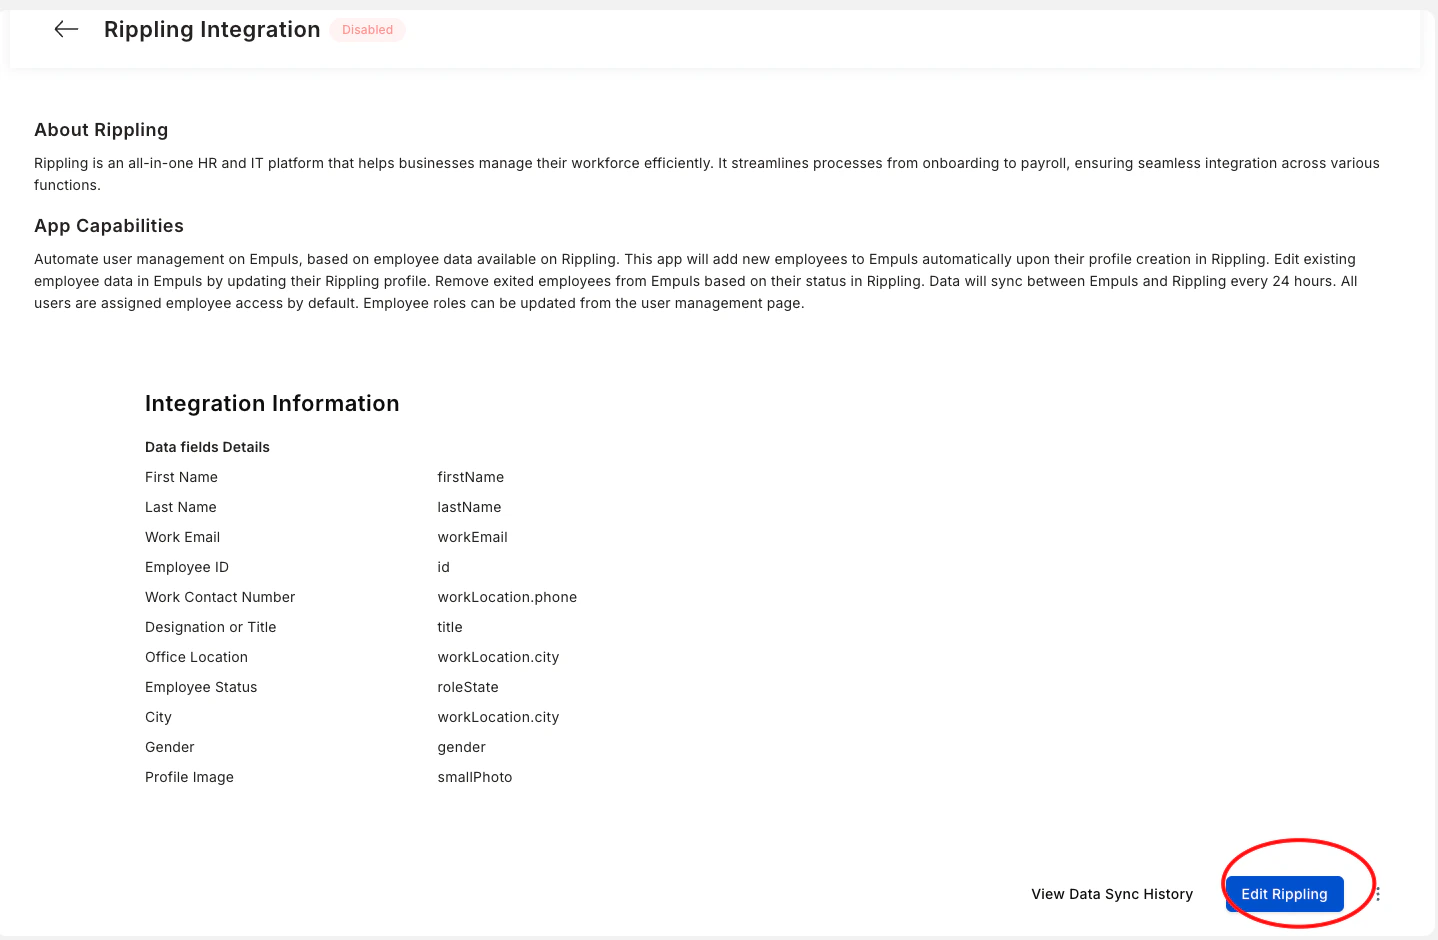
 Click on \*\*Edit Rippling \*\*and proceed to modify any configuration following the same steps as mentioned in the Set Integration steps mentioned above.
 You will get the message that the configuration has been updated successfully.
## **How to turn off this integration?**
Log in to your Empuls account.
Go to **Admin Dashboard** by clicking on "**Reports and Settings**".
Navigate to "**Integrations.**"
Navigate to the **Active Integrations** section and click on the **Rippling** app.
You can turn off the integration by simply clicking on \*\*REMOVE Rippling HR. \*\*
It will ask whether you want to remove\*\* Rippling HR.\*\* Click on **REMOVE.**
Questions? Contact us at [cs@xoxoday.com](mailto:cs@xoxoday.com). We are more than happy to help you!
You will get the message that the configuration has been updated successfully.
## **How to turn off this integration?**
Log in to your Empuls account.
Go to **Admin Dashboard** by clicking on "**Reports and Settings**".
Navigate to "**Integrations.**"
Navigate to the **Active Integrations** section and click on the **Rippling** app.
You can turn off the integration by simply clicking on \*\*REMOVE Rippling HR. \*\*
It will ask whether you want to remove\*\* Rippling HR.\*\* Click on **REMOVE.**
Questions? Contact us at [cs@xoxoday.com](mailto:cs@xoxoday.com). We are more than happy to help you!