> ## Documentation Index
> Fetch the complete documentation index at: https://help-empuls.xoxoday.com/llms.txt
> Use this file to discover all available pages before exploring further.
# Oracle
> Seamlessly integrate Emplus with Oracle.
## Why this Integration?
This integration automates user account management processes in Empuls based on the employee data available in your Oracle account.
With this integration, you can :
* Add new employees to Empuls automatically when their Oracle profile is created.
* Edit existing employee data in Empuls simply by updating their Oracle profile.
* Remove exited employees from Empuls based on their exit date/status in Oracle.
Once this integration is enabled, the data will sync once every 24 hours between Empuls and your Oracle account.
All users are assigned employee access as default. Employee access role can be updated from user management page.
## Prerequisites for this integration
Please get in touch with your Oracle account manager and request them to share the below client details for your Oracle account:
1. 'url' : Unique Identifier
2. 'username': User name
3. 'password': Password
Also, the below key map needs to be configured for the credentials shared above.
```
Oracle Key Map = { Email: 'email', First Name: 'first_name', Last Name: 'last_name', City: 'city', Department: 'department', Designation: 'designation', Country: 'country', Joining Date: 'joining_date', Employee ID: 'emp_id', Date of Birth: 'dob', Manager Email: 'manager_email', Grade Name: 'grade_name', HR Email: 'hr_email', Employee Status: 'employee_status' }
```
Once the API is configured by the dedicated Oracle team, you can confidently proceed with the integration by following the steps below.
## How to set up this integration?
Log in to your Empuls account
Go to **Admin Dashboard** by clicking on "**Reports and Admin**".
Navigate to "**Integrations.**"
Navigate to the HRMS Applications section and click on the Oracle app
Click the "Add Oracle" button to start the integration
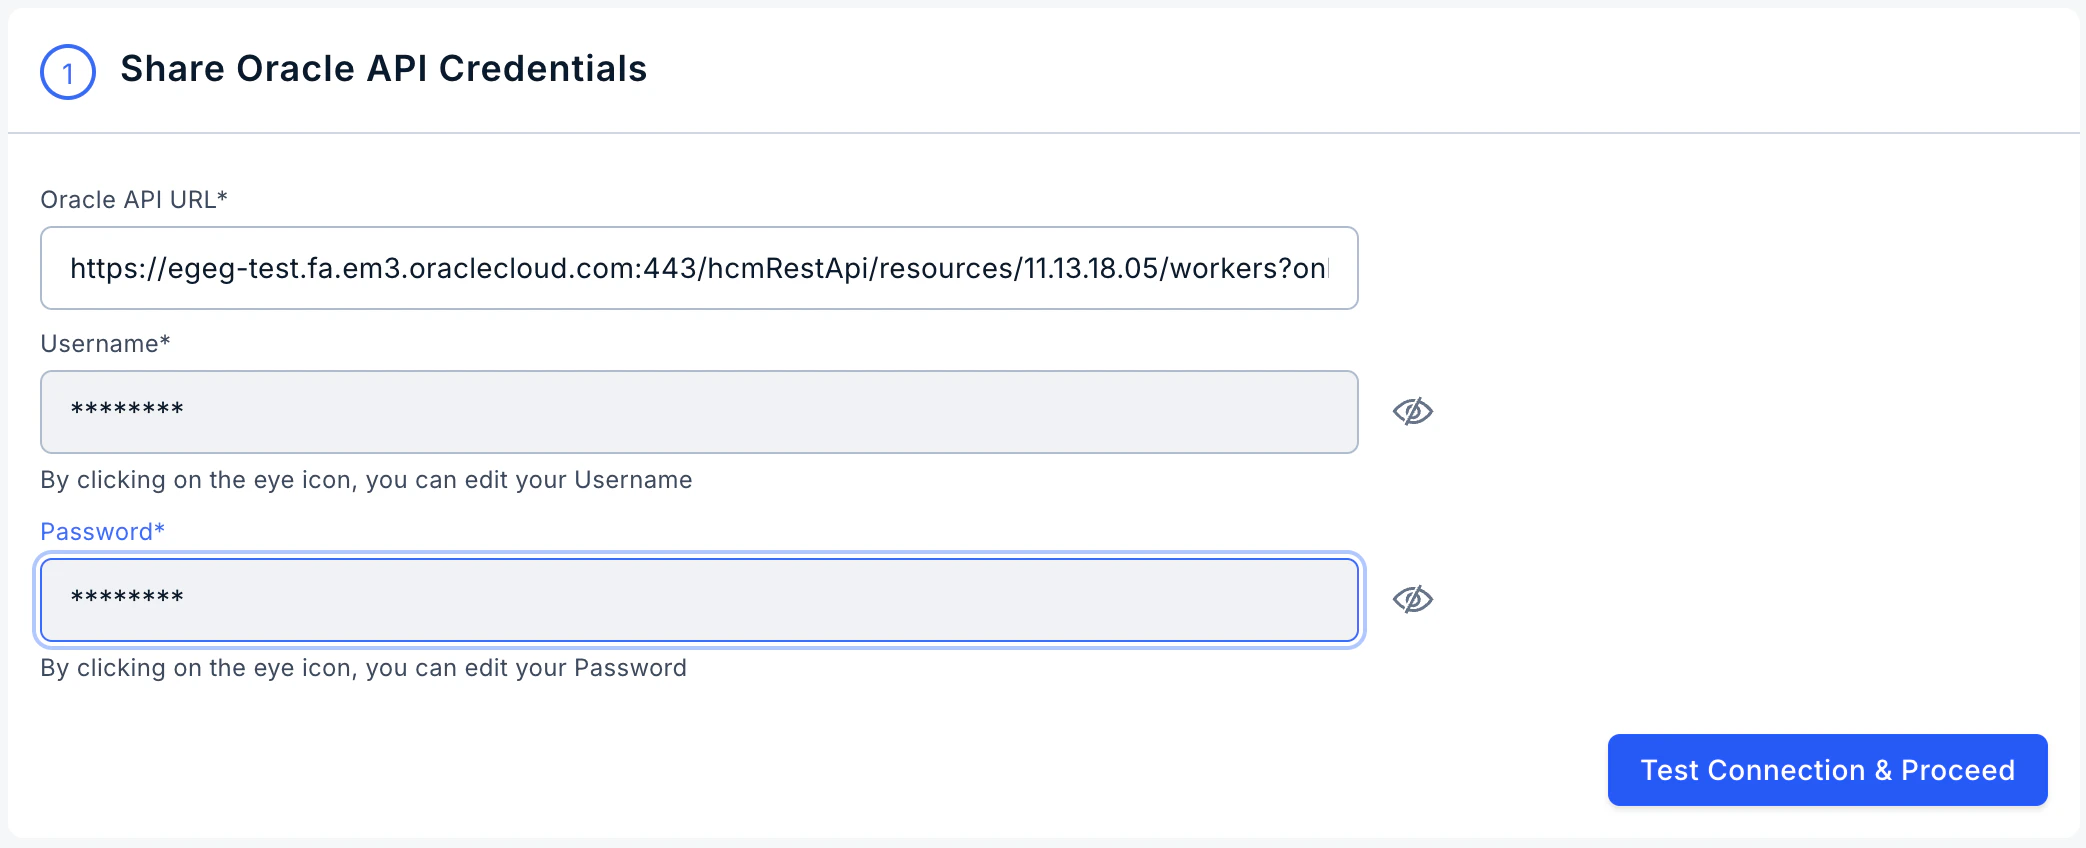
Enter your Oracle credential, including Oracle URL, username, and password. Click the "Test Connection & Proceed" button to verify the connection with your Oracle account.
 This step allows you to select the data you wish to upload to your Empuls account.
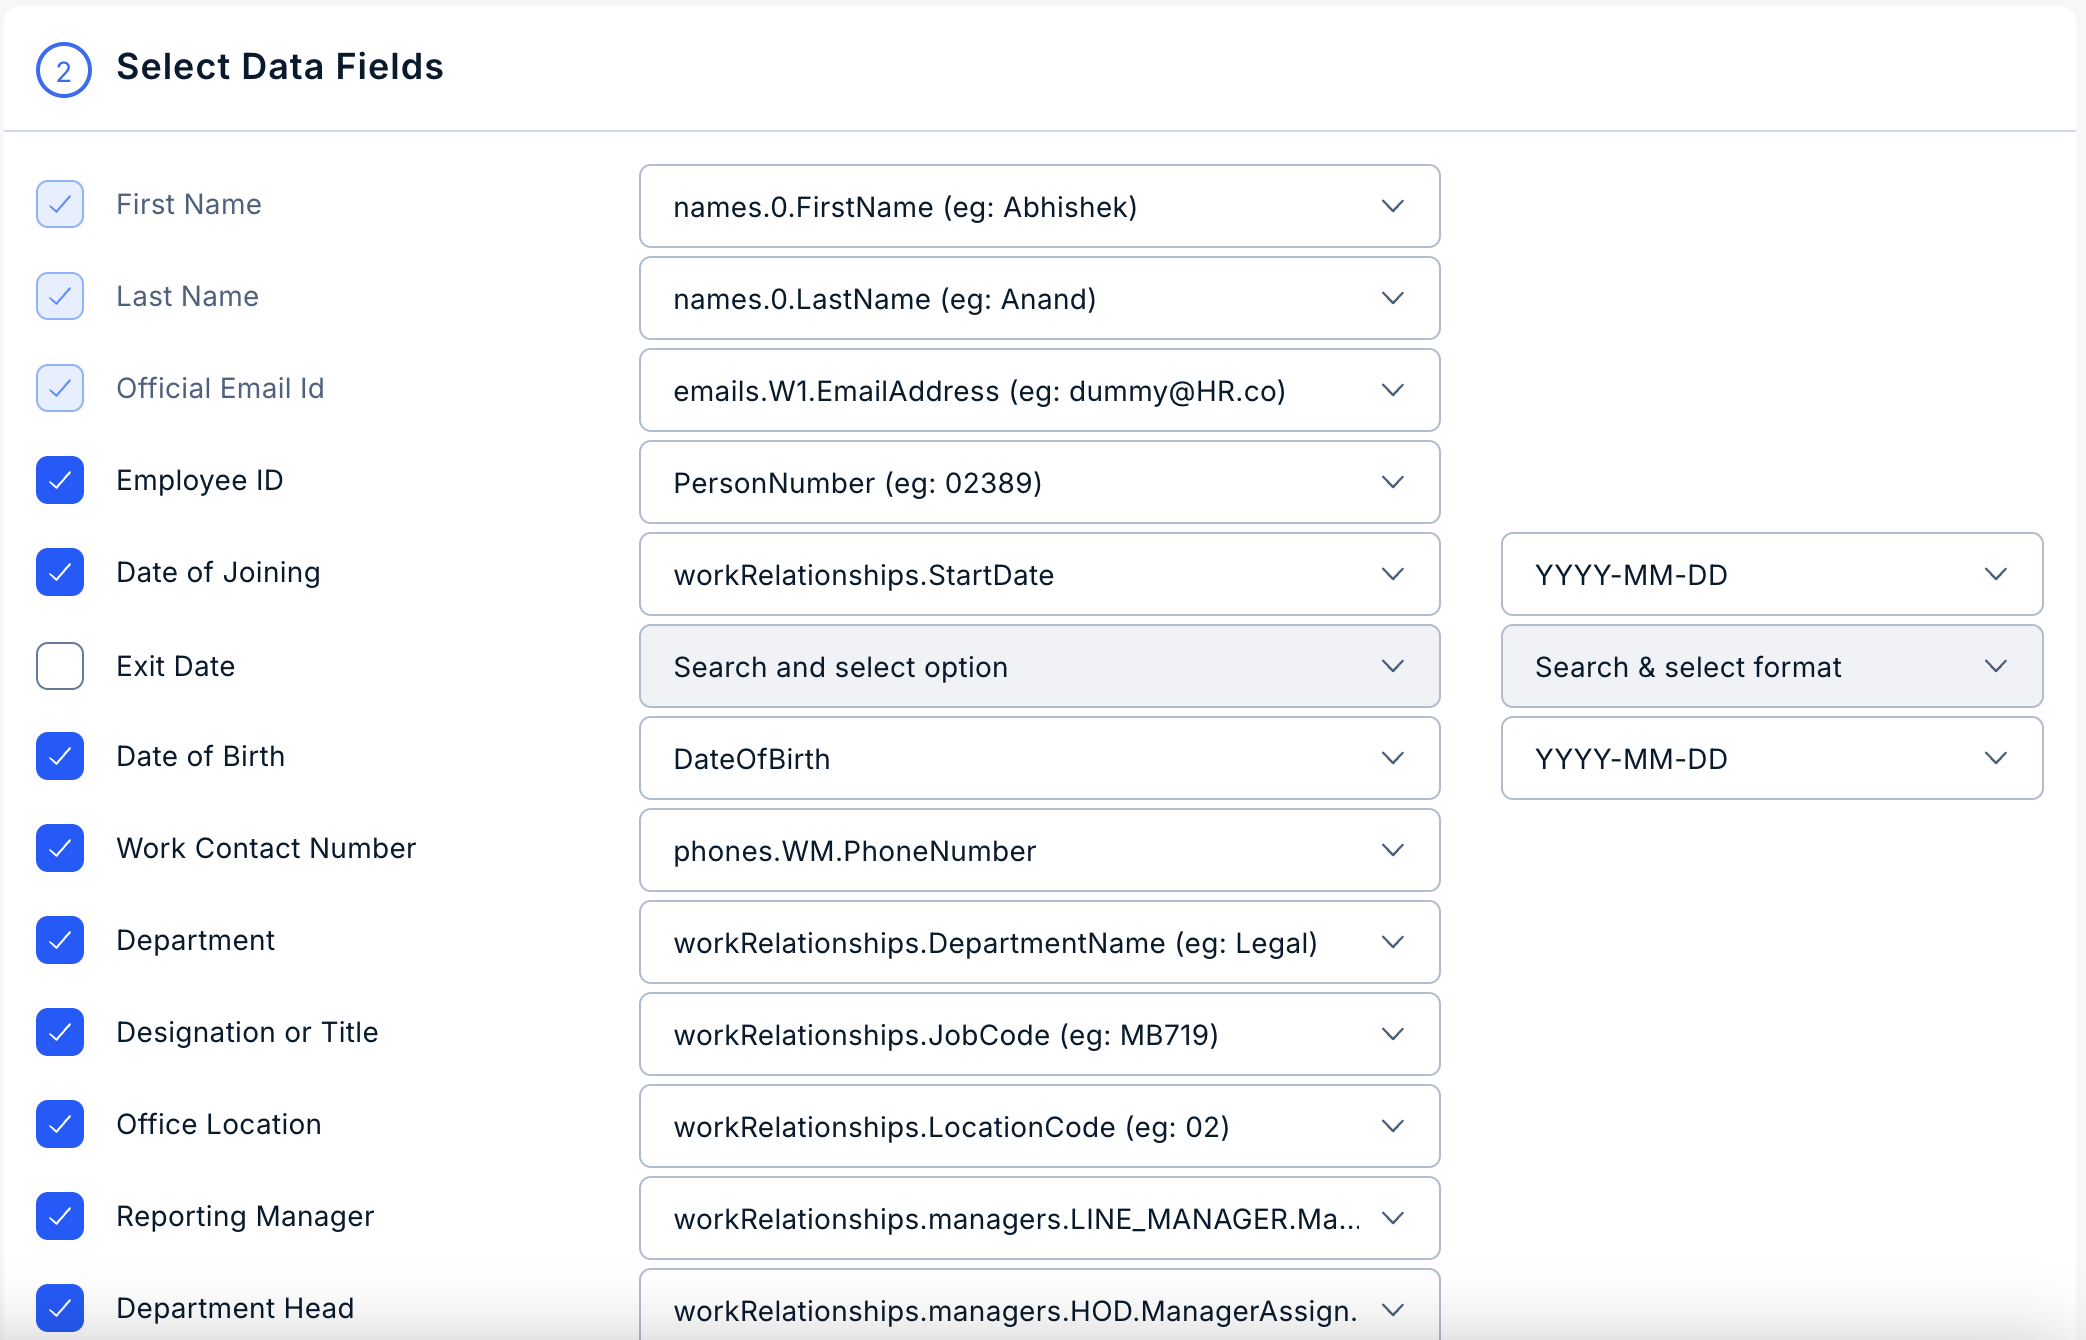
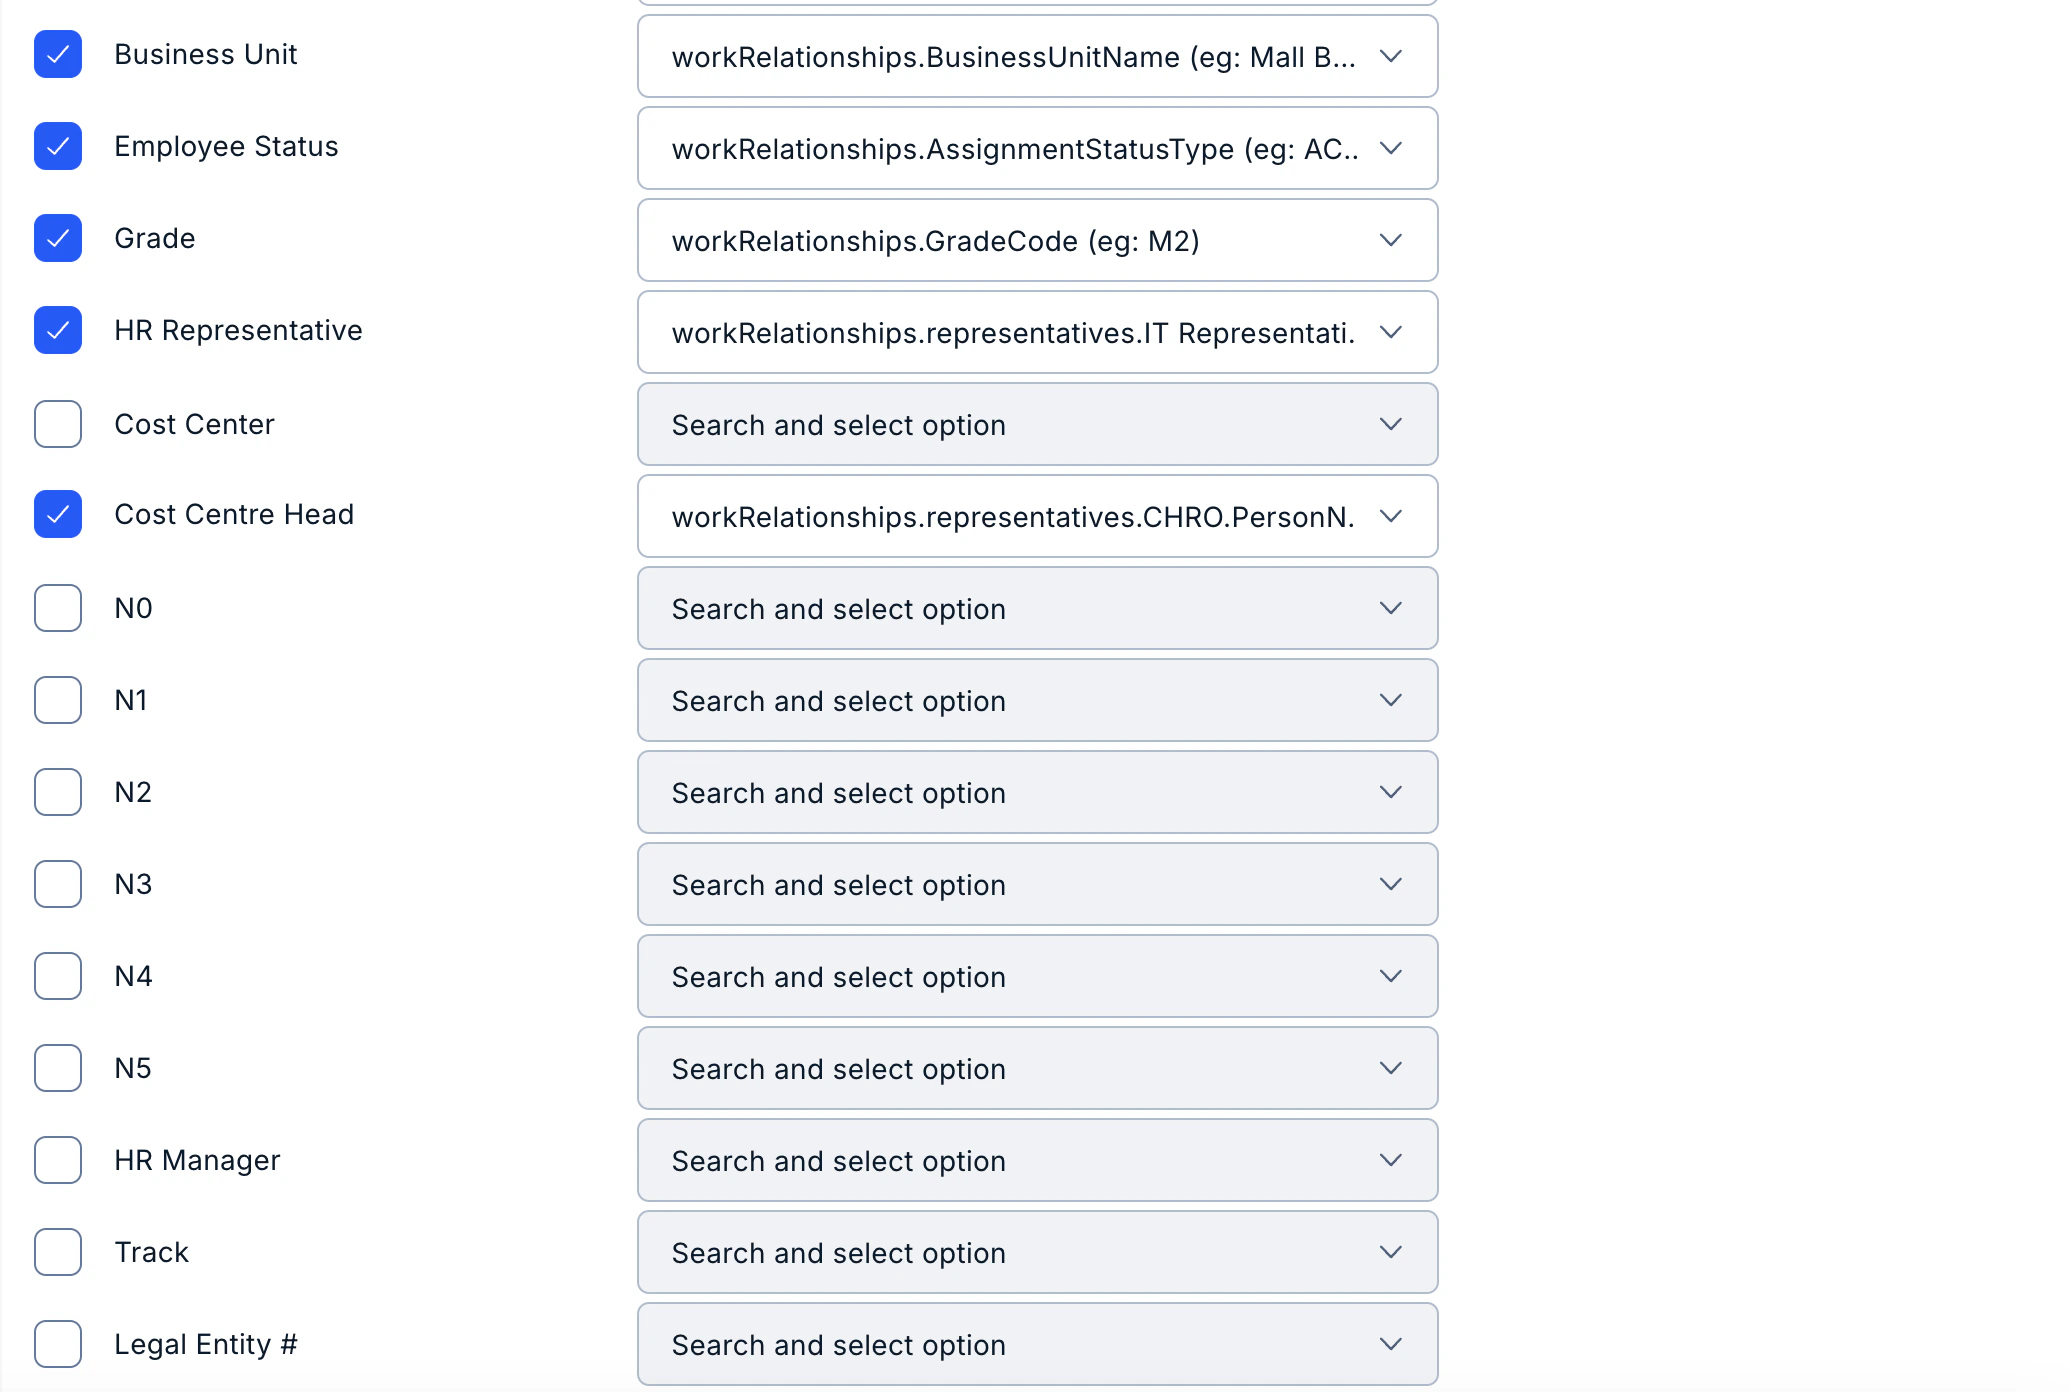 Data can be mapped for
1. First name
2. Last name
3. Official email
4. Employee code/ID
5. Grade
6. Department
7. Designation
8. Date of birth
9. Date of Joining
10. Mobile number
11. Business Unit
12. Cost center
13. Location
14. Contact/Mobile number, and many more
* Select the data fields to be imported to Empuls. All the fields are selected by default. You may uncheck the boxes to unselect specific fields. For example, uncheck the Work Contact Number fields if you do not wish to share this information with Empuls. A few fields, like the First Name, Last Name, and Email ID are mandatory and thus cannot be unchecked.
* Map the data fields on your Oracle account to the correct fields on Empuls to configure the platform per your needs.
* Select the date format for the Date of Joining & Date of Birth fields to ensure that dates are updated correctly on Empuls.
Admins can download employee data in CSV format before uploading to Empuls to validate that the data fields are mapped and no record is repeated.
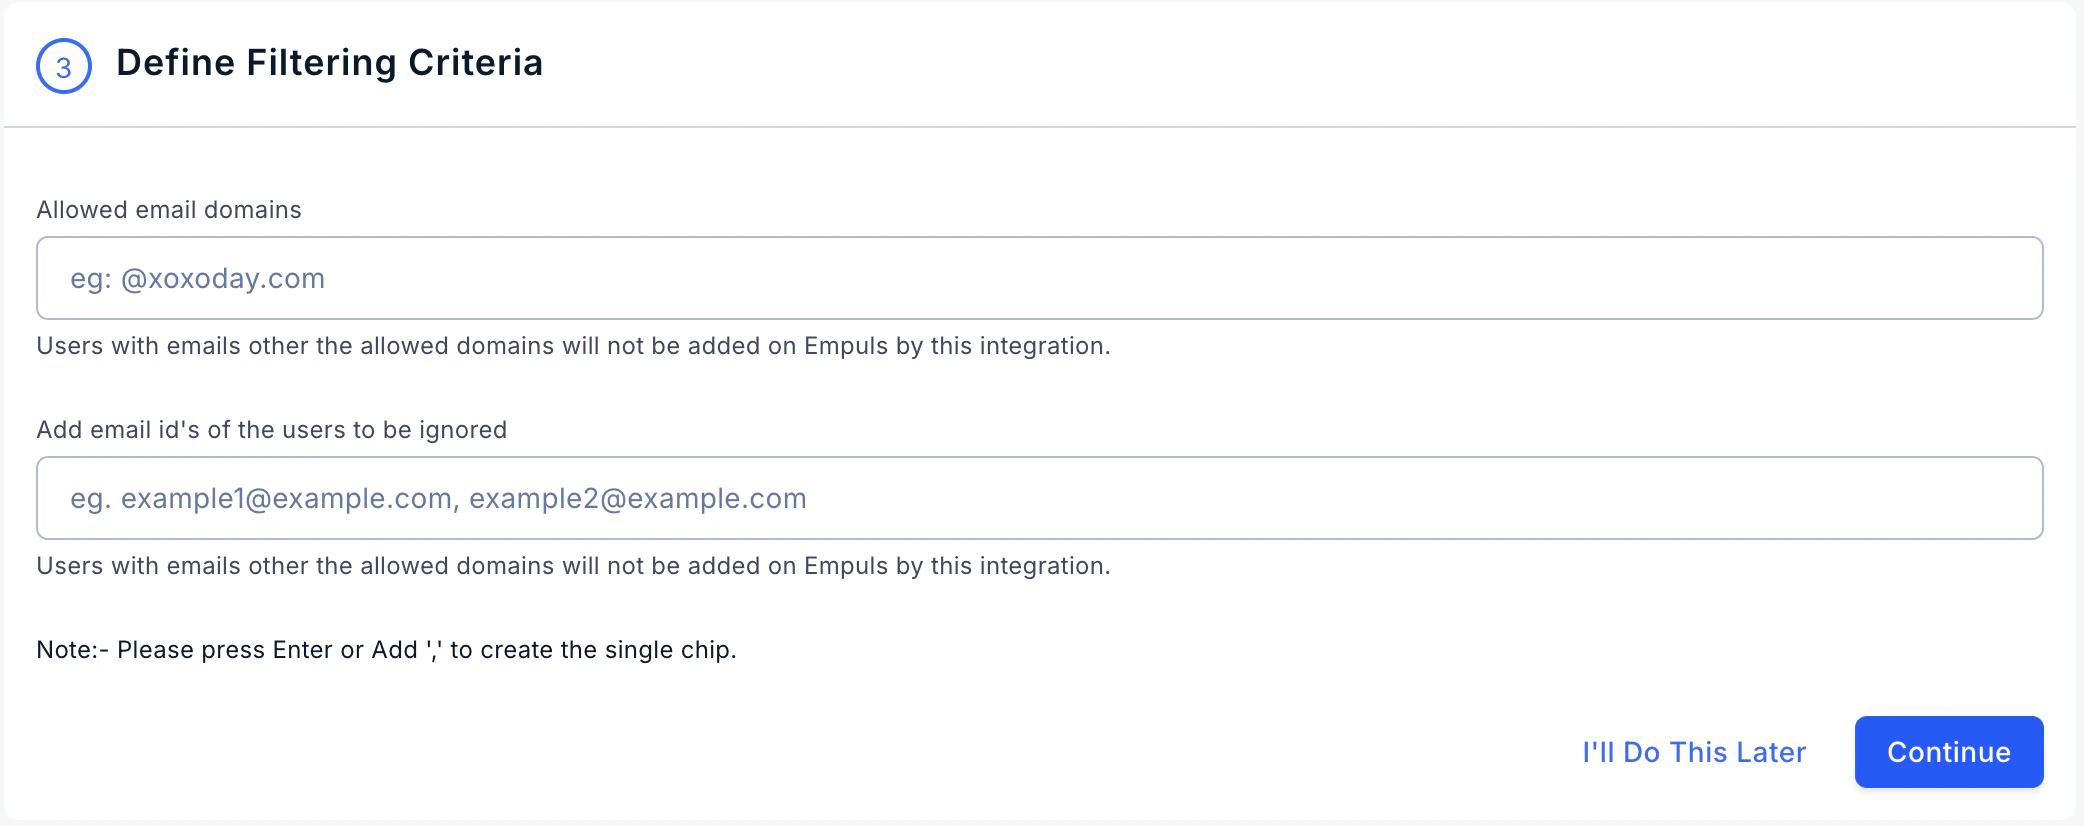
You can define the filter criteria to ensure that only allowed email domains are added to Empuls by this integration. You can even ignore certain email ID's that you don't wish to add to Empuls by this integration.
Data can be mapped for
1. First name
2. Last name
3. Official email
4. Employee code/ID
5. Grade
6. Department
7. Designation
8. Date of birth
9. Date of Joining
10. Mobile number
11. Business Unit
12. Cost center
13. Location
14. Contact/Mobile number, and many more
* Select the data fields to be imported to Empuls. All the fields are selected by default. You may uncheck the boxes to unselect specific fields. For example, uncheck the Work Contact Number fields if you do not wish to share this information with Empuls. A few fields, like the First Name, Last Name, and Email ID are mandatory and thus cannot be unchecked.
* Map the data fields on your Oracle account to the correct fields on Empuls to configure the platform per your needs.
* Select the date format for the Date of Joining & Date of Birth fields to ensure that dates are updated correctly on Empuls.
Admins can download employee data in CSV format before uploading to Empuls to validate that the data fields are mapped and no record is repeated.
You can define the filter criteria to ensure that only allowed email domains are added to Empuls by this integration. You can even ignore certain email ID's that you don't wish to add to Empuls by this integration.
 * Run Date Sync Once Now: Select this option to launch your Empuls immediately. This will create accounts for all employees and send invites.
* Schedule First Data Sync for Later: Select this option to schedule employee account creation to a later date and time. This will help you plan and execute employee account creation on Empuls to coincide with your internal launch announcements.
Click on **Save & Finish** to complete your integration setup.
* Run Date Sync Once Now: Select this option to launch your Empuls immediately. This will create accounts for all employees and send invites.
* Schedule First Data Sync for Later: Select this option to schedule employee account creation to a later date and time. This will help you plan and execute employee account creation on Empuls to coincide with your internal launch announcements.
Click on **Save & Finish** to complete your integration setup.