> ## Documentation Index
> Fetch the complete documentation index at: https://help-empuls.xoxoday.com/llms.txt
> Use this file to discover all available pages before exploring further.
# Automate gifts
> Set up lifecycle-triggered gifts — welcome, birthday, work anniversary, service milestones, and more — that Empuls sends automatically on the right date with reward points, merchandise, or a personalised message.
Automated gifts are occasion-based rewards that Empuls delivers without any manual trigger. Configure them once and Empuls fires them every time the trigger condition is met — on every birthday, every work anniversary, or every new joiner's first day. Each automation can carry reward points, a merchandise or gift-card collection, or just a personalised message.
Birthday and work-anniversary greetings are generated automatically as soon as an employee's date of birth (DOB) or date of joining (DOJ) is added to Empuls via their profile or HRMS sync. You do not need to create a separate greeting for each individual.
## Common automated events
| Event | Trigger | Typical reward |
| ---------------------- | ----------------------- | -------------------------------------- |
| Birthday | Employee DOB each year | Points gift or message |
| Work anniversary | DOJ each year | Points, milestone gift, or certificate |
| New joiner welcome | Day of joining | Welcome kit, points, or message |
| Onboarding day 30 / 90 | Days after DOJ | Check-in message |
| Service milestones | 1 yr, 3 yr, 5 yr, etc. | Tiered reward + certificate |
| Farewell / exit | Day account is disabled | Farewell message |
| Festive / seasonal | Scheduled date | Points or branded card |
## Create an automated gift
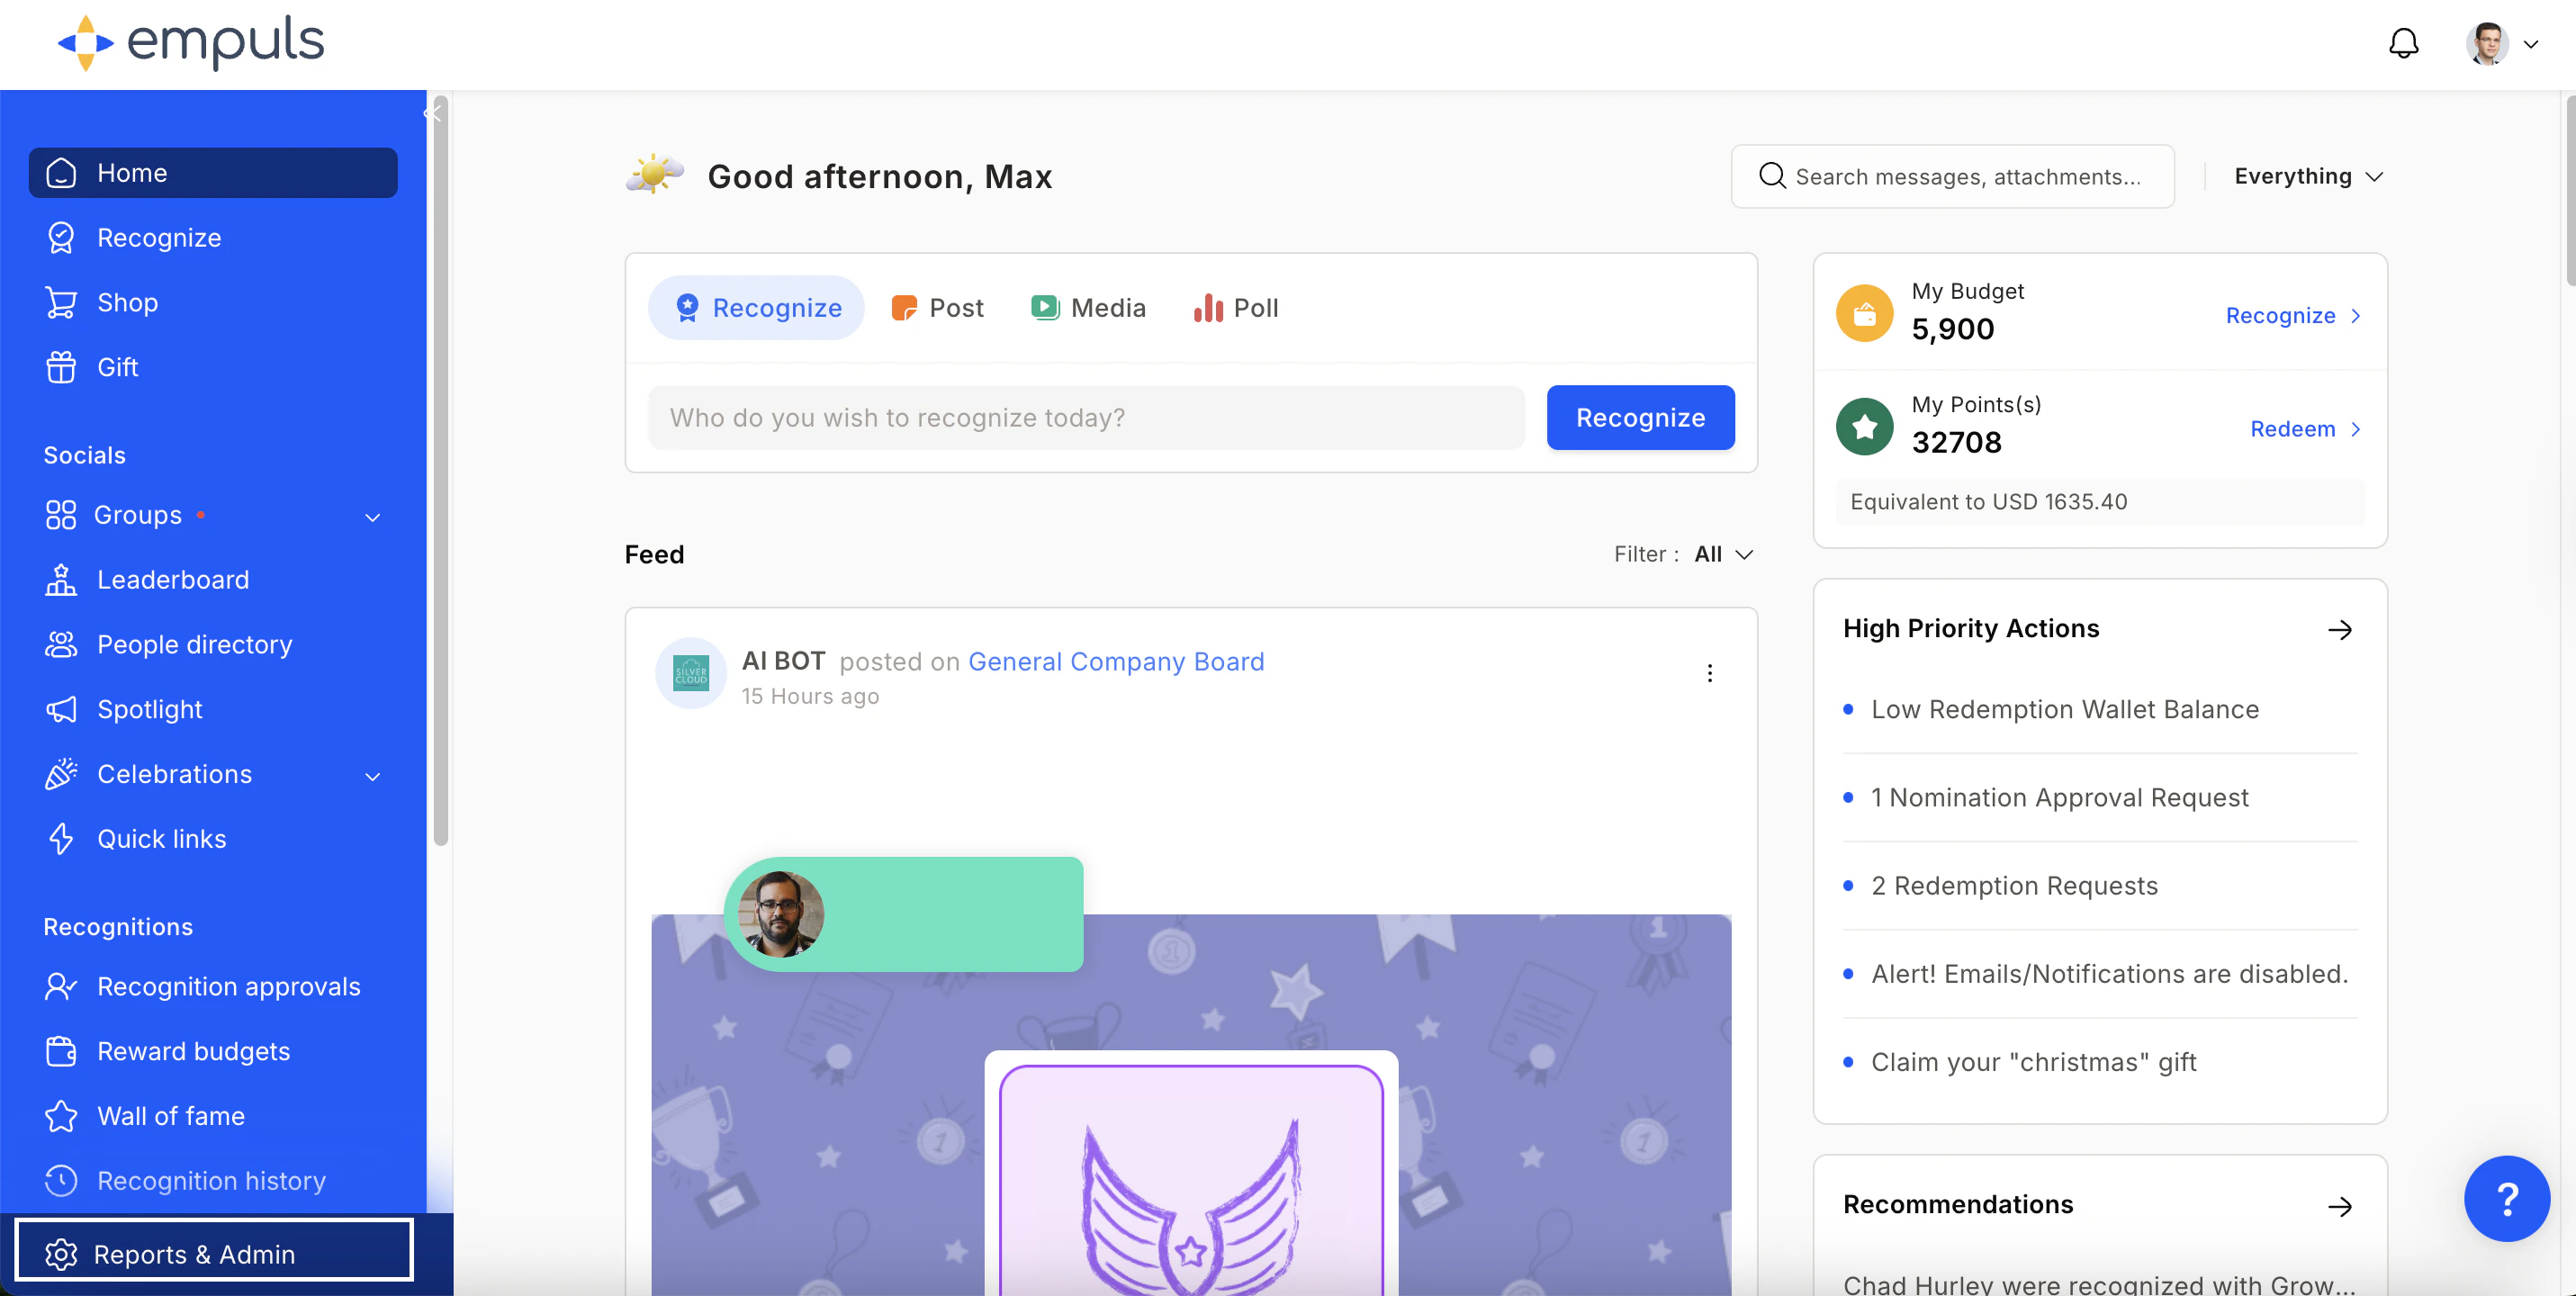
Go to **Admin Dashboard > Gifts > Manage Gifts** and click **Create Gift**.
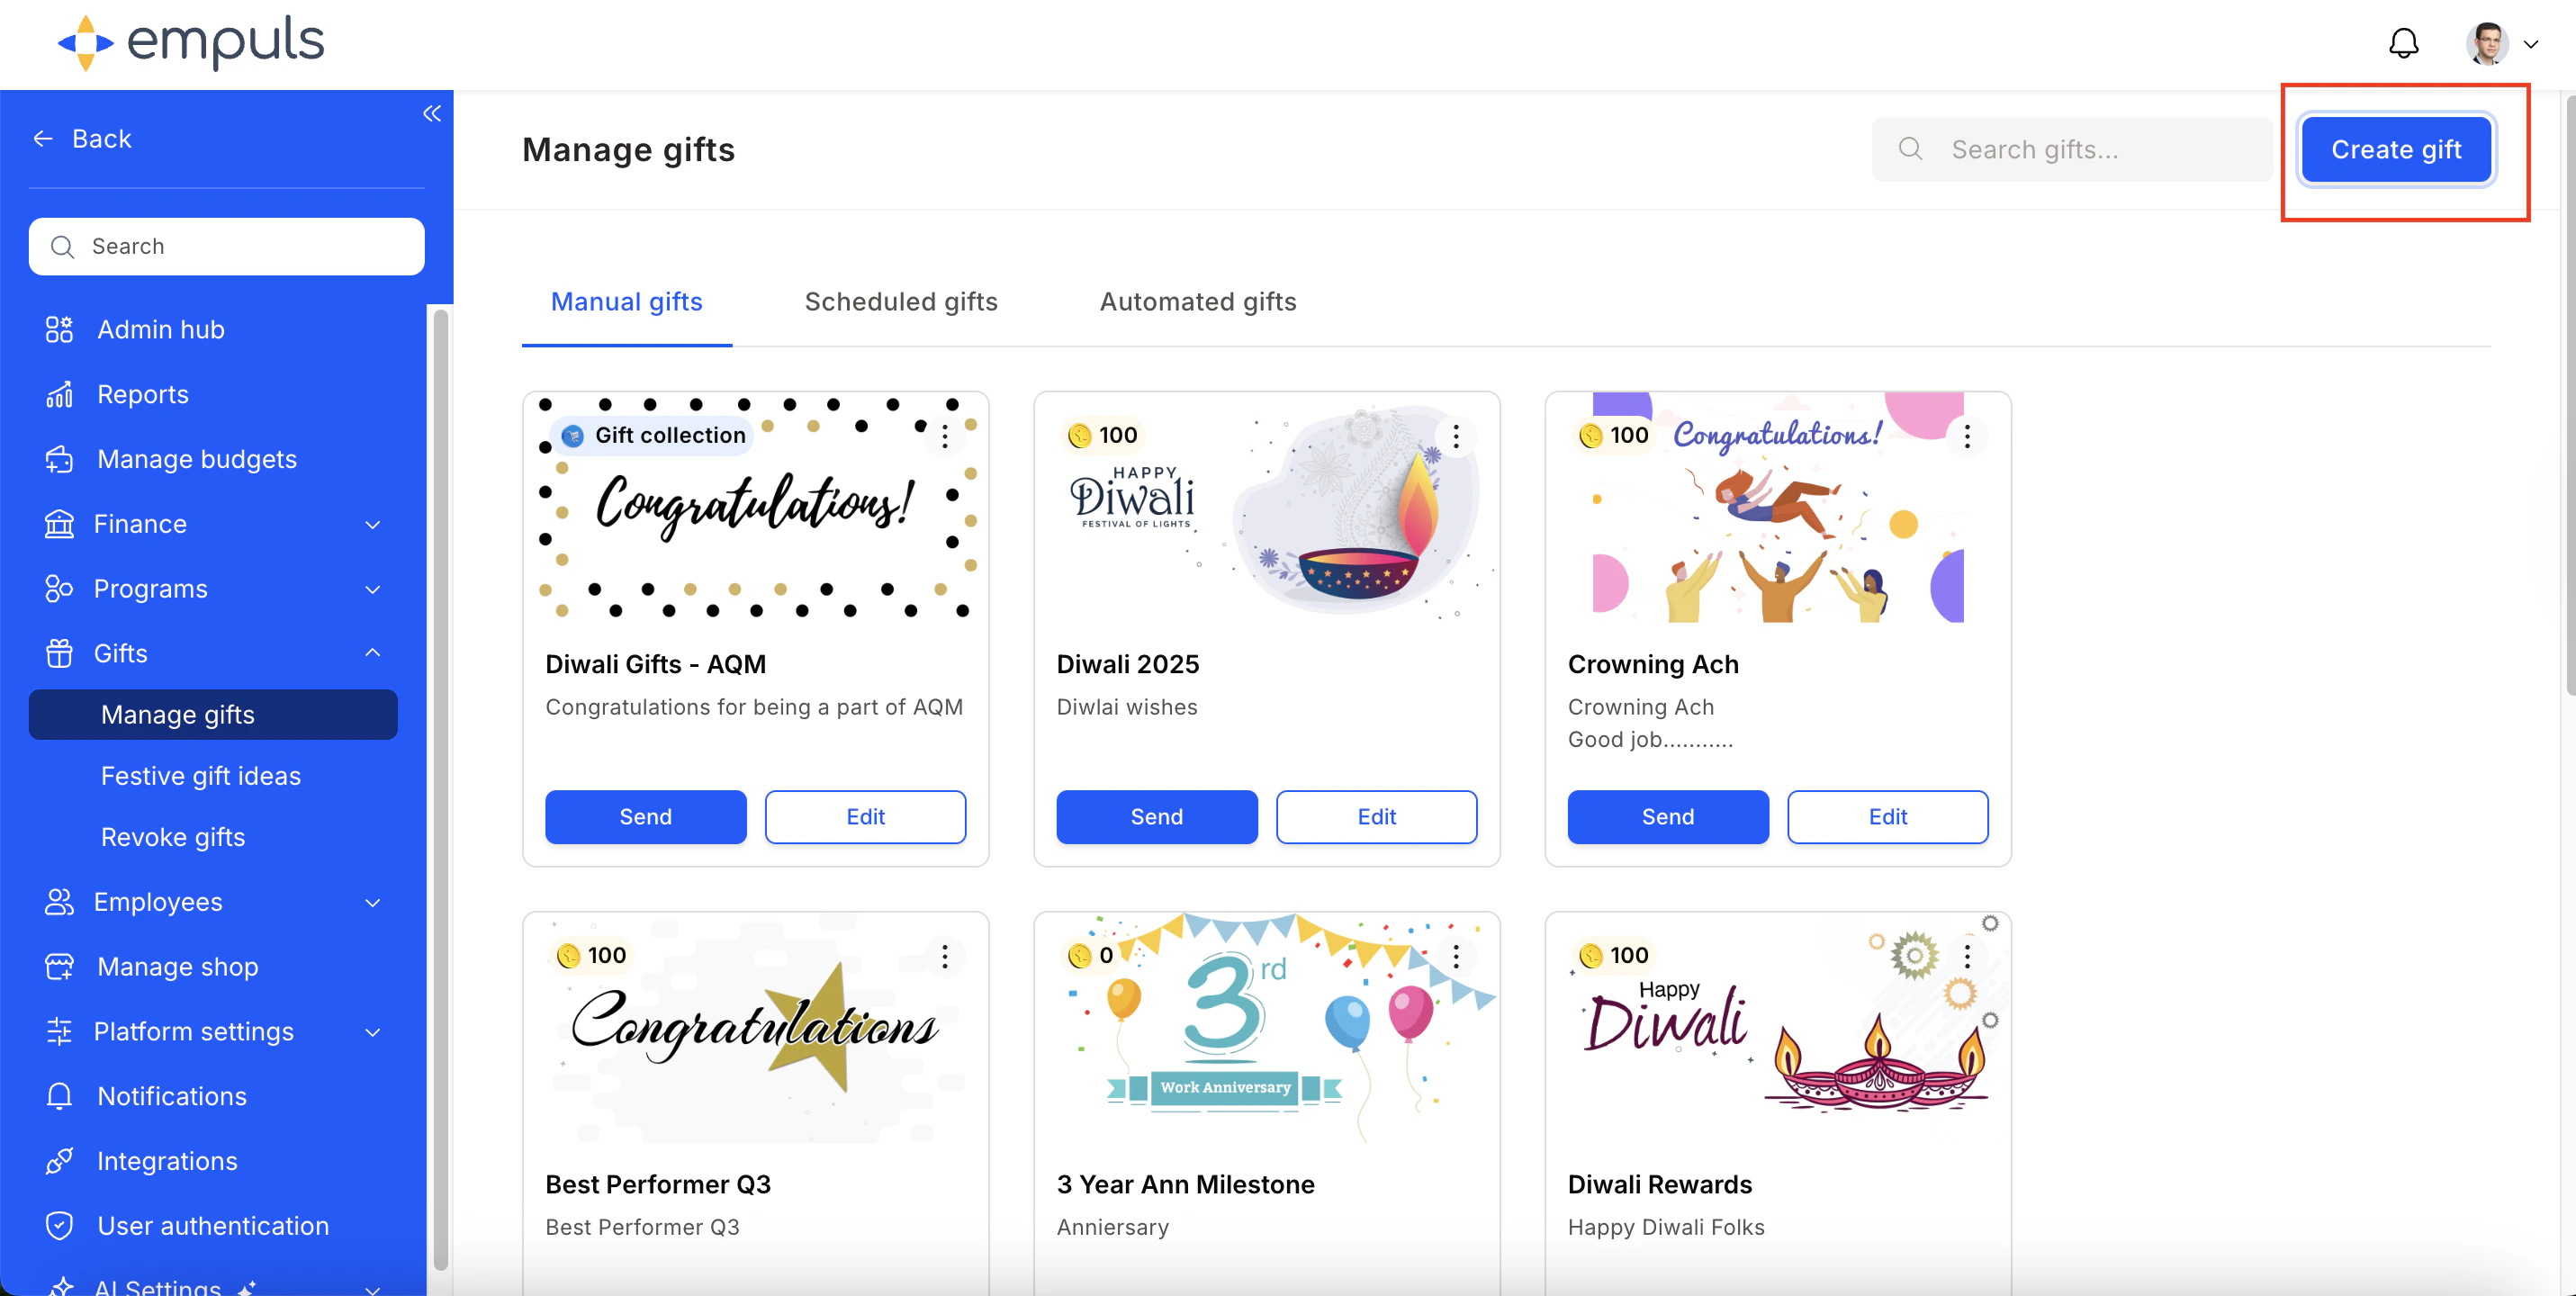
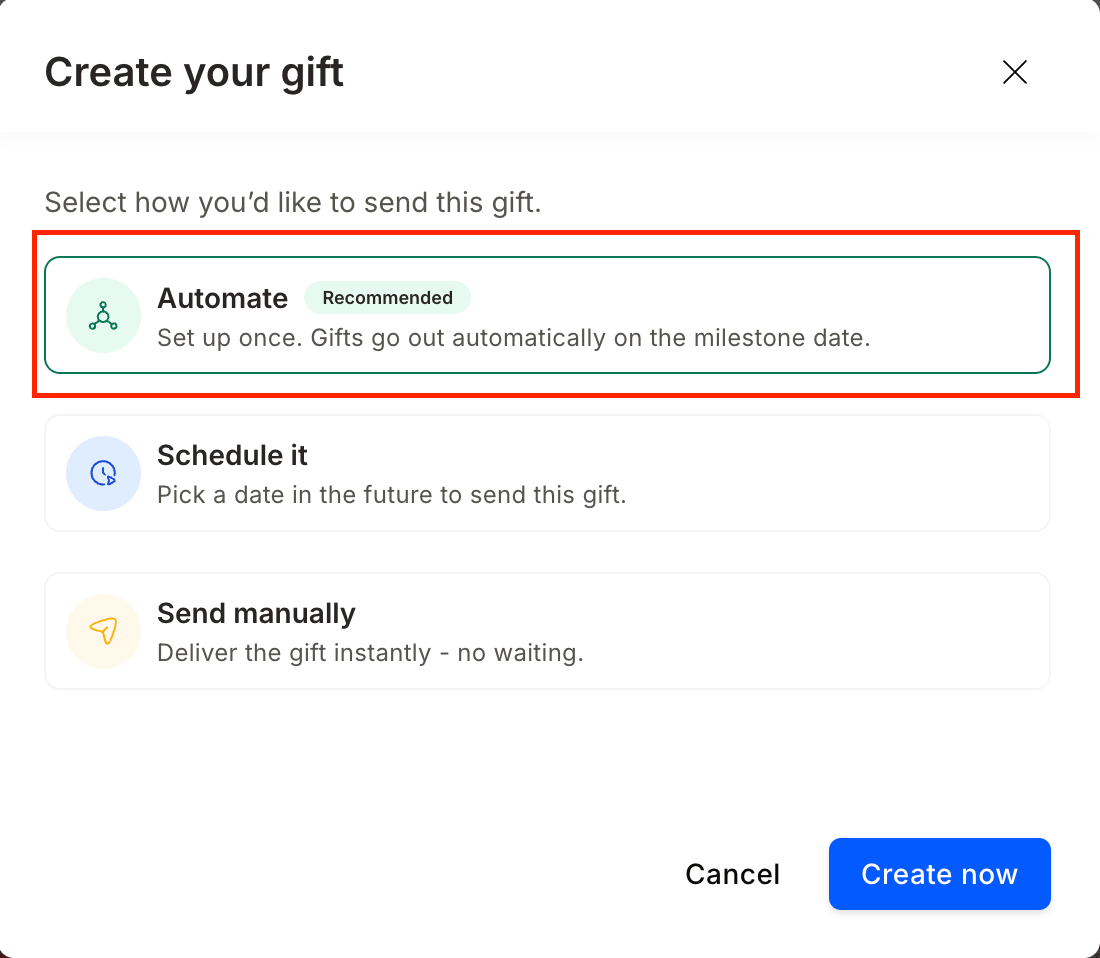
 Choose **Automate** and click **Create**.
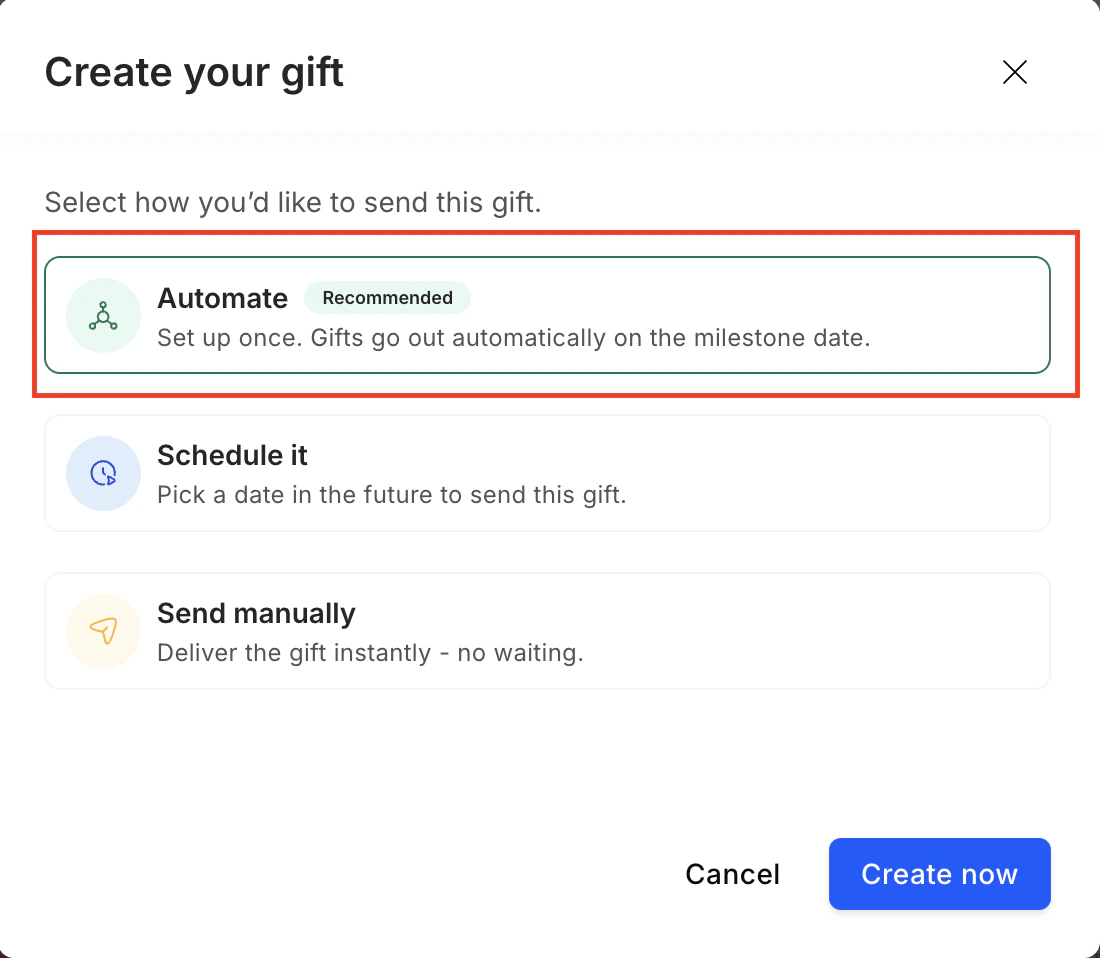 Click **Let's Begin** to open the step-by-step configuration form.
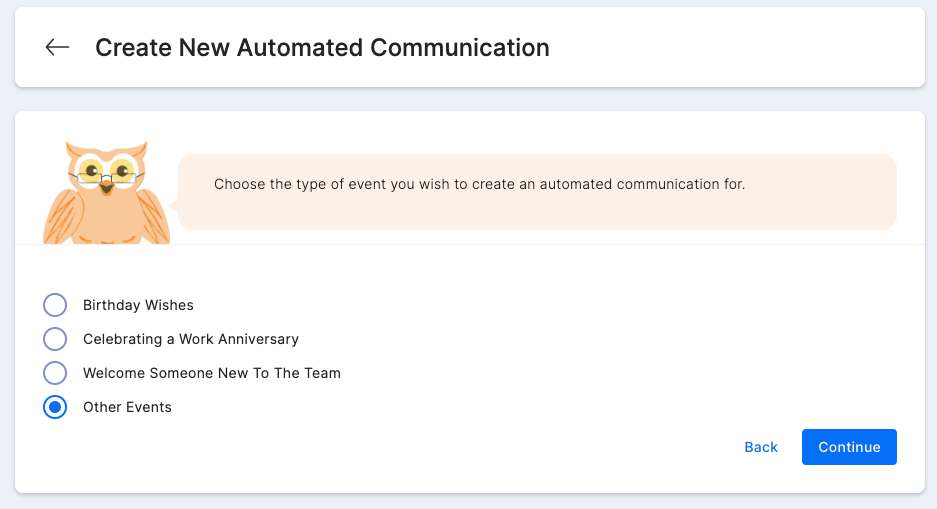
 Choose the lifecycle event — Birthday, Work Anniversary, New Joiner, Festive, or a custom event.
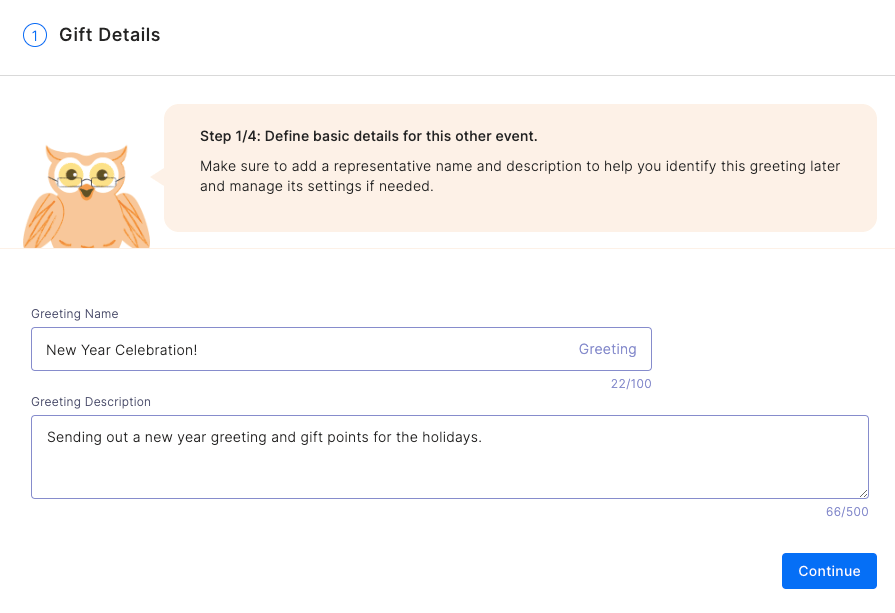
 Fill in the **Greeting Name**, **Description**, and any **stakeholders** (such as the recipient's manager) who should be notified when the gift fires.
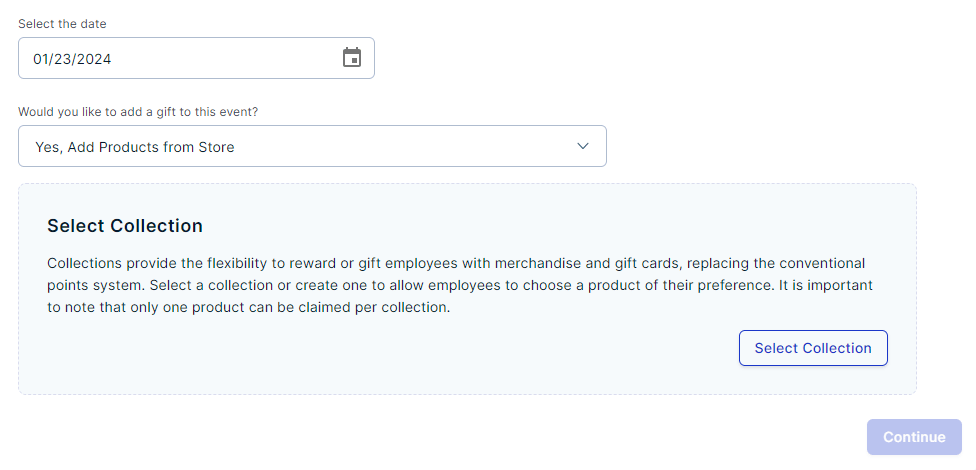
 Choose one of three reward options:
* **Reward points** — Enter the points amount to credit to the recipient's account.
* **Products from the store** — Link a merchandise or gift-card collection (see [Physical and product-based gifts](/admin/gifts/setup-product-based-gifts)).
* **Non-monetary** — Send a personalised greeting without any monetary reward.
Choose one of three reward options:
* **Reward points** — Enter the points amount to credit to the recipient's account.
* **Products from the store** — Link a merchandise or gift-card collection (see [Physical and product-based gifts](/admin/gifts/setup-product-based-gifts)).
* **Non-monetary** — Send a personalised greeting without any monetary reward.
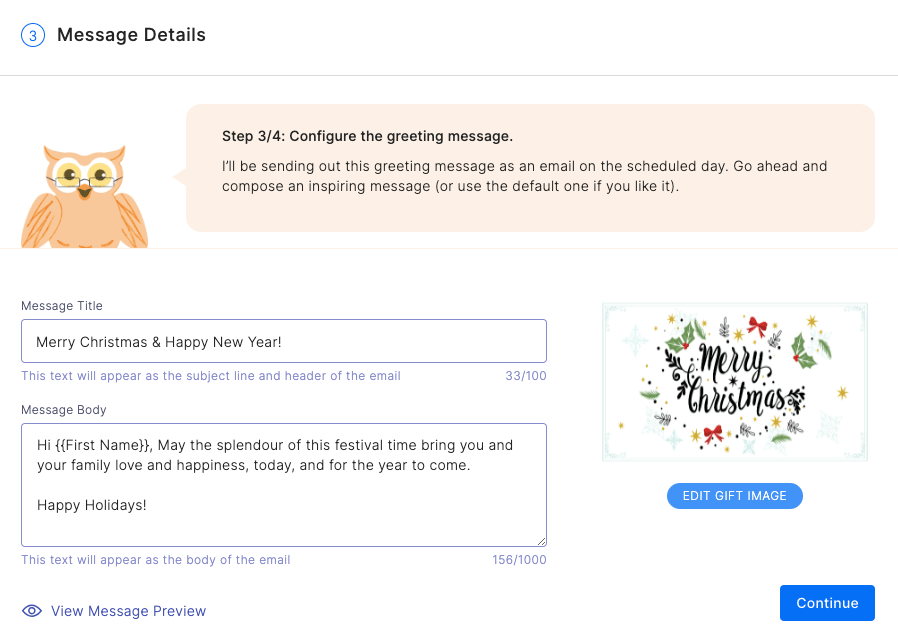
 Write the message title and body. Use placeholders — `{{First Name}}`, `{{completed_year}}`, `{{department}}` — so each recipient gets a personalised message.
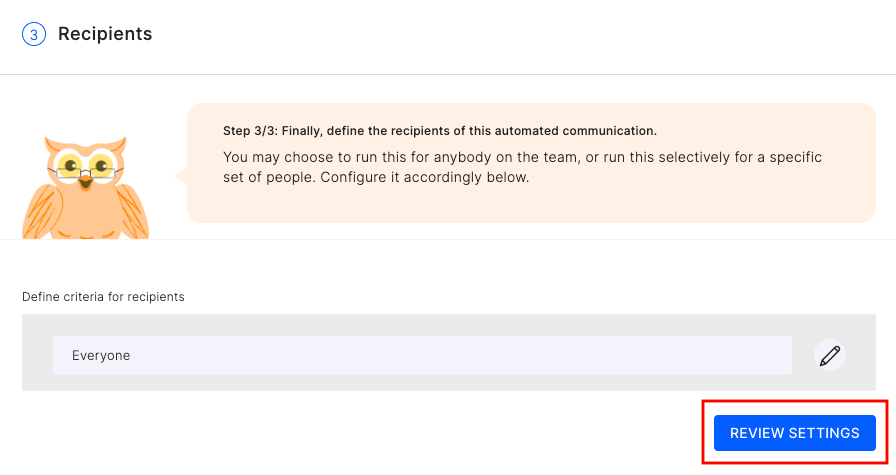
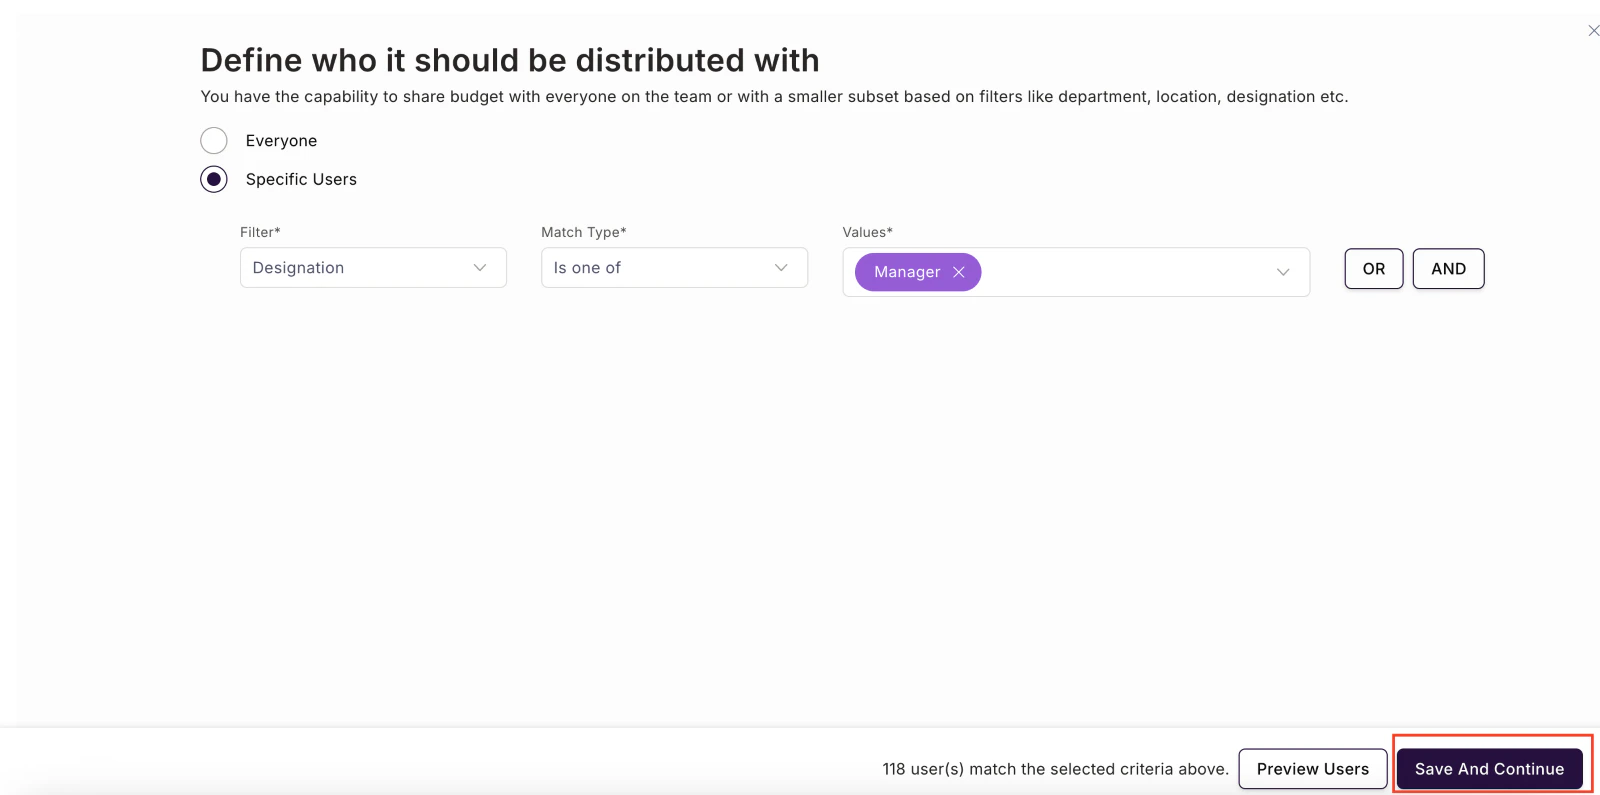
 Specify the audience using filters (department, designation, location, or custom fields). For standard lifecycle events, Empuls determines recipients automatically from employee data. Review the summary and click **Confirm and Create**.
 ## Service award automation (milestone years)
Service awards automatically celebrate employees on their work anniversary milestones — year 1, 3, 5, 10, and beyond. Empuls reads each employee's date of joining from your HRMS and triggers the award on the anniversary date with no manual effort from HR.
Key features of service award automations:
* **Tiered rewards** — Create separate automations for each milestone year with different point values, gift collections, and certificate designs.
* **Yearbook** — A digital keepsake compiled from all feed posts and wishes on the anniversary day.
* **Wishboard** — Colleagues post personalised messages; AI suggestions make it quick for busy teammates.
* **Branded certificates** — Downloadable certificate templates tailored to each milestone year.
* **Multi-channel notifications** — Award winners are notified via Microsoft Teams, Slack, and email (based on your integrations).
### Set up a service award automation
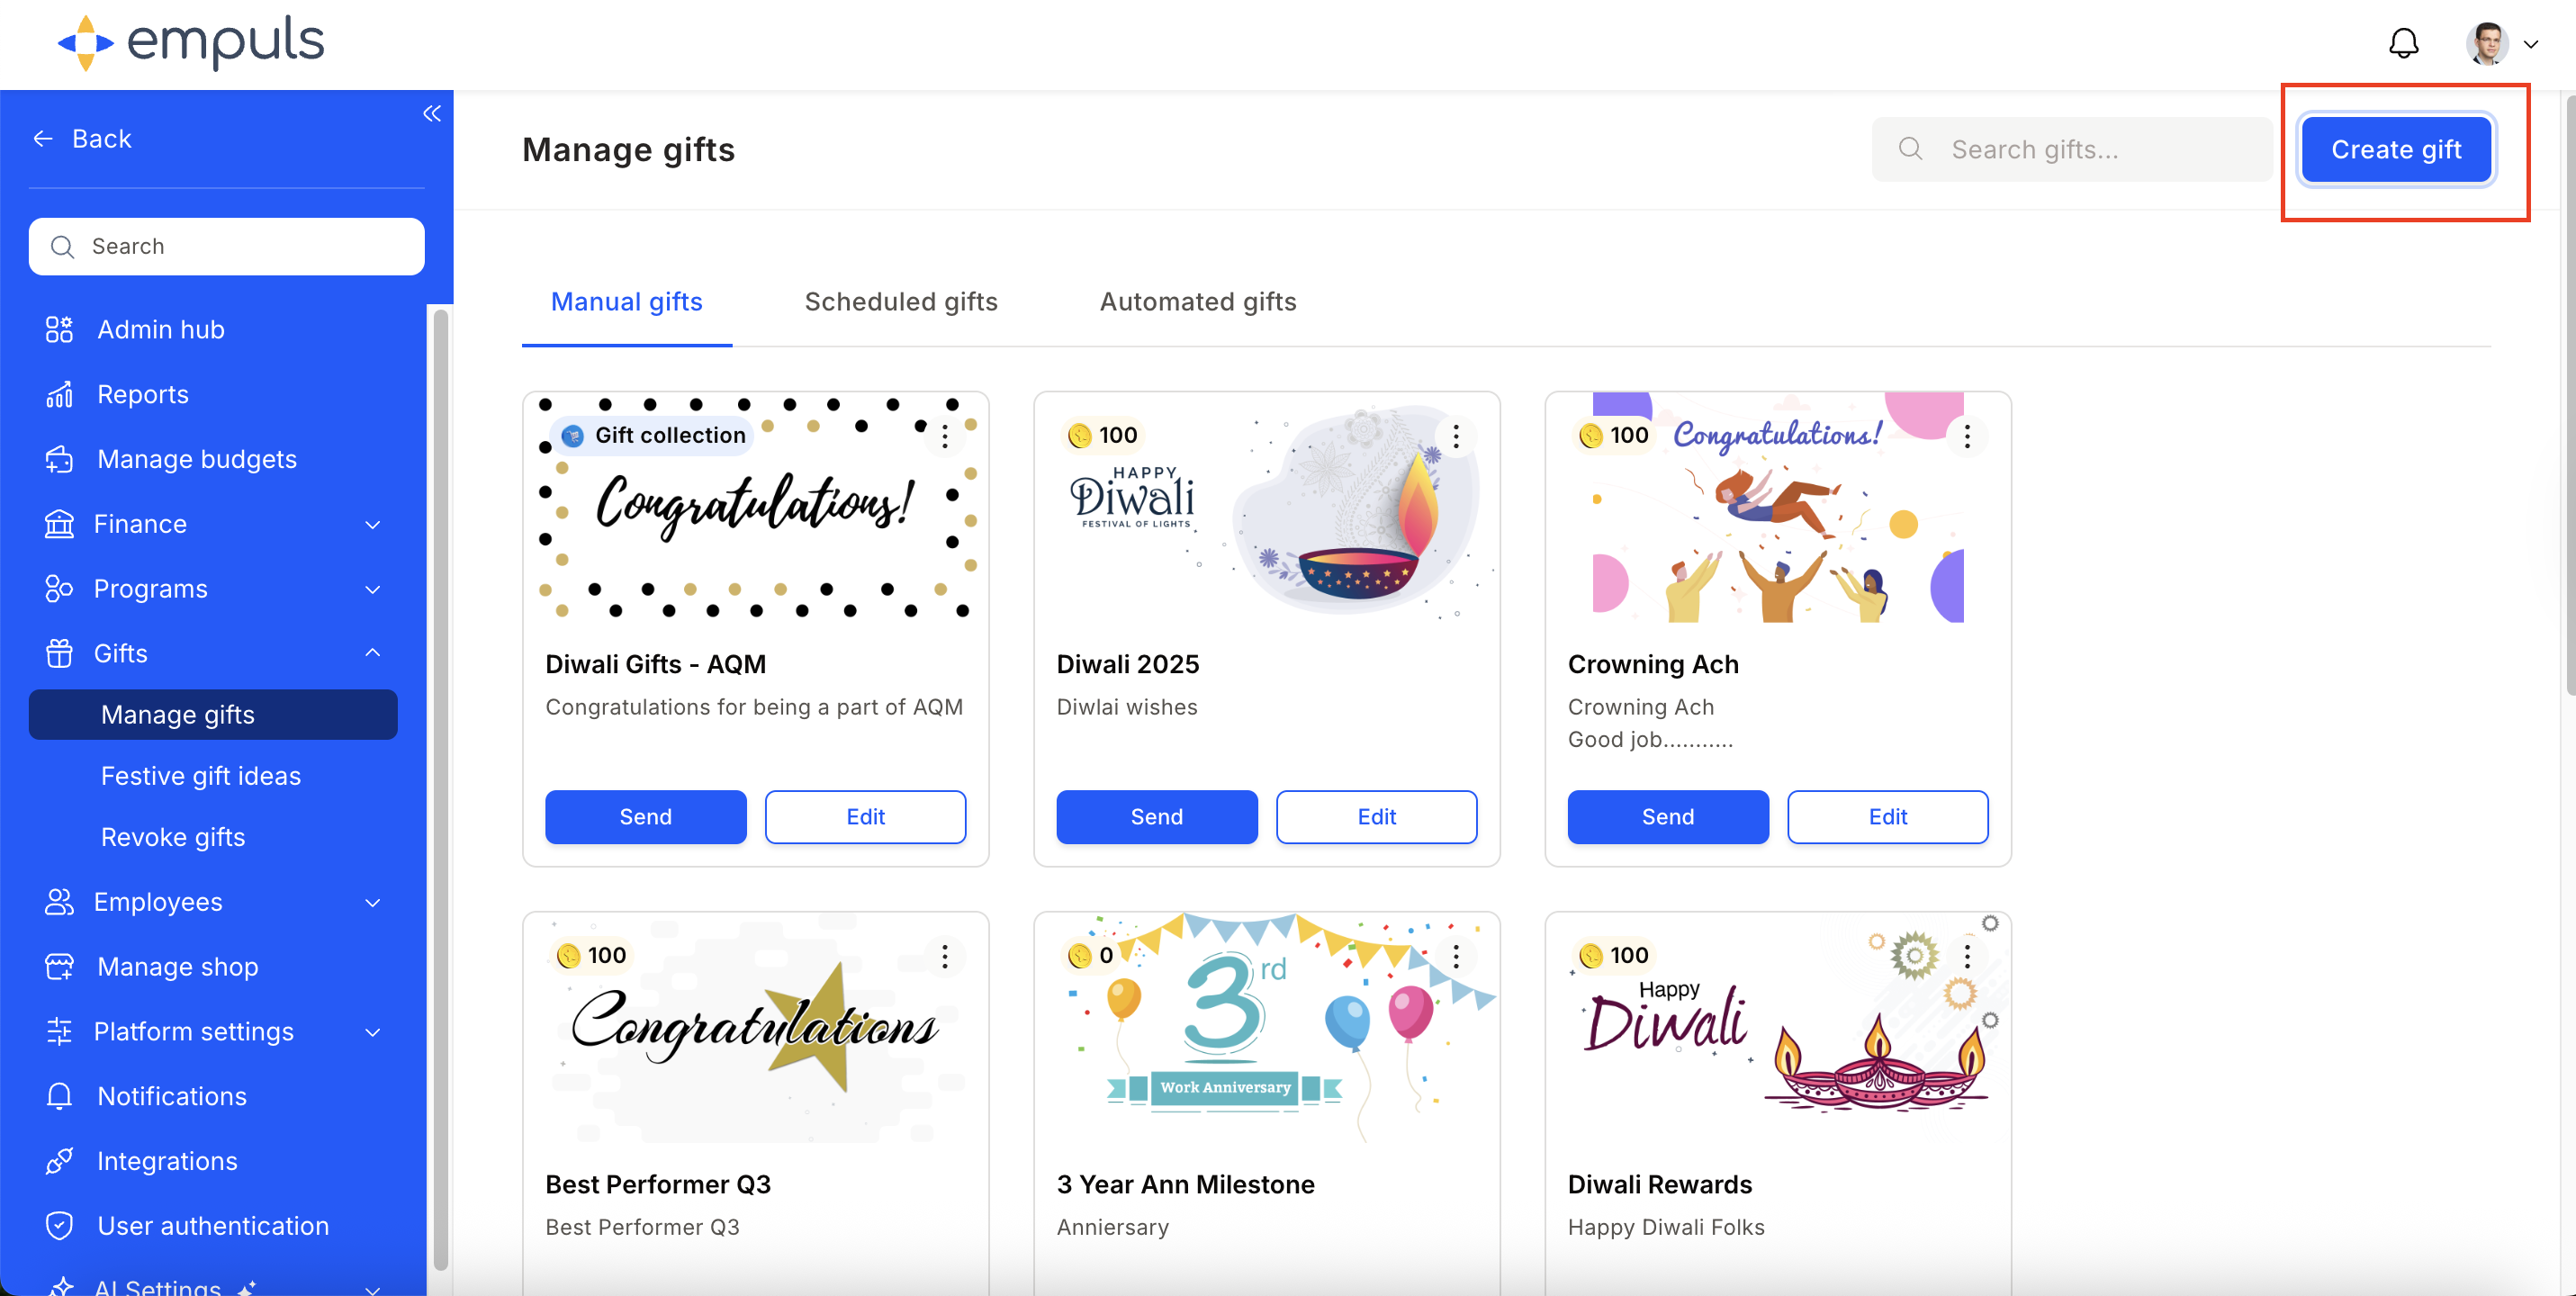
Go to **Admin Dashboard > Gifts > Manage Gifts > Create Gift** and select **Automate**.
## Service award automation (milestone years)
Service awards automatically celebrate employees on their work anniversary milestones — year 1, 3, 5, 10, and beyond. Empuls reads each employee's date of joining from your HRMS and triggers the award on the anniversary date with no manual effort from HR.
Key features of service award automations:
* **Tiered rewards** — Create separate automations for each milestone year with different point values, gift collections, and certificate designs.
* **Yearbook** — A digital keepsake compiled from all feed posts and wishes on the anniversary day.
* **Wishboard** — Colleagues post personalised messages; AI suggestions make it quick for busy teammates.
* **Branded certificates** — Downloadable certificate templates tailored to each milestone year.
* **Multi-channel notifications** — Award winners are notified via Microsoft Teams, Slack, and email (based on your integrations).
### Set up a service award automation
Go to **Admin Dashboard > Gifts > Manage Gifts > Create Gift** and select **Automate**.
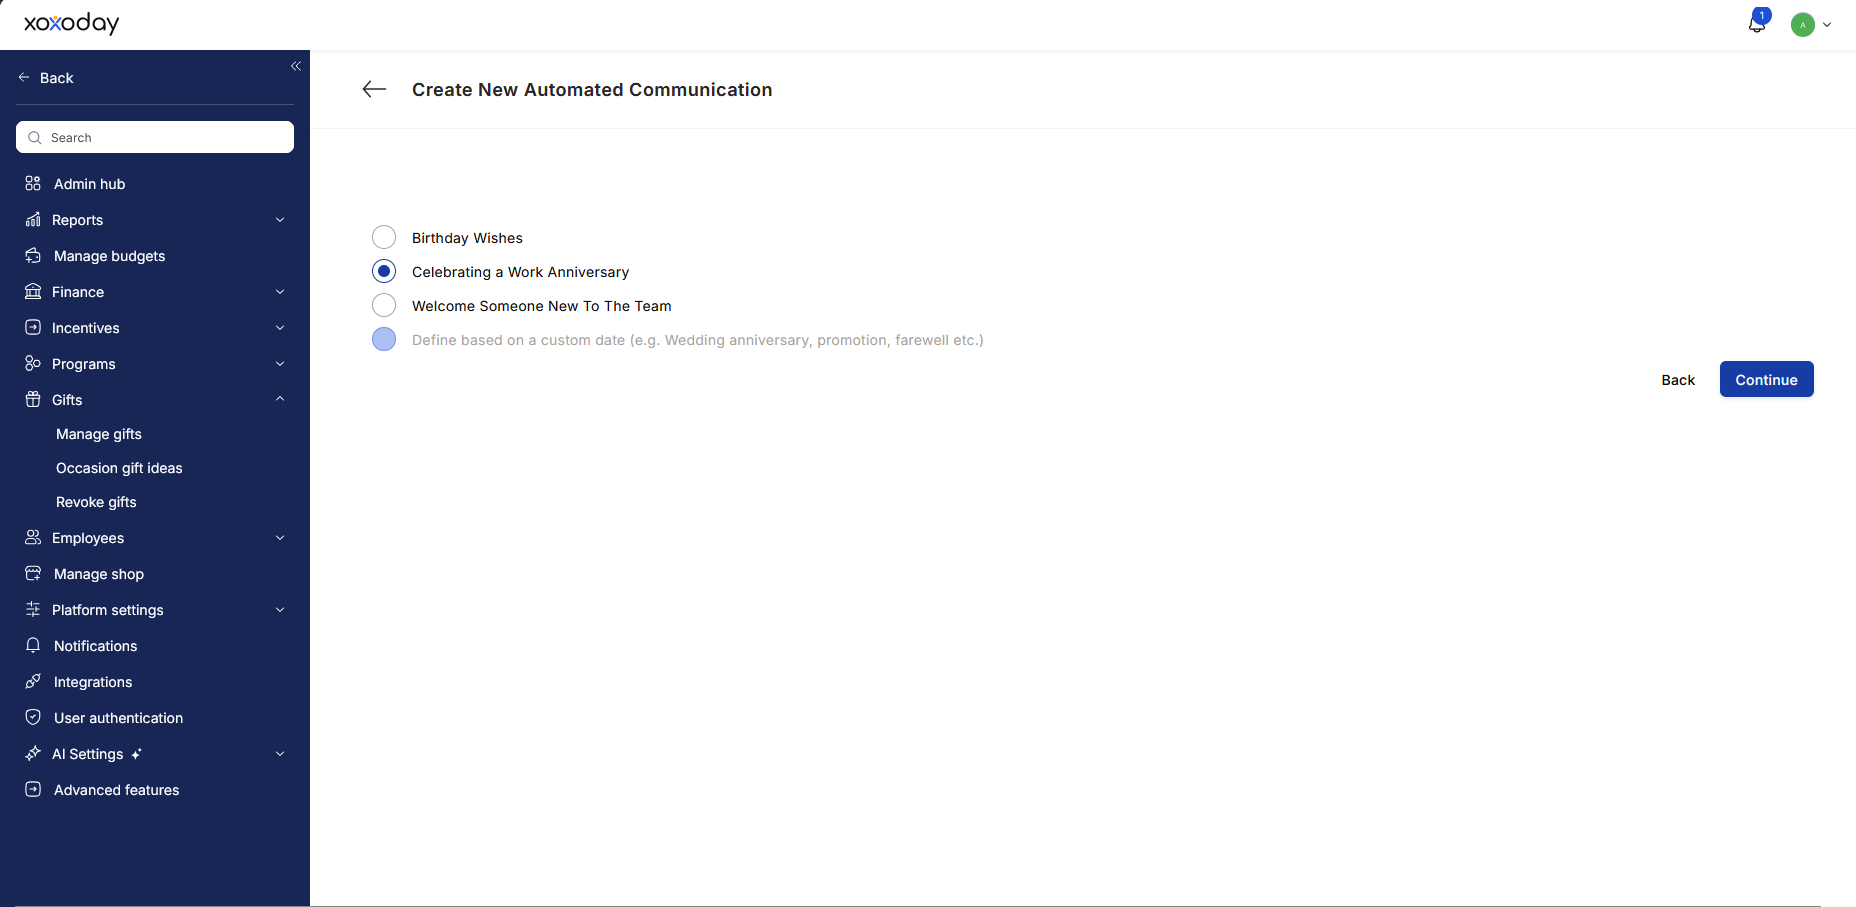
 Click **Let's Begin**, then select **Celebrating a Work Anniversary** from the event template list. Click **Continue**.
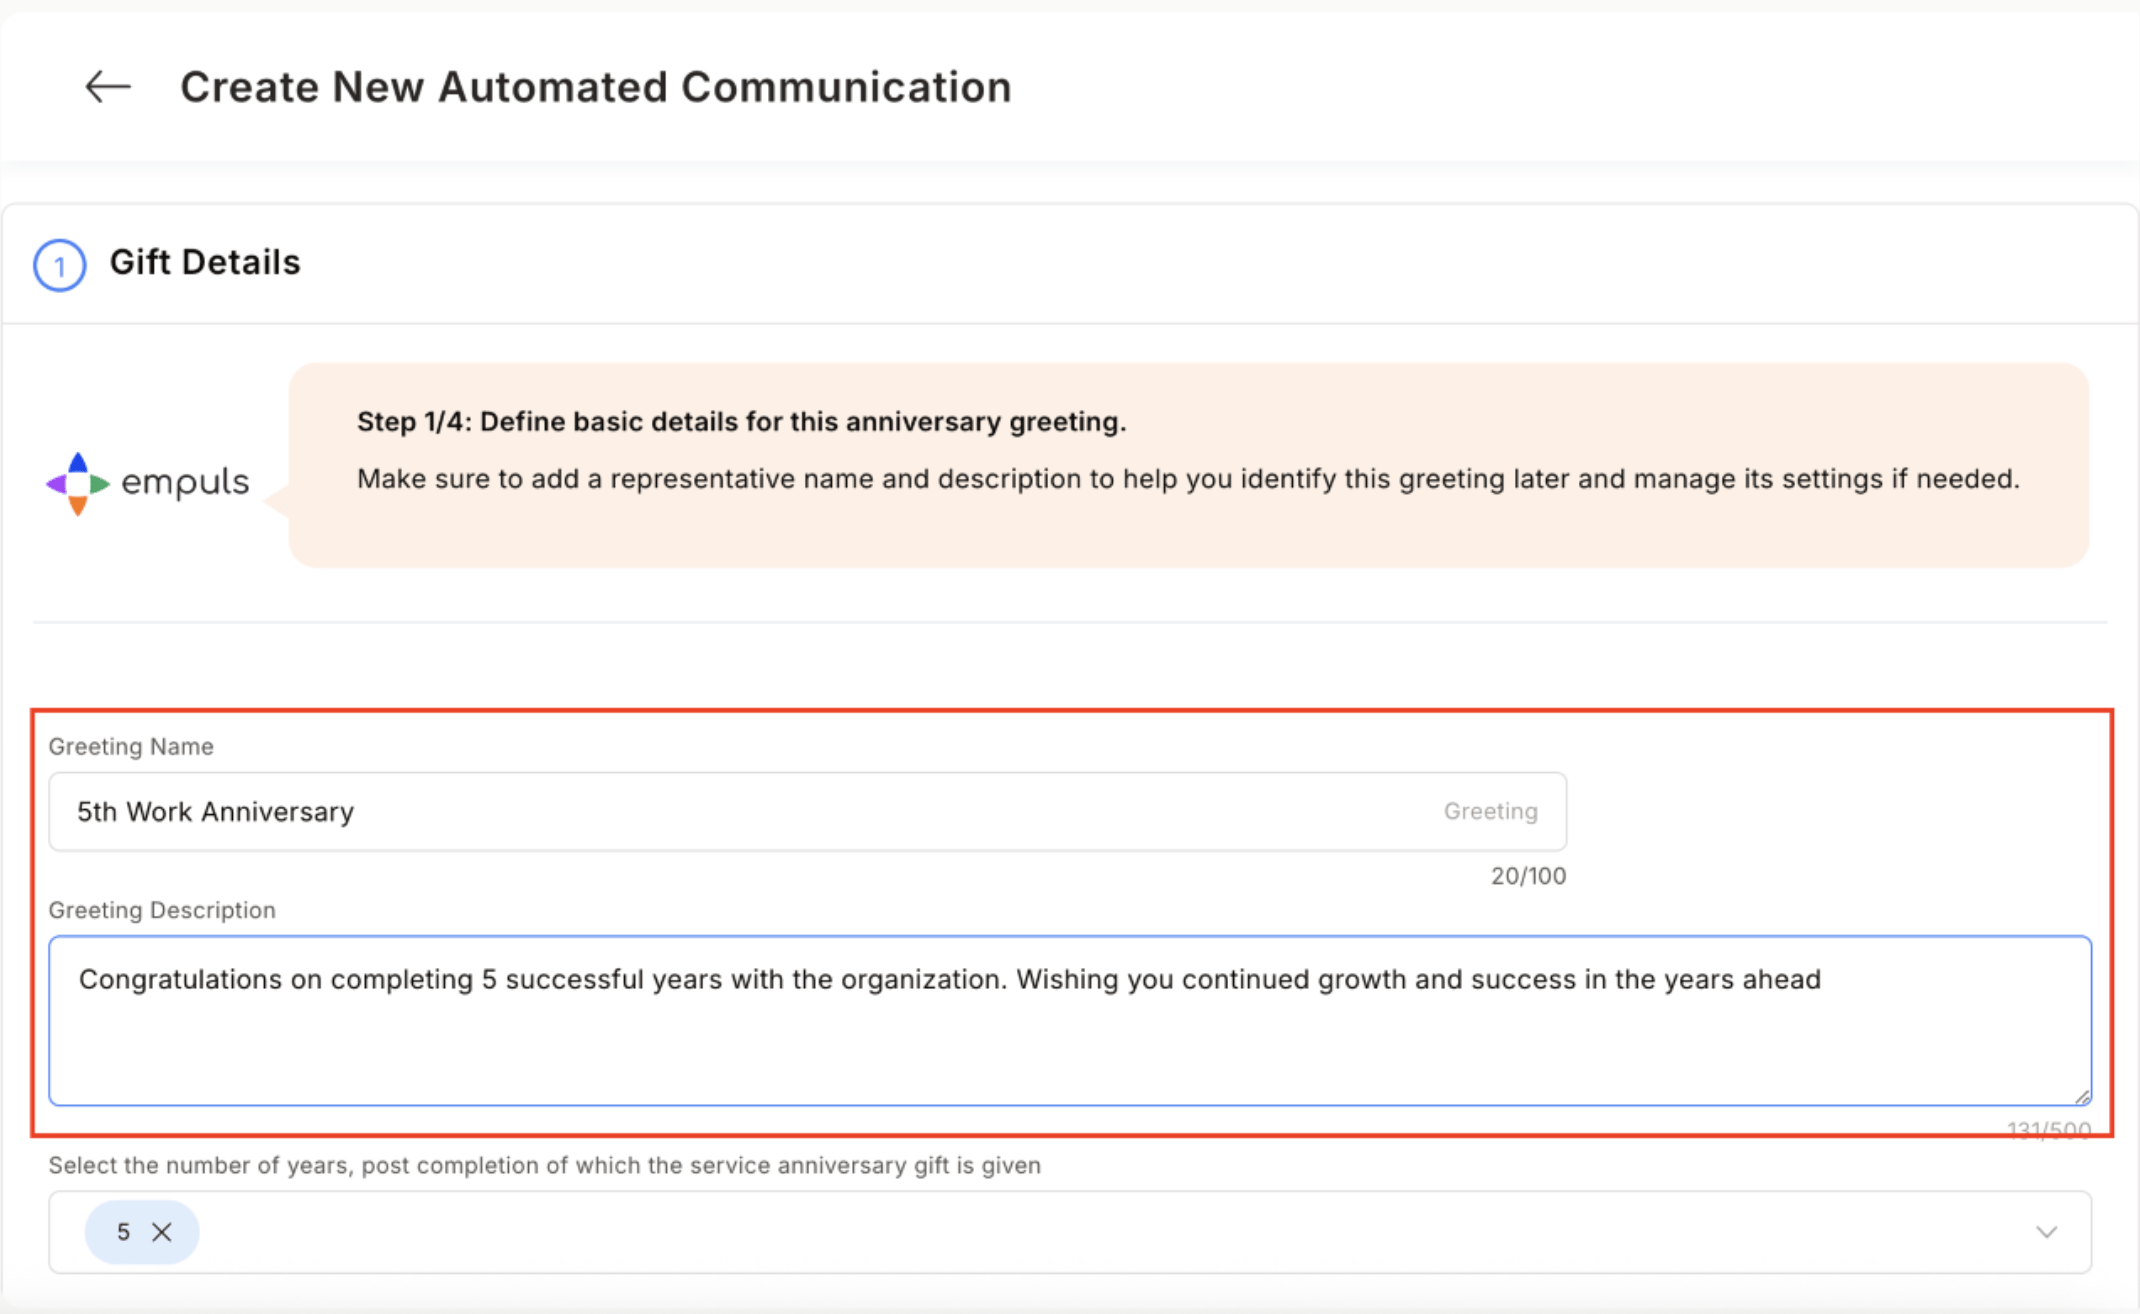
 Enter a **Gift Name** and **Description** (e.g., "5-Year Work Anniversary Award"). Select the anniversary milestone year from the dropdown (1, 3, 5, 10, or a custom value). Add stakeholder notifications if needed.
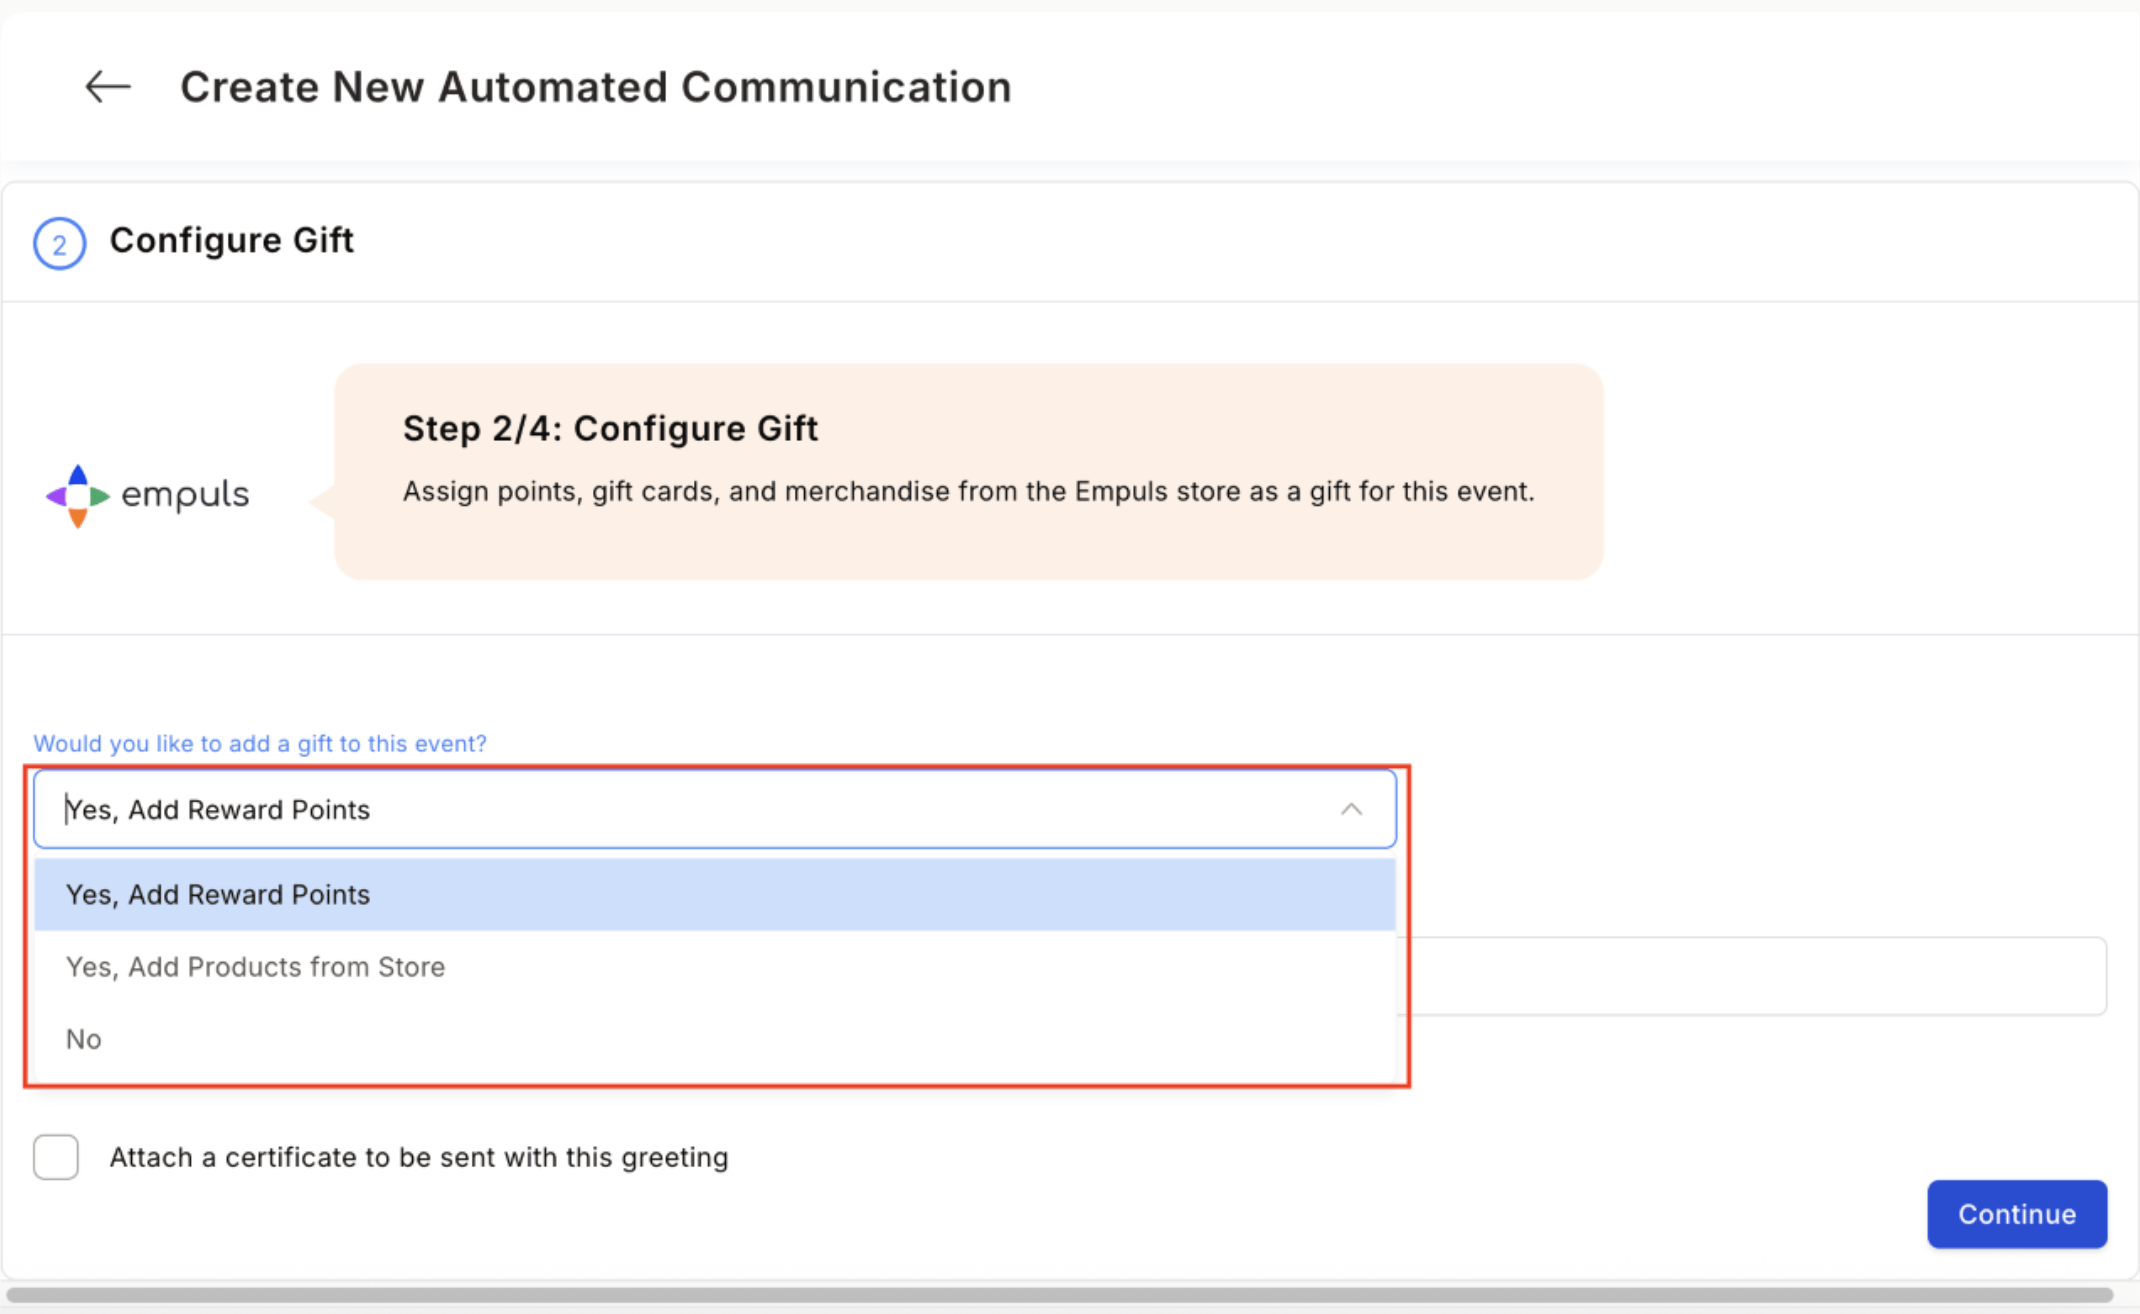
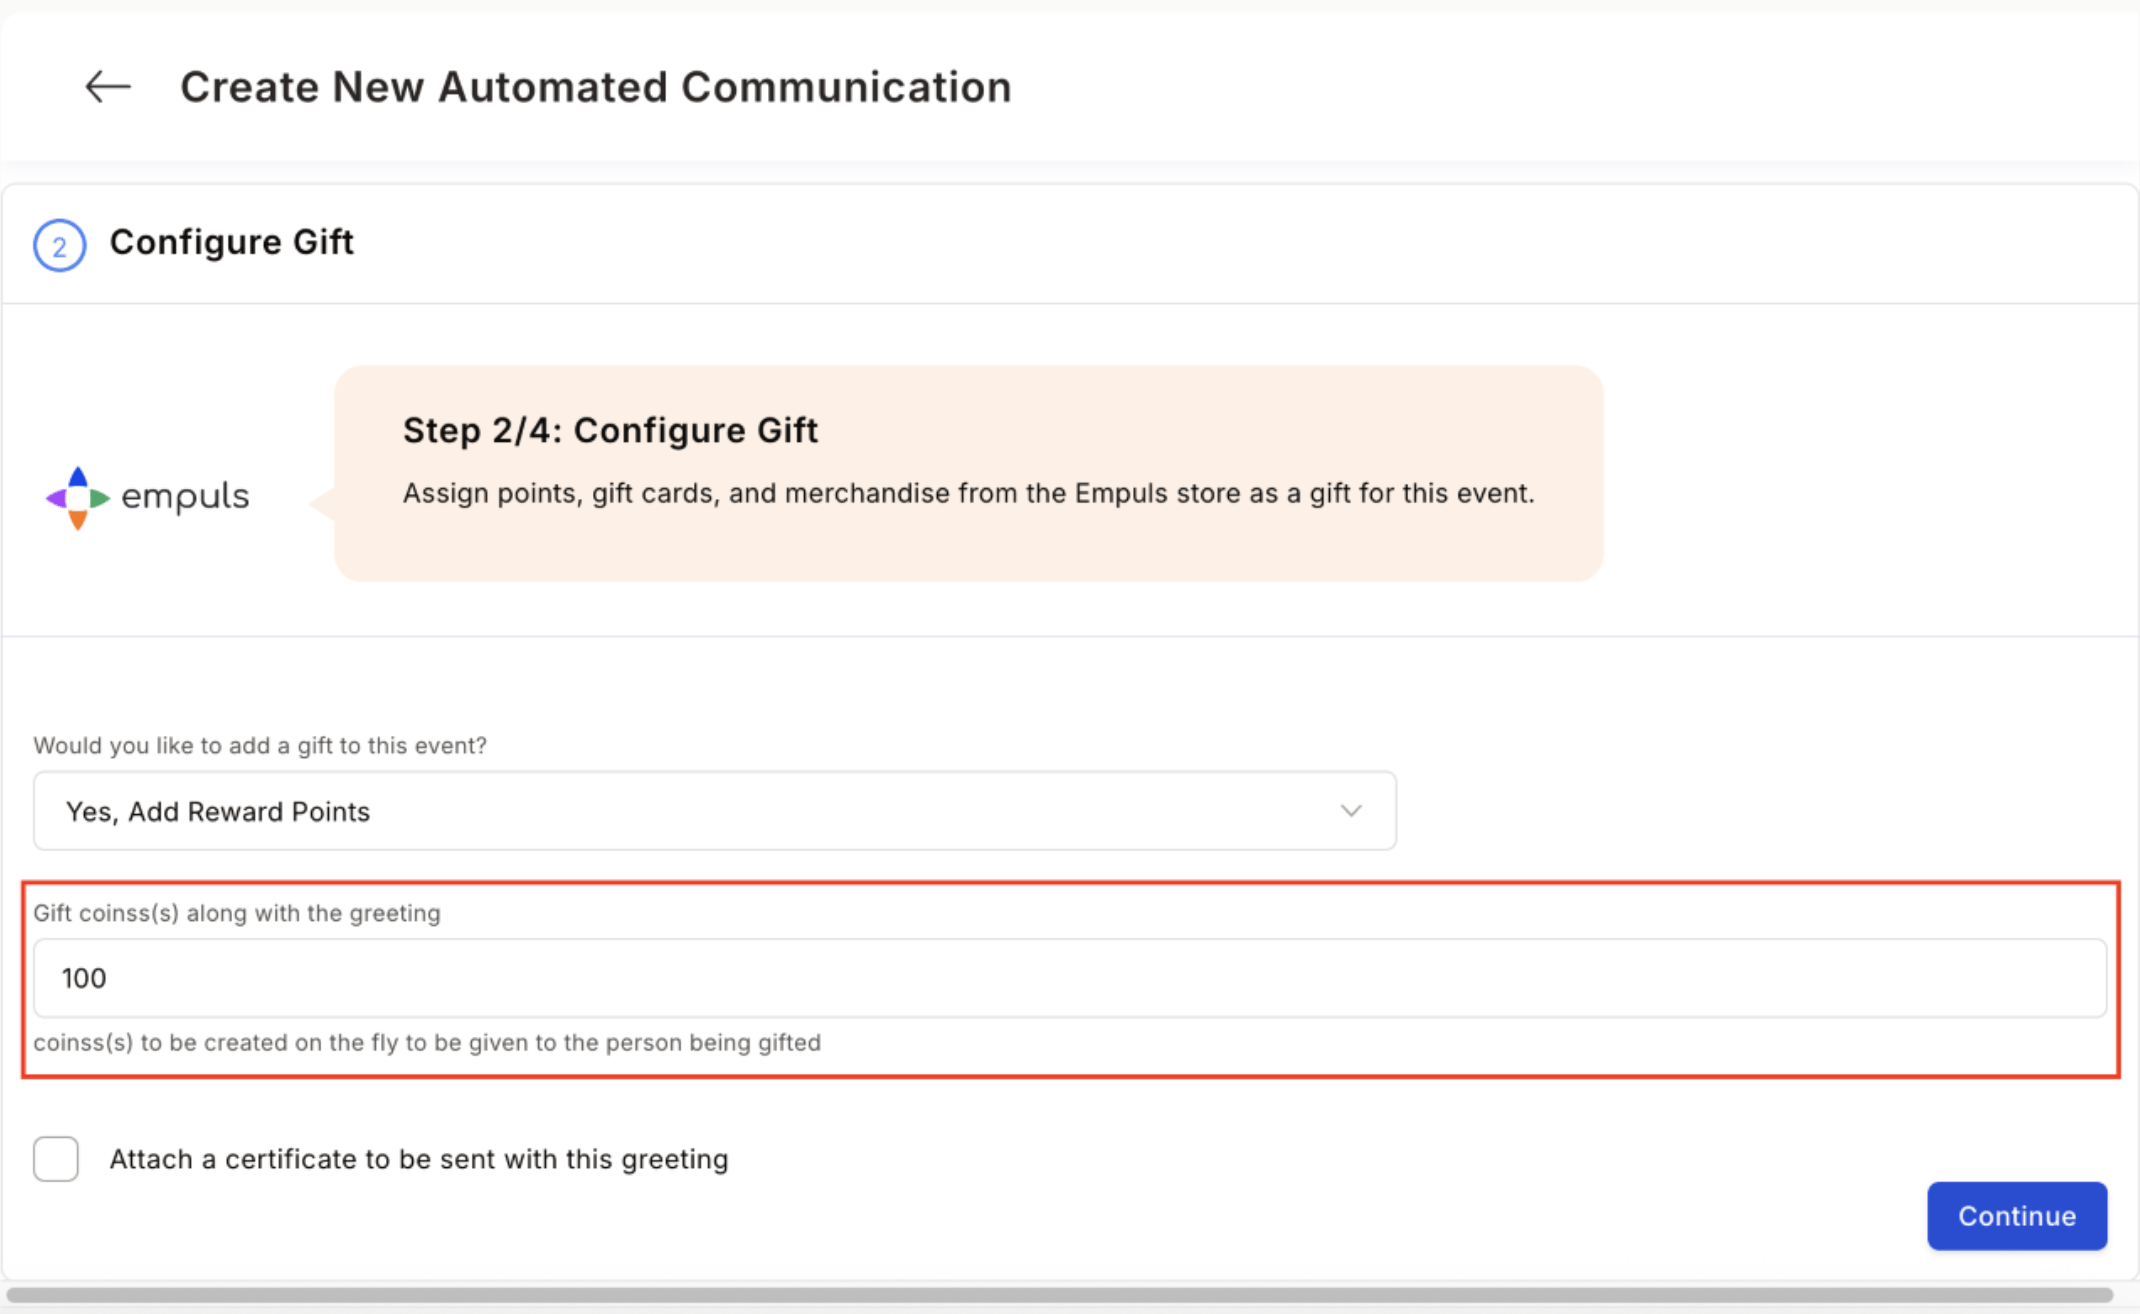
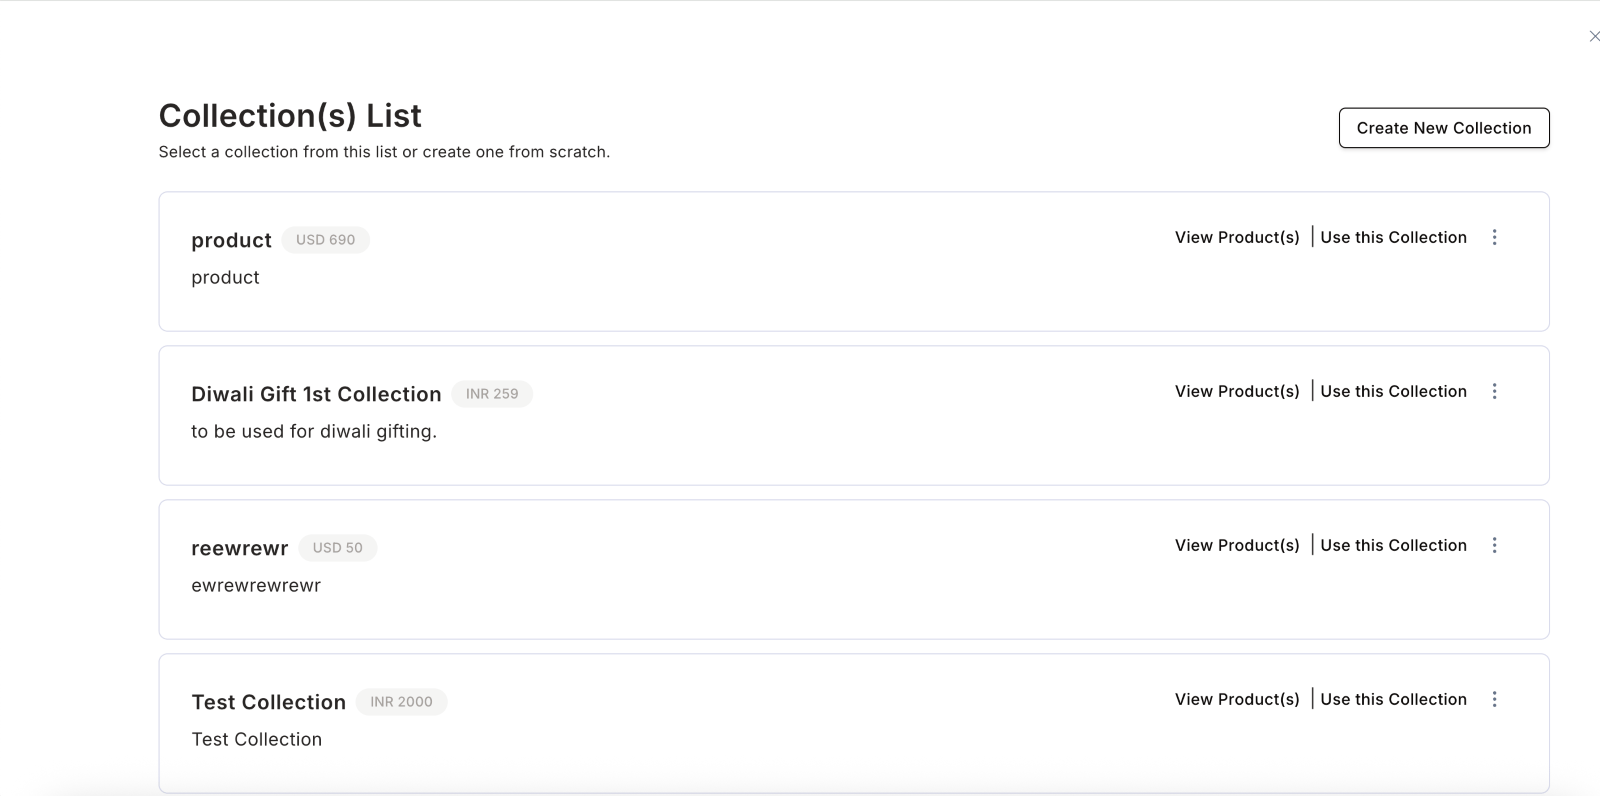
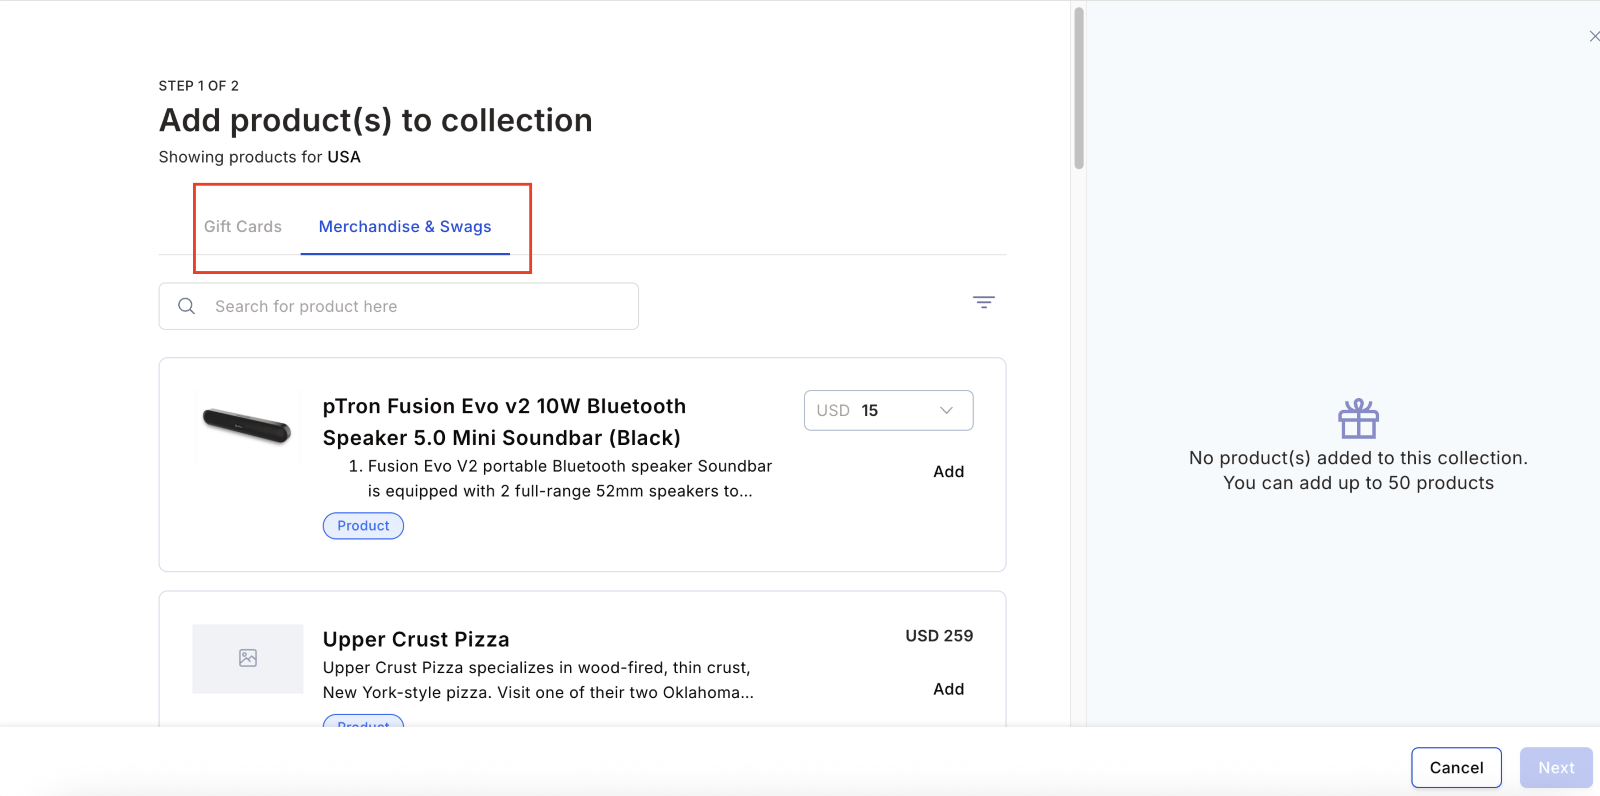
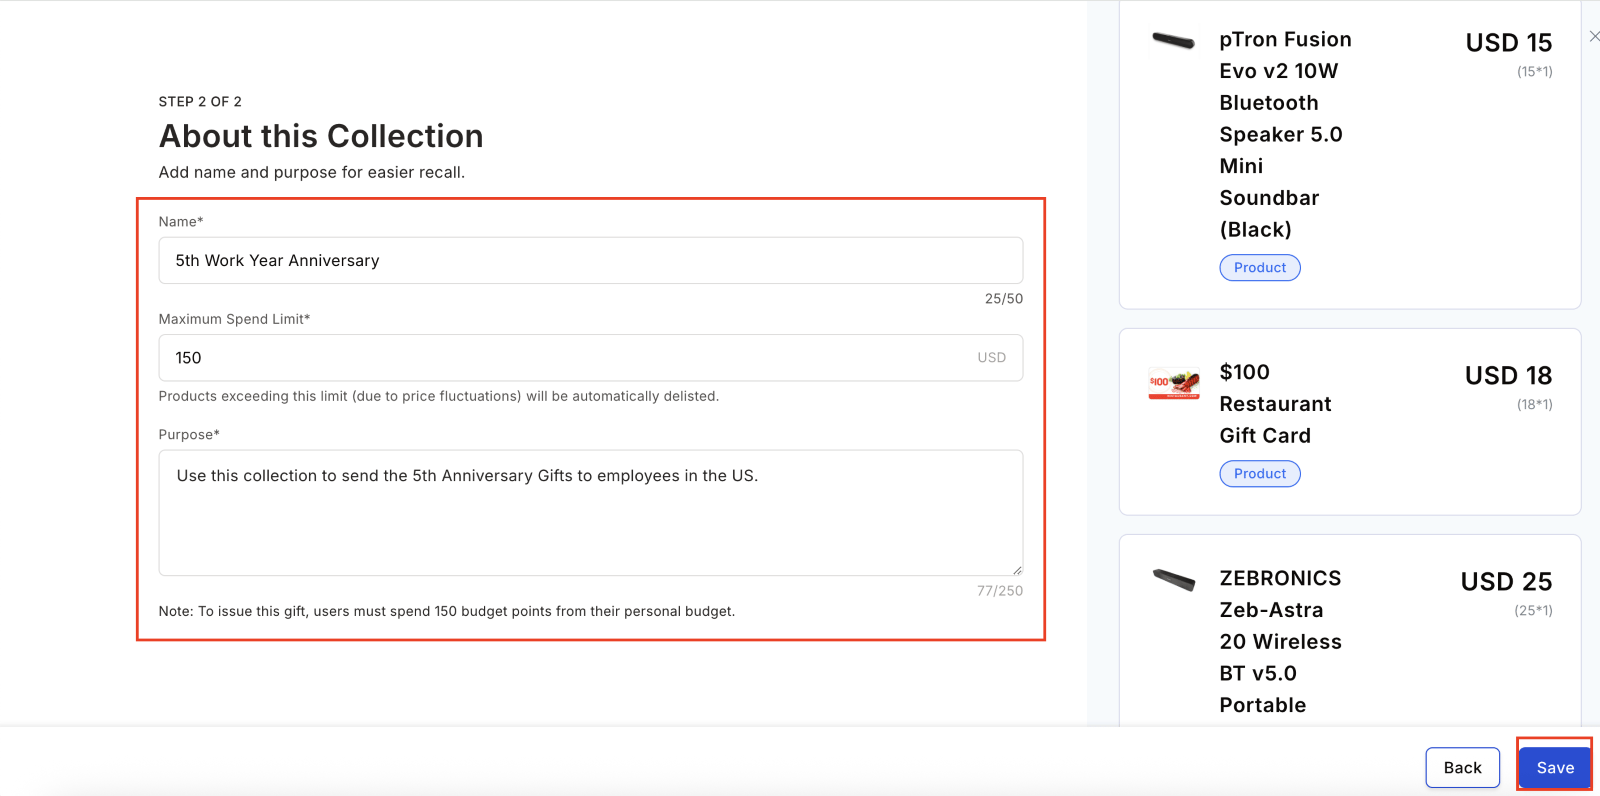
 Choose **Reward points** or **Products from the store**. For products, select or create a gift collection filtered by country for region-specific relevance.
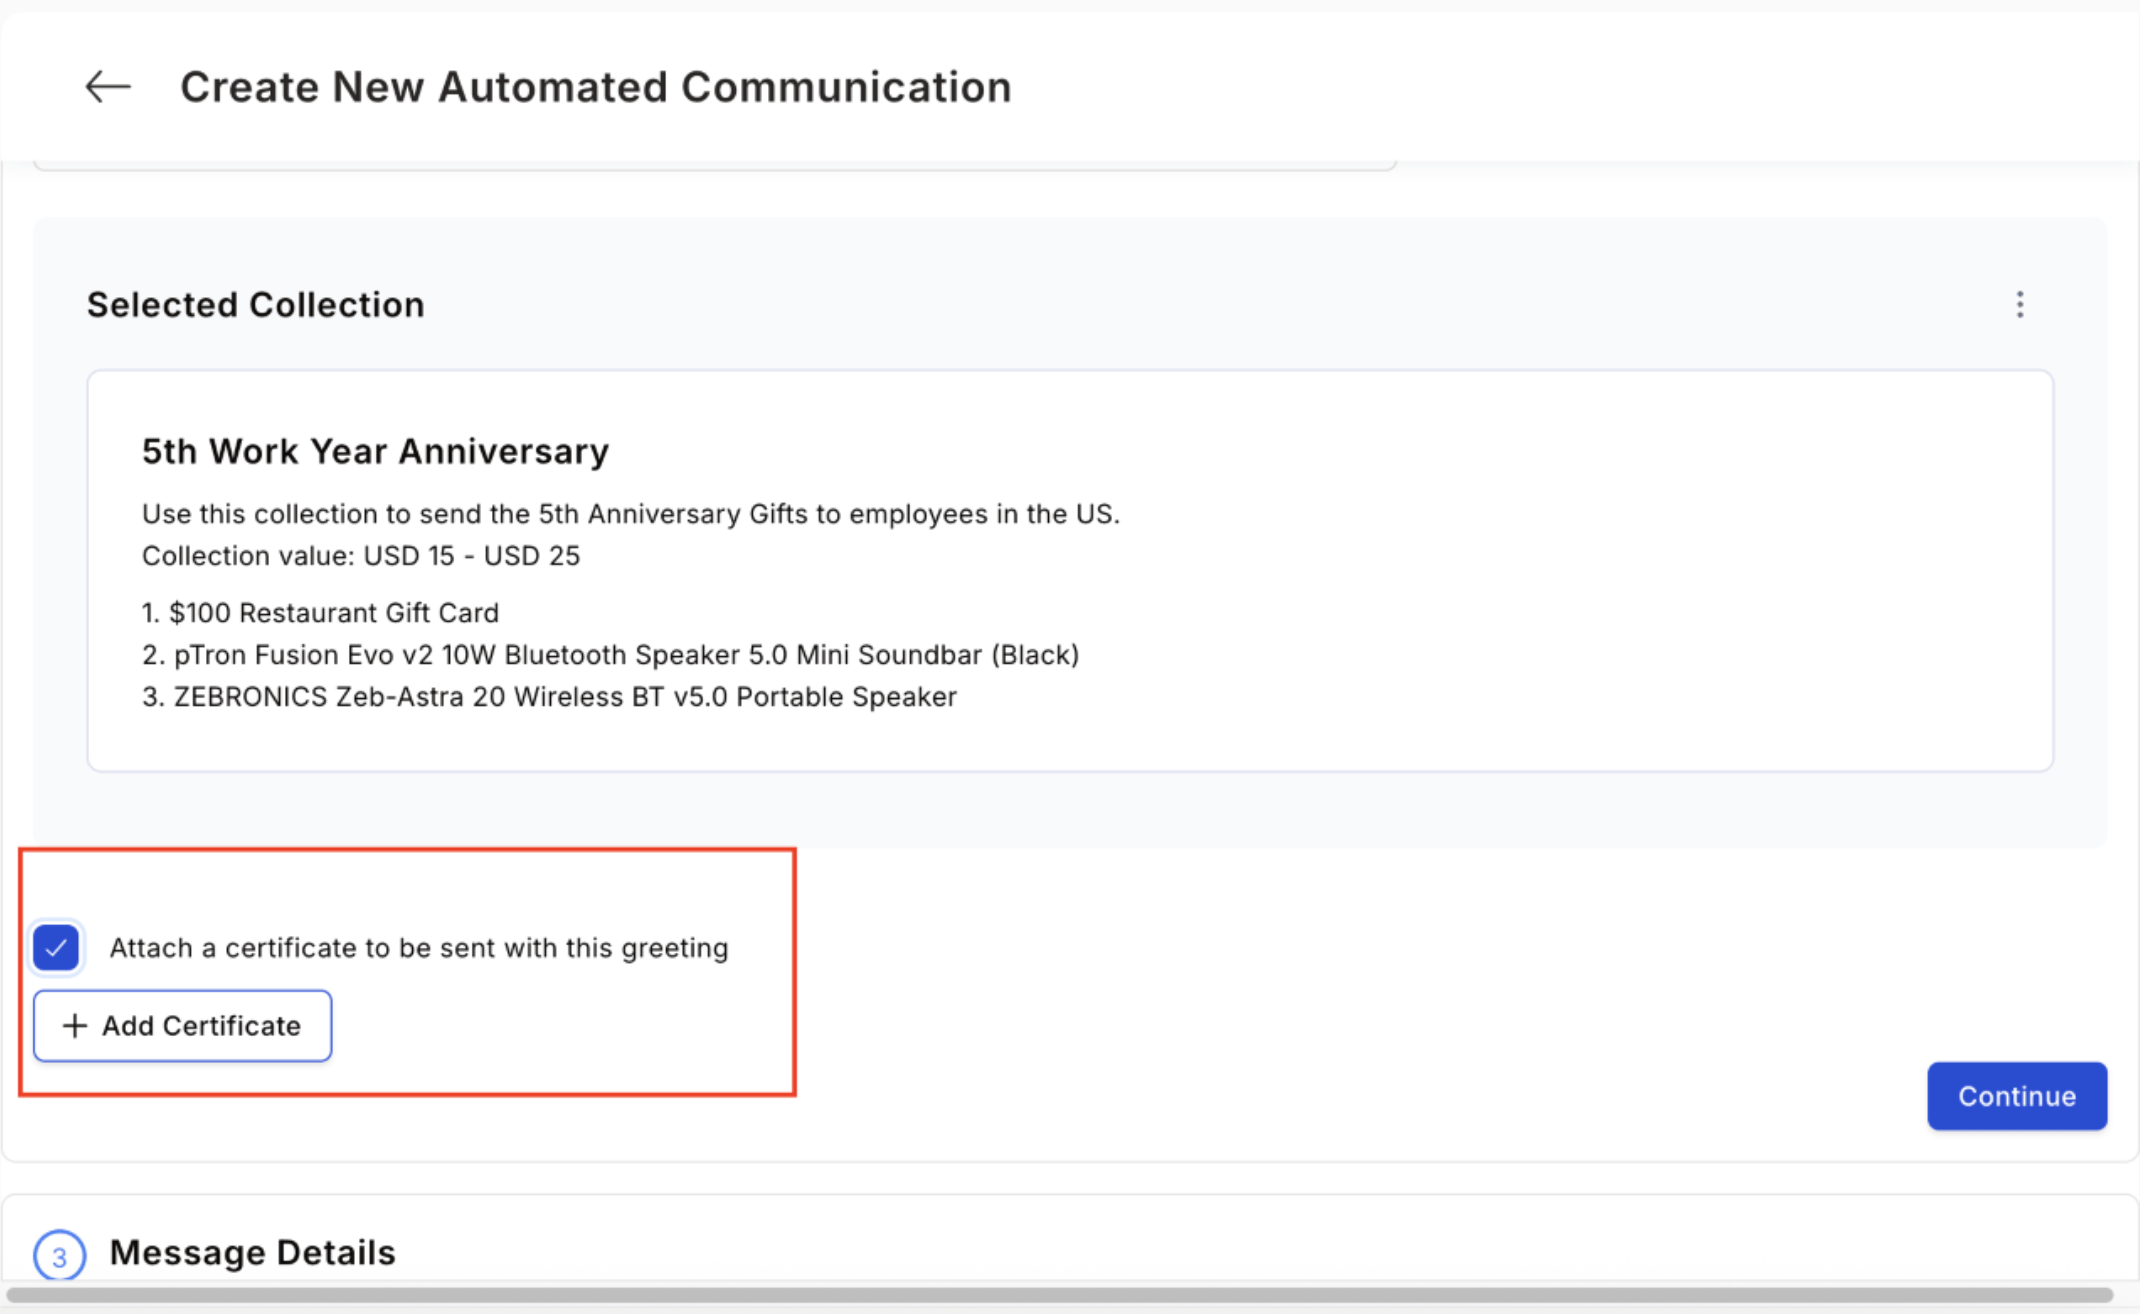
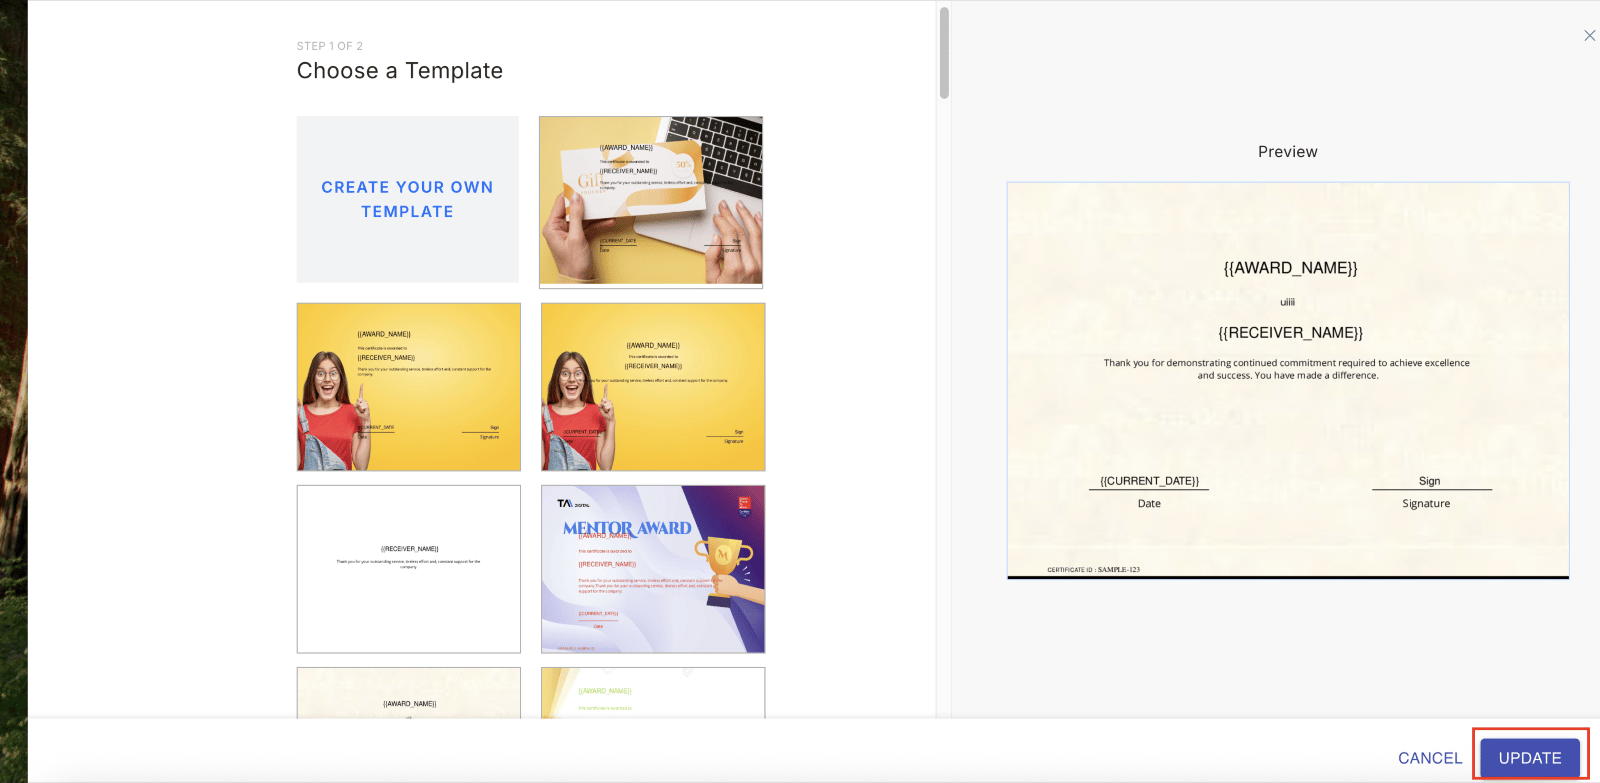
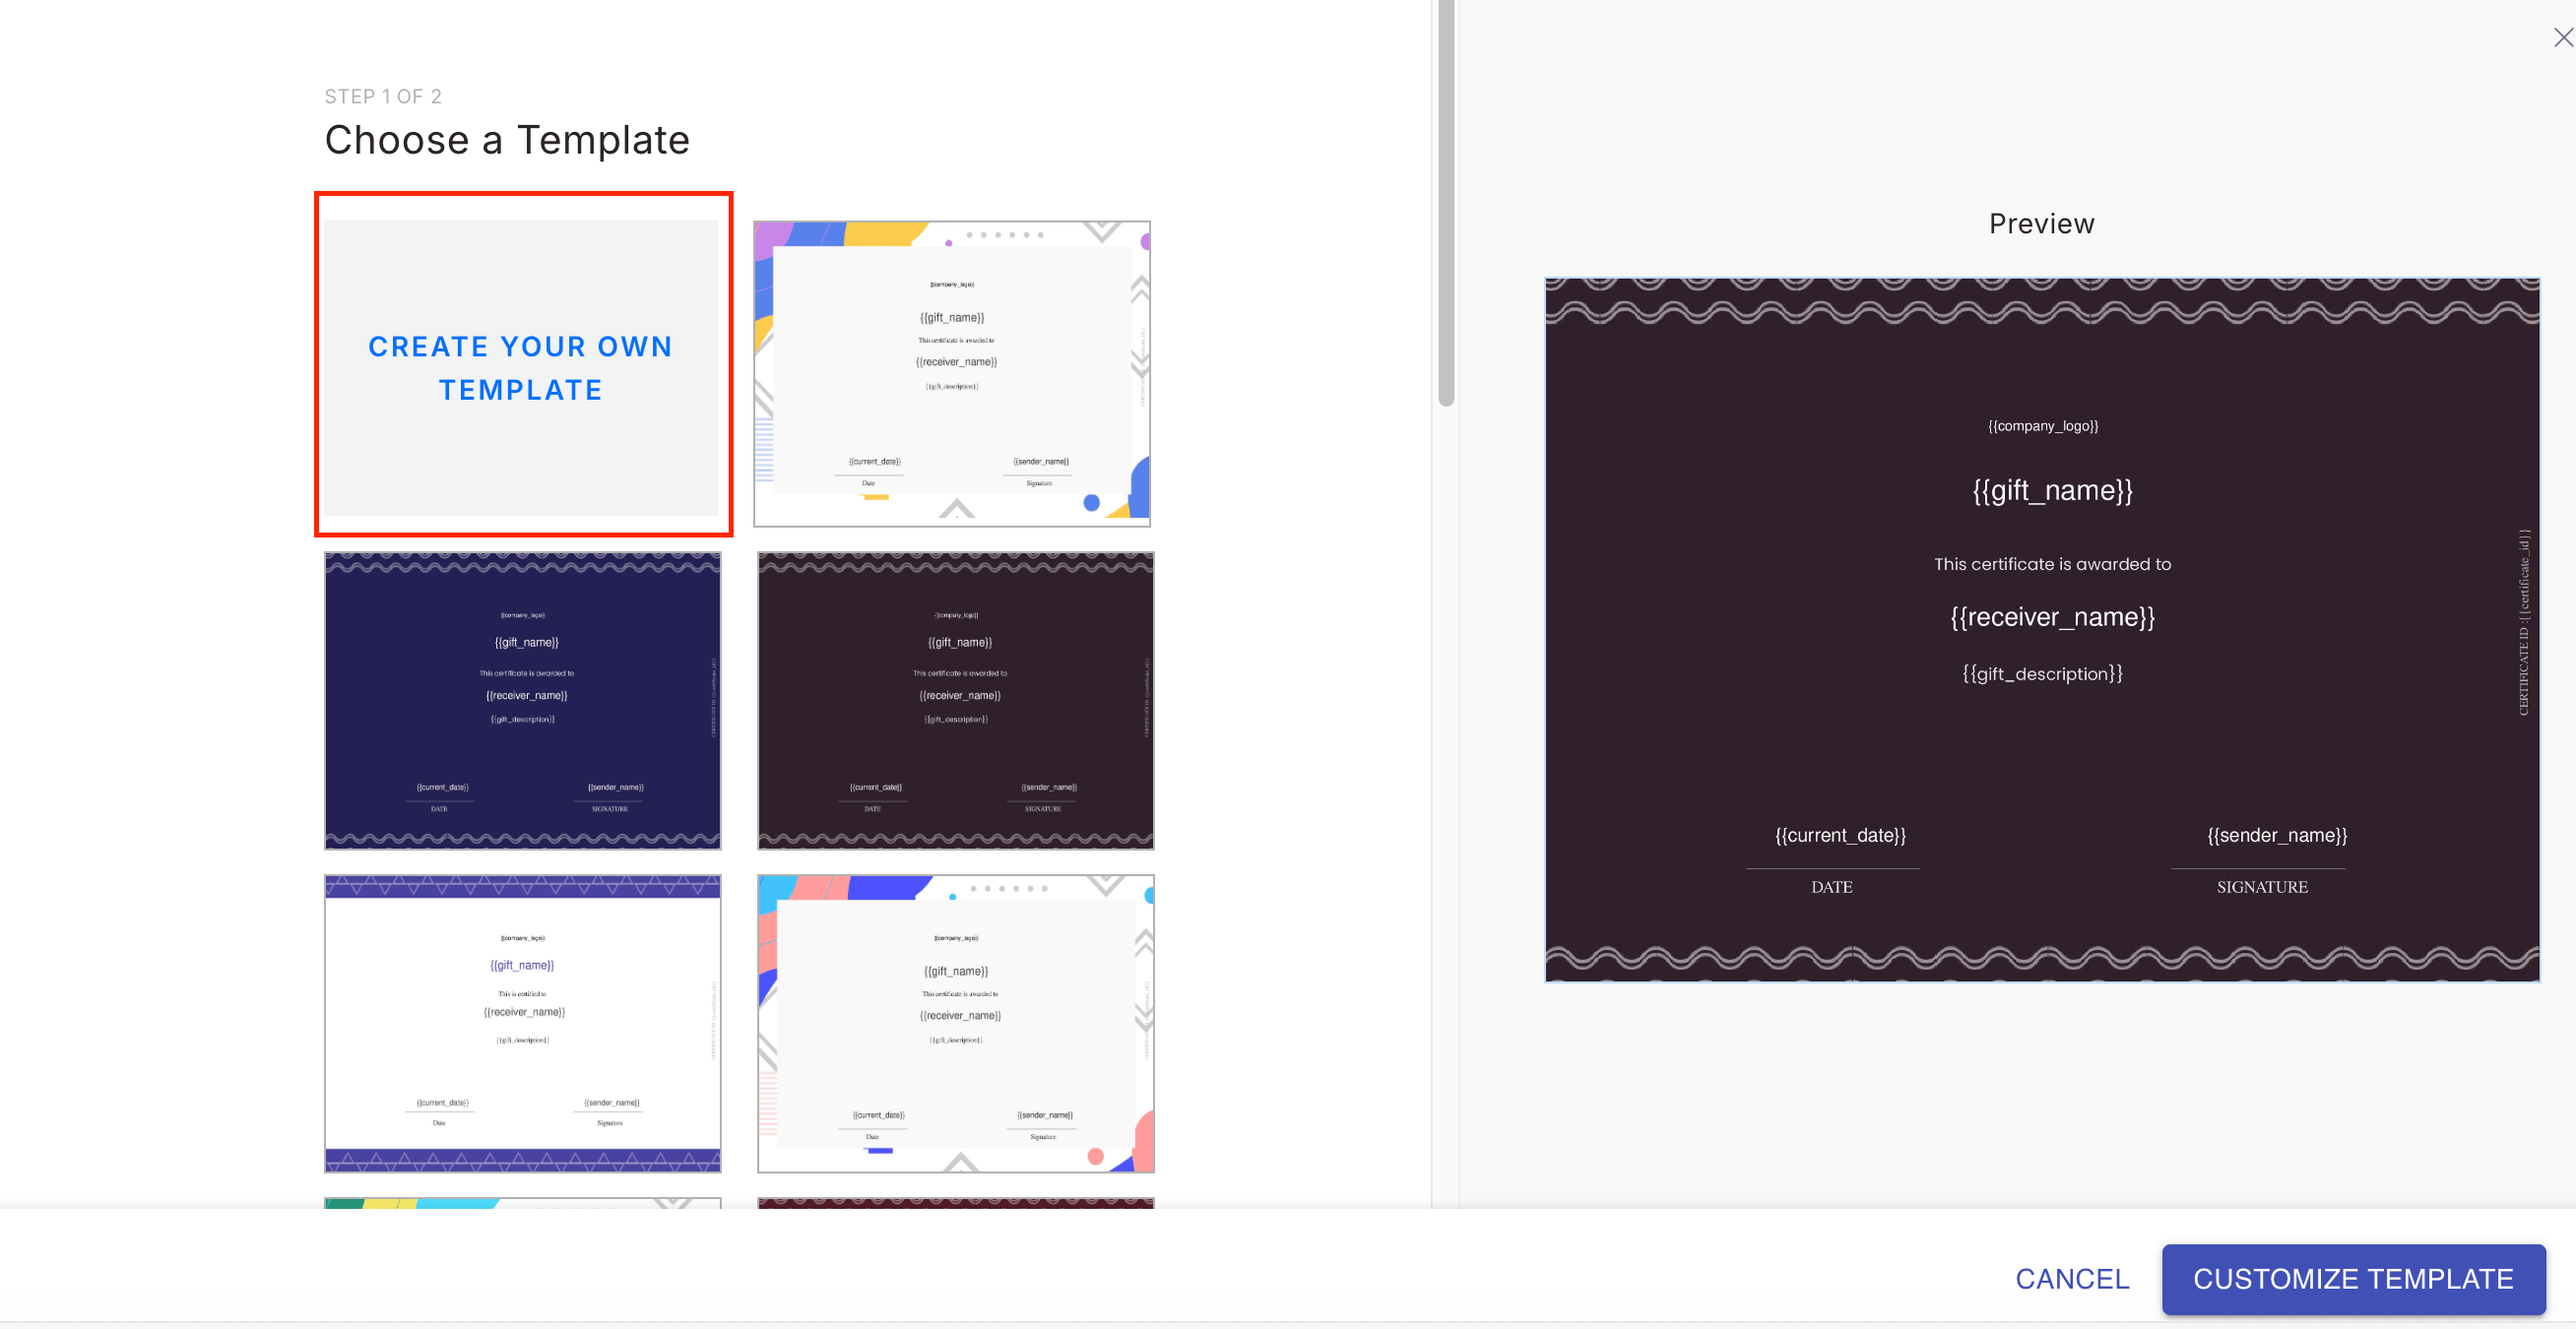
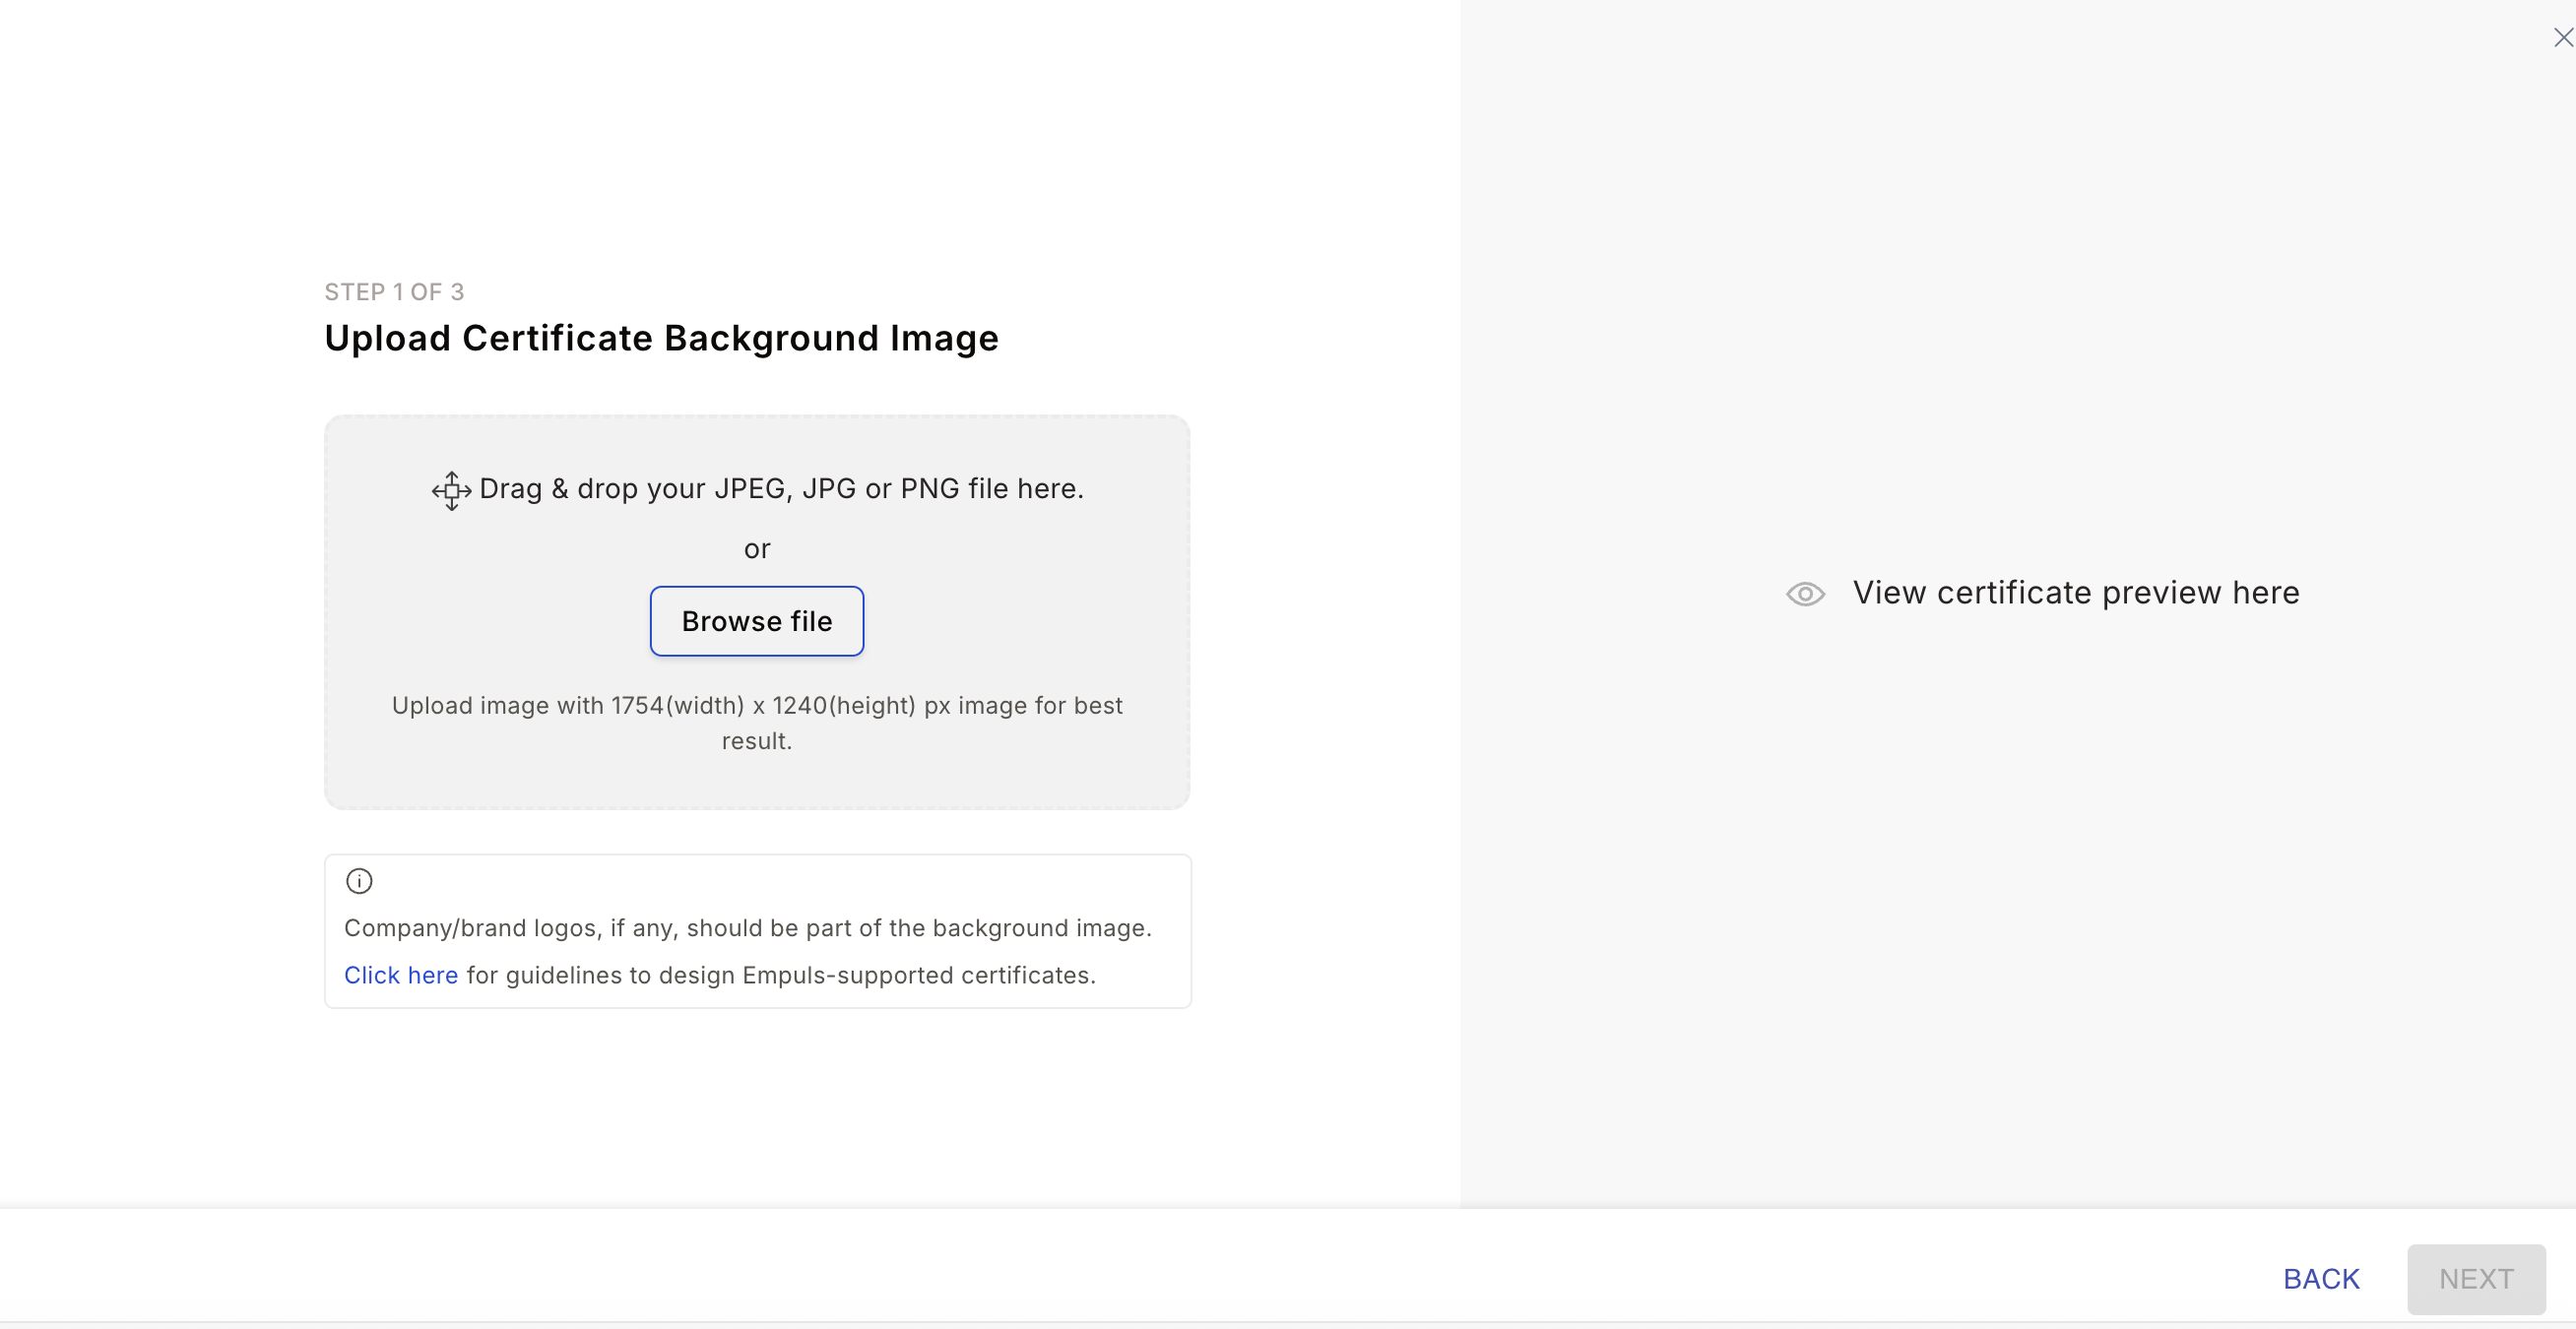
 Check the box to include a certificate. Click **+ Add Certificate**, choose a template or upload a custom design, preview it, and click **Continue**. Use `{{completed_year}}` in the message to automatically insert the number of years served.
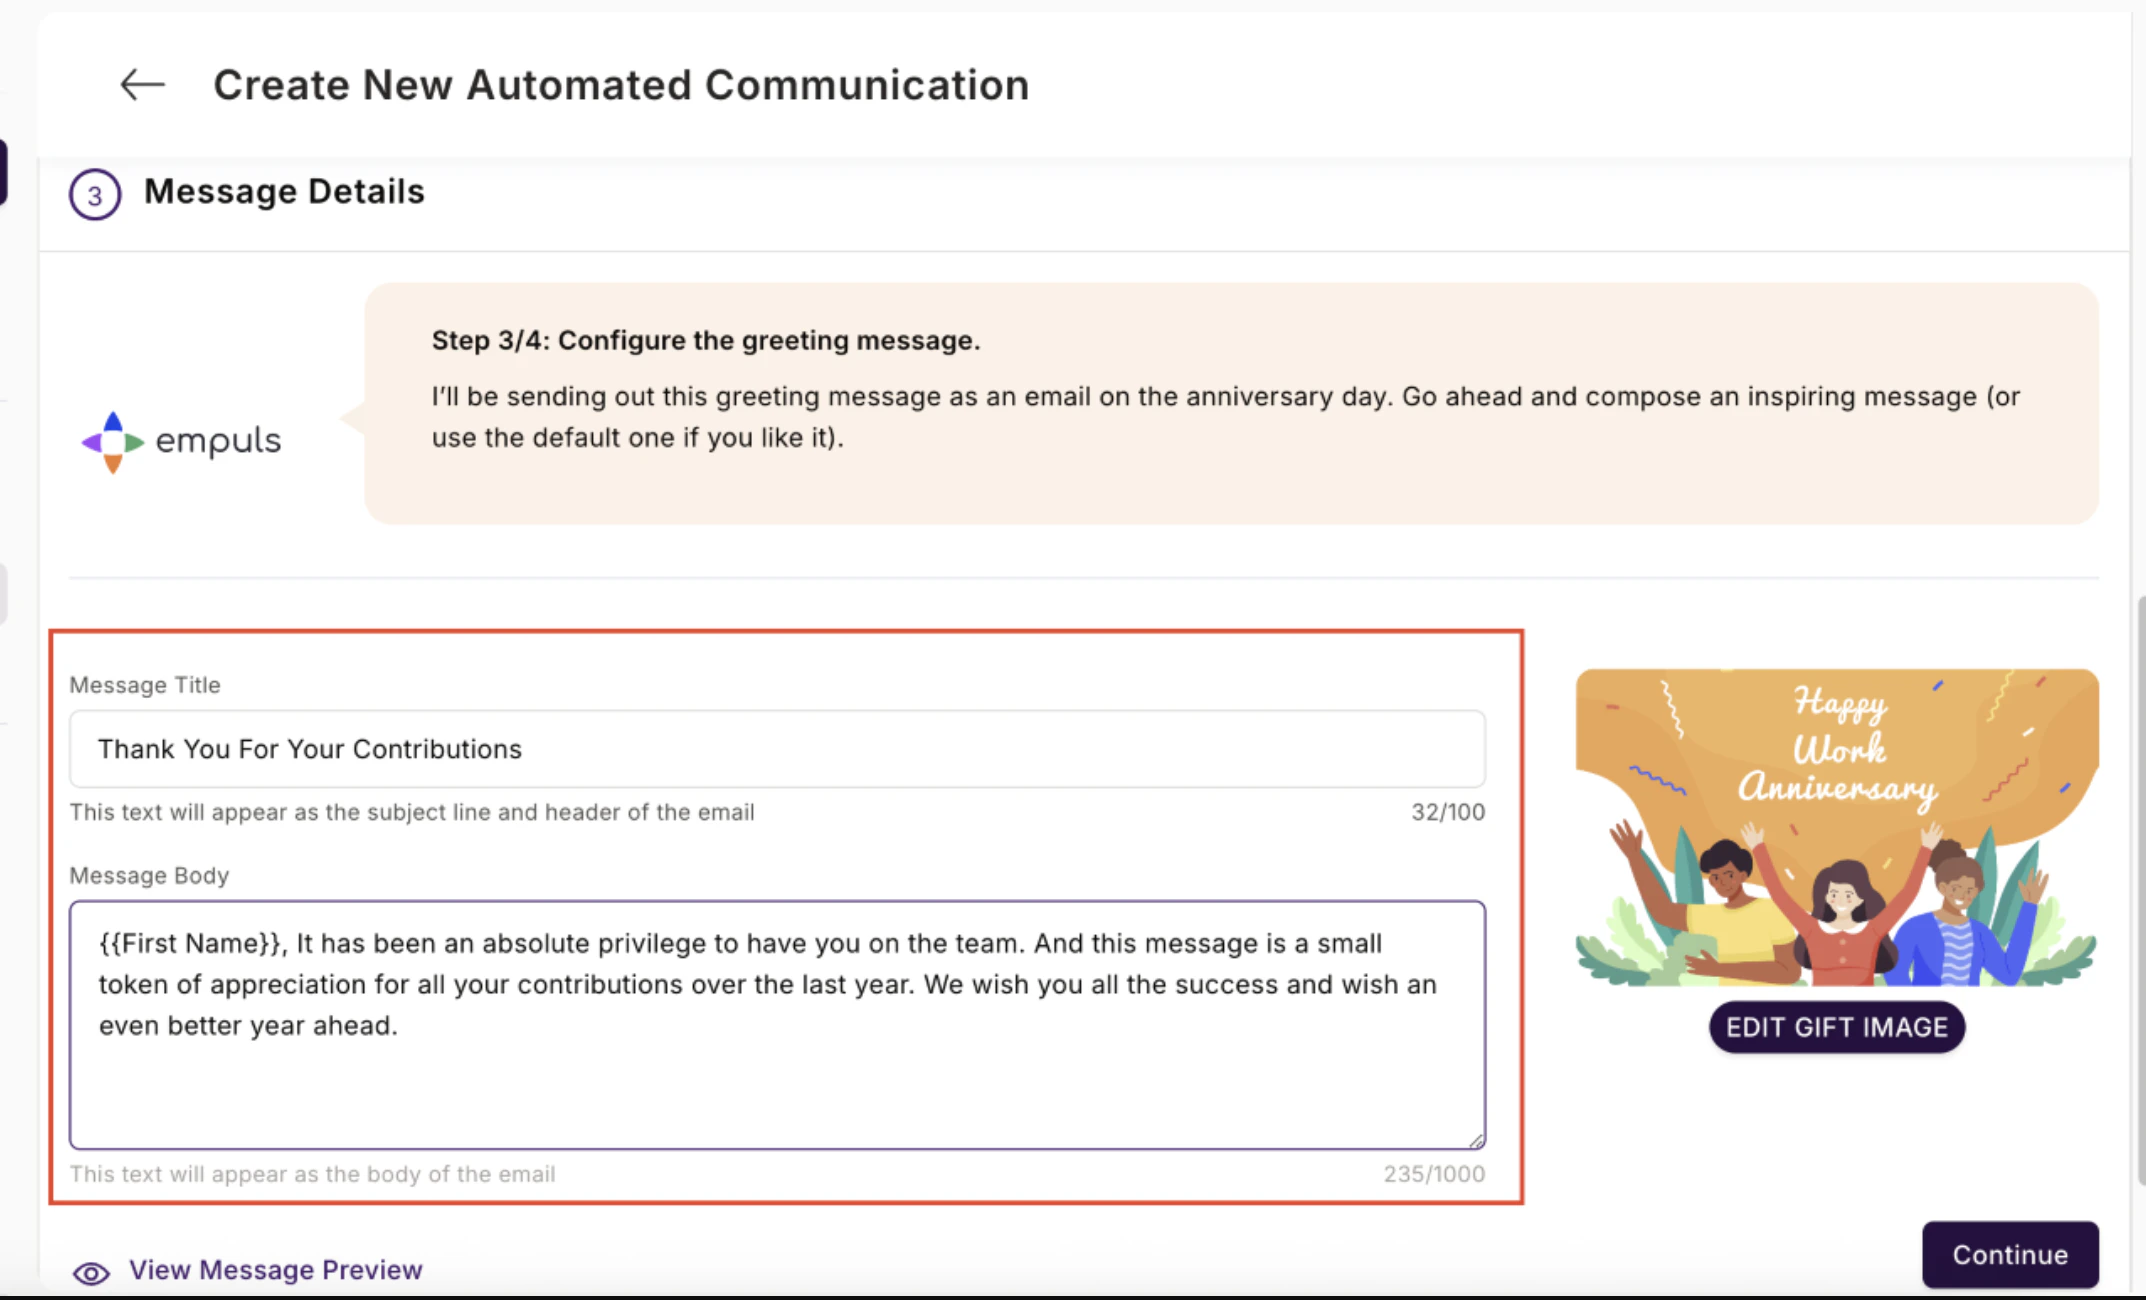
 Write the message title and body with personalisation placeholders. For example:
**Title:** Celebrating `{{completed_year}}` year(s) of excellence
**Body:** `{{First Name}}`, it's been a privilege to have you on the team for `{{completed_year}}` year(s).
Write the message title and body with personalisation placeholders. For example:
**Title:** Celebrating `{{completed_year}}` year(s) of excellence
**Body:** `{{First Name}}`, it's been a privilege to have you on the team for `{{completed_year}}` year(s).
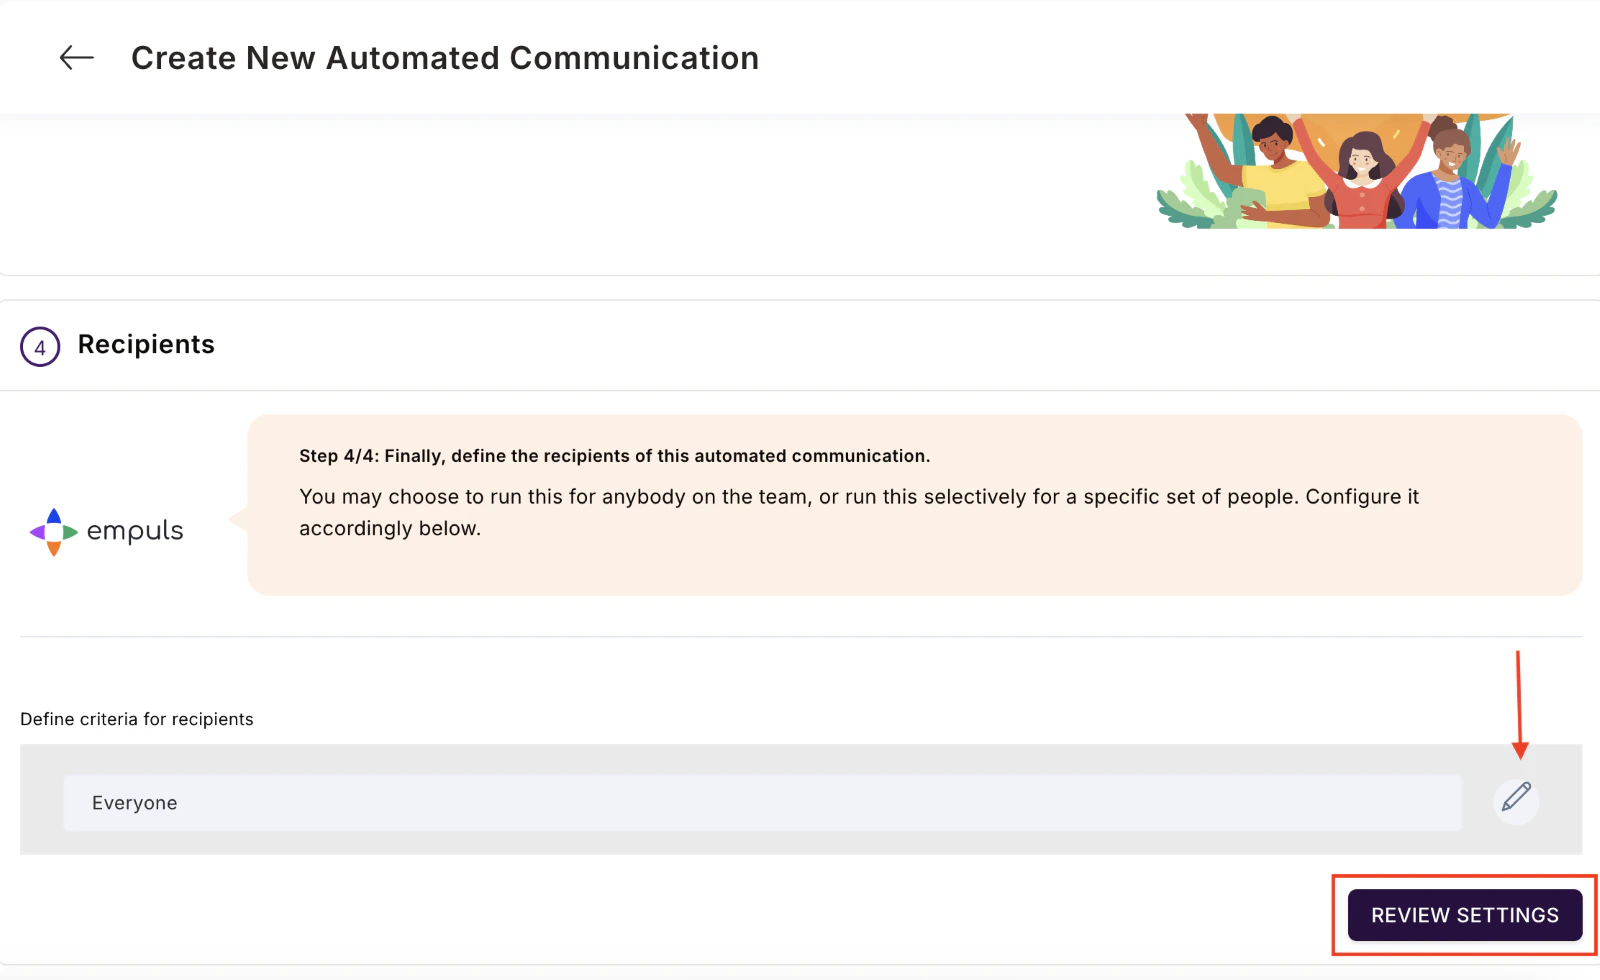
 Choose **Everyone** or filter by department, designation, or location. Click **Save and Continue**, review all settings, and click **Confirm and Create** to activate.
 Set up a separate automation for each milestone year (1 yr, 3 yr, 5 yr, 10 yr) with different reward values and certificate designs to create a tiered programme.
## Manage existing automated gifts
Navigate to **Gifts > Manage Gifts > Automated Gifts**. From the three-dot menu on any card you can:
* **Edit** — Update message, points, or recipients. Changes apply from the next trigger date.
* **Disable** — Stop the automation from firing. Re-enable it at any time.
* **View Report** — See the full history of sends, automation details, and delivery status.
## Greeting template fields
| Field | Purpose |
| ----------------- | ------------------------------------------------------------------------------------- |
| **Name** | Internal label in the admin panel. |
| **Description** | Internal note about when or why the gift fires. |
| **Message title** | Subject line shown to the employee. Supports `{{First Name}}` and other placeholders. |
| **Message body** | Main greeting text with the same placeholder support. |
| **Icon / image** | Visual displayed alongside the message. |
| **Points** | Reward-points value. Set to 0 for message-only greetings. |
| **Gift type** | If points are set, choose between reward points or a gift-catalog item. |
| **Condition** | The lifecycle trigger (DOB, DOJ, anniversary year, scheduled date). |
| **Interval** | For recurring greetings, how often the trigger repeats. |
| **FYI condition** | Optional recipients (manager, HRBP) copied on the notification. |
## Tips and limits
* Greetings rely on accurate DOB and DOJ in employee records. Keep your [HRMS sync](/admin/integrations/hris-hrms) healthy or fill in data manually.
* Point gifts draw from the org budget. Set caps in [Budgets](/admin/finance/budgets) to control monthly spend.
* A greeting fires once per employee per trigger date. Re-enabling a disabled greeting won't backfill missed dates.
## Related
Set up merchandise or gift-card collections to attach to automated gifts.
Cap the points budget that funds automated gifts.
Sync DOB and DOJ so greetings fire accurately.
Set up a separate automation for each milestone year (1 yr, 3 yr, 5 yr, 10 yr) with different reward values and certificate designs to create a tiered programme.
## Manage existing automated gifts
Navigate to **Gifts > Manage Gifts > Automated Gifts**. From the three-dot menu on any card you can:
* **Edit** — Update message, points, or recipients. Changes apply from the next trigger date.
* **Disable** — Stop the automation from firing. Re-enable it at any time.
* **View Report** — See the full history of sends, automation details, and delivery status.
## Greeting template fields
| Field | Purpose |
| ----------------- | ------------------------------------------------------------------------------------- |
| **Name** | Internal label in the admin panel. |
| **Description** | Internal note about when or why the gift fires. |
| **Message title** | Subject line shown to the employee. Supports `{{First Name}}` and other placeholders. |
| **Message body** | Main greeting text with the same placeholder support. |
| **Icon / image** | Visual displayed alongside the message. |
| **Points** | Reward-points value. Set to 0 for message-only greetings. |
| **Gift type** | If points are set, choose between reward points or a gift-catalog item. |
| **Condition** | The lifecycle trigger (DOB, DOJ, anniversary year, scheduled date). |
| **Interval** | For recurring greetings, how often the trigger repeats. |
| **FYI condition** | Optional recipients (manager, HRBP) copied on the notification. |
## Tips and limits
* Greetings rely on accurate DOB and DOJ in employee records. Keep your [HRMS sync](/admin/integrations/hris-hrms) healthy or fill in data manually.
* Point gifts draw from the org budget. Set caps in [Budgets](/admin/finance/budgets) to control monthly spend.
* A greeting fires once per employee per trigger date. Re-enabling a disabled greeting won't backfill missed dates.
## Related
Set up merchandise or gift-card collections to attach to automated gifts.
Cap the points budget that funds automated gifts.
Sync DOB and DOJ so greetings fire accurately.